

2003-2007 HUMMER H2 Console Guide: Fixing Latches, Wear, and Color Matching
Your definitive guide to diagnosing common H2 center console problems, finding the right used part, and avoiding costly color-match mistakes.
- The single most critical factor when buying a used console is verifying the color match (Wheat vs. Ebony/Gray).
- The console lid latch is the most common failure point, and GM does not sell the latch separately from the lid.
- A complete used OEM assembly is the most cost-effective way to replace a heavily damaged console, as new parts are largely discontinued and expensive.
- Replacement is a manageable DIY job, but be extremely careful with the plastic clips on the shifter and cupholder trim to avoid breakage.
Symptoms of a Failing or Damaged Console Panel

Because the console panel is a structural and cosmetic part, 'failure' typically refers to physical damage or wear from regular use. These issues can range from minor annoyances to problems that affect the use of vehicle controls.
Broken Console Lid Latch
This is the most common failure point. The small plastic catch mechanism inside the armrest lid breaks, preventing the lid from latching securely. You may find the lid pops open during turns or when driving over bumps. In many cases, the latch button feels loose or does not spring back. The internal plastic piece that retracts is often the component that fractures.
Cracked or Peeling Trim and Surfaces
The H2's interior plastics, while durable, can become brittle over time. You may notice cracks forming around high-stress areas like the shifter opening or mounting points. The silver or gray painted finishes on the trim pieces can also peel or wear away, especially on the side panels where they are frequently kicked or brushed against.
Worn or Torn Armrest Upholstery
The armrest (console lid) is a high-contact area. The original vinyl or leather can crack, tear, or the underlying foam can collapse after years of use. This is not only a cosmetic issue but can also be uncomfortable for the driver and passenger.
Malfunctioning Cupholders or Power Outlets
The cupholder assembly is a complex pop-up unit that can get stuck or have its internal mechanism break. Likewise, the 12V power outlets integrated into the console can stop working due to loose connections, which often become disconnected during console removal or other interior work.
Warning: When removing the shifter trim cover, the metal retaining clips are notoriously difficult to release and can break the plastic mounting tabs on the cover. Pull straight up with firm, even pressure.
Buying a Used 2003-2007 H2 Console Panel

A used OEM console is often the most practical and cost-effective solution for a damaged unit, as new replacements are extremely expensive or discontinued. However, careful inspection is critical to ensure you get a good part.
The Ultimate Checklist for Used Console Inspection:
- Verify the Color Combination: This is the most important step. H2 interiors came in two primary color schemes: Wheat (tan/beige) and Ebony (black/gray). The console itself is a multi-tone unit with black, tan, and gray components. Get the RPO code from the glove box sticker of the donor vehicle if possible, or bring a piece of your own interior trim to compare colors in person. The main interior color codes are WA504F for Medium Wheat and WA167A for Ebony.
- Test the Lid Latch: Open and close the main armrest lid several times. Ensure it clicks shut securely and doesn't pop open with a light tug. If it feels weak or doesn't latch, the internal mechanism is likely broken, which is a common and difficult-to-fix issue.
- Inspect All Mounting Points: Flip the console over and check every screw hole and mounting tab. Look for stress cracks, especially around the base where it bolts to the floor and around the shifter opening.
- Check the Armrest Surface: Look for rips, deep scratches, or collapsed foam on the armrest lid. Minor wear is expected, but significant damage may require reupholstering. Aftermarket leather and vinyl replacement skins are available if the rest of the console is in good shape.
- Examine Trim Panels: Check the silver/gray side trim panels for peeling paint or deep gouges. Also, inspect the rear panel to ensure the vents and any controls are intact.
- Confirm All Components are Included: A 'complete' assembly should include the main body, the shifter trim bezel, the cupholder, the inner storage bin, and the armrest lid. Ensure all associated wiring for power outlets is present and not cut.
Pro Tip: Many sellers on sites like eBay list console components separately (lid, shifter trim, etc.). While this can be good for minor repairs, buying a complete, assembled console from a single donor vehicle is the best way to guarantee a perfect color and fit match between all the pieces.
Replacement Overview
Replacing the entire center console is a moderately difficult job that requires basic hand tools and patience. 🎬 Watch: Complete center console removal and replacement walkthrough The process involves removing numerous screws and carefully disconnecting electrical connectors.
- Disconnect the Battery: Always disconnect the negative battery terminal before working on interior components with electrical connections.
- Remove Shifter Handle and Trim: The T-handle shifter is typically held by a small Allen screw. The cupholder tray and shifter trim bezel must be carefully pried upwards to release their retaining clips.
- Remove Mounting Bolts: There are several bolts securing the console to the floor brackets, located inside the main storage bin and at the front of the console.
- Disconnect Electrical Connectors: Before fully removing the console, you must disconnect the wiring harnesses for the 12V power outlets and any rear seat controls.
- Installation: Installation is the reverse of removal. Be careful not to overtighten screws in the plastic, and ensure all electrical connectors are securely re-seated.
Known Issues, TSBs, and Recalls
There are no specific recalls or Technical Service Bulletins (TSBs) issued by GM for the console panel itself. However, the H2 from this generation had several recalls for other components. The most relevant recalls for interior work include issues with the heated washer fluid system (Recall 08V441000) and the windshield wiper motor module (Recall 08V456000), which could be addressed at the same time as console work. No recalls directly involve the console panel.
Cost Comparison
| Part Type | Estimated Cost |
|---|---|
| New OEM (Dealer) | $1,500+ (if available, many components are discontinued) |
| New Aftermarket | Not available as a complete assembly. Individual components like armrest covers are available ($35 - $70). |
| Used OEM (Salvage) | $250 - $600 for a complete assembly, depending on condition and color. |
| Shop Labor Cost | $200 - $400 |
Frequently Asked Questions (FAQ)
Can I just replace the broken console lid latch?
Unfortunately, GM never sold the latch mechanism as a separate part. The entire console lid assembly had to be purchased. Some owners have had success fabricating a fix or using strong magnets as an alternative to keep the lid closed. Others have attempted to swap internals from other GM truck consoles with mixed results.
How do I know if I have a 'Wheat' or 'Ebony' interior?
The easiest way is to look at your seats and dashboard. The Wheat interior is a distinct tan/beige color. The Ebony interior is primarily black and dark gray. For a definitive match, check the RPO code sticker in your glove box. The code for Wheat is typically '50I' or '502', while Ebony is '48I'. The paint codes are WA504F for Medium Wheat and WA167A for Ebony.
My shifter trim is cracked. Do I need to replace the whole console?
No, the shifter trim bezel is a separate piece that can be removed and replaced. You can often find used OEM shifter trim panels for sale individually online.
Is it difficult to reupholster the armrest lid myself?
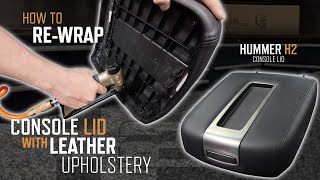
It is a DIY-friendly task if you are patient. It requires removing the lid, stripping the old material, and using spray adhesive and staples to attach the new cover. Many companies sell pre-cut leather or vinyl covers specifically for the H2 lid.
🎬 See how to reupholster your console lidHelpful Videos
Technical Specifications
OEM Part Numbers: 15079695 15177421 88986337 88986338 88986340 15079702
Interior Color Codes: Wheat (RPO: 50I, 502; Paint: WA504F), Ebony (RPO: 48I; Paint: WA167A).
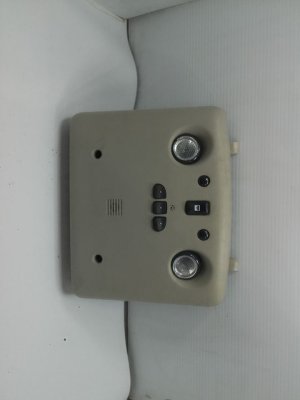
We Have This Part in Stock



The information in this article is provided for general reference and educational purposes only. Vehicle specifications, procedures, and part compatibility can vary by production date, trim level, and region. Always consult your vehicle's factory service manual and verify part numbers before purchasing or performing repairs. Safety-critical components such as airbags, seat belts, and braking systems should be installed by a qualified professional.
- HUMMER H2:
- 🎬 Helpful Videos
- 🛍️ Shop This Part
- Symptoms of a Failing or Damaged Console Panel
- Broken Console Lid Latch
- Cracked or Peeling Trim and Surfaces
- Worn or Torn Armrest Upholstery
- Malfunctioning Cupholders or Power Outlets
- Buying a Used 2003-2007 H2 Console Panel
- The Ultimate Checklist for Used Console Inspection:
- Replacement Overview
- Known Issues, TSBs, and Recalls
- Cost Comparison
- Frequently Asked Questions (FAQ)
- 🎟️ Get 5% Off