

2006-2014 Honda Ridgeline Console Guide: Fixing Latches, Lights, and Lids
A complete guide to diagnosing and replacing the overhead and center consoles in your first-generation Honda Ridgeline, with a focus on common failures and buying used parts.
- The Ridgeline has two different consoles: an 'overhead console' on the ceiling and a 'center console' between the seats. Identify which one you need.
- Always verify your interior color code from the driver's door jamb sticker before buying a used part to ensure an exact match.
- The most common center console failures are a broken armrest latch and torn armrest cover, both of which can be replaced individually without buying a whole console.
- A common overhead console issue is a map light that works manually but not with the door; this requires replacing the console unit itself.
Understanding the Ridgeline's Two Console Systems

When discussing the 'console panel' on a first-generation Honda Ridgeline, it's important to know which part you're dealing with. The truck has two distinct console assemblies that are not interchangeable and have different common problems.
- Overhead Console: The smaller unit on the roof that holds map lights and the sunglass holder.
- Center Console: The large assembly between the driver and passenger seats that includes the main storage box, armrest, and cup holders.
This guide covers both, helping you diagnose issues, find the right replacement, and avoid common purchasing mistakes.
Overhead Console (Roof)

The overhead console is a relatively simple part, but its electronic switches are a known point of failure.
Symptoms of a Failing Overhead Console
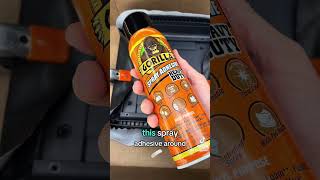
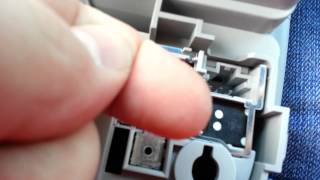
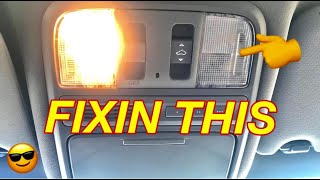
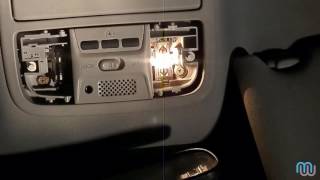
- One Map Light Fails to Illuminate with Door: A very common issue where one of the map lights works when pressed manually but does not turn on automatically when a door is opened. This is typically caused by a faulty switch or a cracked solder joint on the console's internal circuit board. 🎬 Watch: How to fix a faulty map light switch
- Broken Sunglass Holder: The latch or hinge for the sunglass compartment can break, causing the door to not stay closed or to fall off completely.
- Inoperative Sunroof Switch: If your Ridgeline has a sunroof, the switch located in this console can fail, preventing the sunroof from opening or closing.
- Cracked Housing: The plastic body of the console can become brittle over time and crack, especially around the screw mounting points.
Replacement Overview: Overhead Console
Replacing the overhead console is a straightforward DIY job suitable for beginners.
- Difficulty: 1/5
- Time: 10-15 minutes
- Tools: Phillips head screwdriver, small flathead screwdriver or plastic trim tool.
General Steps:
- Gently pry off the clear plastic light lenses with a small flathead screwdriver.
- Remove the two visible Phillips head screws located behind the lenses.
- Carefully pull the console down from the headliner. It is also held by clips.
- Disconnect the electrical connector(s) on the back of the console.
- Installation is the reverse of removal.
Center Console (Between Seats)

The center console is a large, multi-piece assembly with several mechanical parts that wear out over time. Failures here are almost always physical rather than electrical.
Symptoms of a Failing Center Console
- Broken Armrest Latch: The most common failure. The latch that holds the main storage compartment lid closed breaks, preventing the armrest from staying down.
- Worn or Torn Armrest: The surface of the armrest, whether cloth or leather, can tear, stain, or the underlying foam can collapse, making it uncomfortable.
- Faulty Sliding Cup Holder/Tray: The sliding mechanism can jam or break, making it difficult to access the lower storage area.
- Broken Hinges: The main lid's hinges can crack, causing the armrest to become loose, wobbly, or detach completely.
- Damaged 110V Power Outlet: On models equipped with the optional 110V outlet, the cover can break off or the outlet itself can be damaged.
Replacement Overview: Center Console
Replacing the entire center console assembly is more involved but still manageable for a DIYer with basic tools.
- Difficulty: 2/5
- Time: 45-60 minutes
- Tools: Socket set, Phillips head screwdriver, plastic trim removal tools.
General Steps:
- Remove the trim pieces at the rear and sides of the console. These usually pop off.
- Unscrew and remove the shift knob.
- Open the armrest and remove any screws or bolts from inside the storage compartment.
- Locate and remove the mounting bolts at the front and rear of the console base.
- Disconnect any electrical connectors for power outlets.
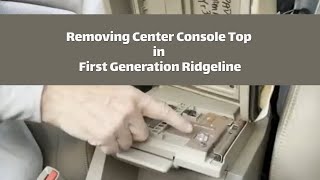
- Lift the entire assembly out of the vehicle. 🎬 See this center console removal walkthrough
- Installation is the reverse of removal.
Pro Tip: For a broken latch or torn armrest, you don't need to replace the whole console. The latch and aftermarket armrest covers are sold separately and are much cheaper and easier to install.
🎬 Watch: How to replace the center console coverBuying a Used Console Panel: What to Check

Buying a used OEM console is often the best value, providing a perfect fit and color match that aftermarket parts can't offer. However, careful inspection is critical.
The Most Important Step: Verify Your Interior Color
Honda offered the Ridgeline with several interior colors like Gray, Atlas Gray, and Beige. These colors can look very similar in photos. Ordering the wrong color is a common and frustrating mistake. Always verify your vehicle's specific interior color code before buying.
How to find your color code:
- Open the driver's side door.
- Look for the white and black sticker on the door jamb (the area of the car body the door latches to).
- The interior color code is labeled 'INTERIOR COLOR' and is typically a short code like NH220L or YR309L.
- Match this code to the part you are ordering. Reputable sellers of used parts will often list this code in the description.
Warning: Do not rely on color names like 'Gray' alone. 'Atlas Gray' (Code: ZE) and 'Dark Gray' (Code: ZL) are different shades. Always use the code for an exact match.
Inspection Checklist for a Used Part
When inspecting an Overhead Console:
- ✅ Check the Sunglass Door: Open and close it several times. Ensure it latches securely and the hinge feels solid.
- ✅ Inspect Buttons: Press the map light and sunroof switches. They should have a crisp, tactile click, not a mushy feel.
- ✅ Examine the Housing: Look for cracks in the plastic, especially around the screw holes.
- ✅ Verify Sunroof Option: Make sure the console matches your truck's configuration (with or without a sunroof switch).
When inspecting a Center Console:
- ✅ Test the Latch: Actuate the main armrest latch repeatedly. This is the #1 failure point.
- ✅ Inspect the Armrest Surface: Check for rips, deep stains, cigarette burns, and collapsed foam. Confirm it's the correct material (cloth vs. leather) for your trim.
- ✅ Check the Hinges: Open and close the main lid. It should move smoothly without excessive side-to-side play.
- ✅ Test the Sliding Tray: Ensure the cup holder tray slides back and forth without binding.
- ✅ Look for Scratches and Stains: Check for deep gouges or chemical discoloration from harsh cleaners.
- ✅ Check Mounting Points: Flip the console over and ensure none of the plastic mounting tabs or bolt holes are broken.
Known Issues, TSBs, and Recalls
As of mid-2026, there are no official recalls or Technical Service Bulletins (TSBs) from Honda specifically related to the overhead or center console assemblies for the 2006-2014 Ridgeline. Most issues are related to normal wear and tear.
Cost Comparison
| Part | New OEM | Used OEM | Aftermarket |
|---|---|---|---|
| Center Console Assembly (Complete) | $400 - $600+ | $100 - $250 | Not Available |
| Overhead Console Assembly | $75 - $150 | $30 - $70 | Not generally available |
| Center Console Latch Only | $50 - $75 | N/A | $15 - $30 |
| Armrest Cover Only | N/A (Part of lid) | N/A | $10 - $40 |
(Prices are estimates as of late 2026 and can vary based on condition and supplier.)
Frequently Asked Questions
Can I just replace the broken center console latch?
Yes. The center console latch is available as a separate part from Honda (part number series 83435-SJC-A01Z) and from aftermarket suppliers. This is a much more cost-effective repair than replacing the entire armrest lid or console.
Why does my driver's side map light not turn on with the door, but the passenger side does?
This is a very common problem shared with the Honda Pilot of the same era. It is almost always a failure within the overhead console unit itself, not the door switch. The cause is typically a bad switch or a cracked solder joint on the internal circuit board. The easiest solution is to replace the entire overhead console assembly with a new or used unit.
Will a console from a 2007 Ridgeline fit my 2013 model?
Yes, for the most part. The console assemblies for the first-generation Ridgeline (2006-2014) are physically interchangeable. However, you MUST ensure the color and options (leather/cloth armrest, sunroof switch) match your specific vehicle.
Can I replace my cloth armrest with a leather one?
Yes. If you want to upgrade, you can purchase a used leather armrest lid and it will fit onto your existing center console base. You just need to remove the hinge screws from your old lid and attach the new one.
Helpful Videos
Technical Specifications
OEM Part Numbers: 83250-SDA-A01ZA 83250-SDA-A03ZA 83250-SDA-A03ZC 83250-SDA-A03ZG 83250-SDA-A03ZK 83405-SJC-A01ZE 83405-SJC-A01ZG 83410-SJC-A21ZK 83410-SJC-A21ZL 83420-SJC-A01ZD 83420-SJC-A11ZA 83420-SJC-A11ZC 83435-SJC-A01ZE 83435-SJC-A01ZD 83435-SJC-A01ZF
Fitment covers model years 2006-2014. Key variations include interior color (e.g., Atlas Gray, Dark Gray, Beige), armrest material (cloth or leather), and overhead console configuration (with or without sunroof switch).
We Have This Part in Stock



The information in this article is provided for general reference and educational purposes only. Vehicle specifications, procedures, and part compatibility can vary by production date, trim level, and region. Always consult your vehicle's factory service manual and verify part numbers before purchasing or performing repairs. Safety-critical components such as airbags, seat belts, and braking systems should be installed by a qualified professional.
- Honda Ridgeline:
- 🎬 Helpful Videos
- 🛍️ Shop This Part
- Understanding the Ridgeline's Two Console Systems
- Overhead Console (Roof)
- Symptoms of a Failing Overhead Console
- Replacement Overview: Overhead Console
- Center Console (Between Seats)
- Symptoms of a Failing Center Console
- Replacement Overview: Center Console
- Buying a Used Console Panel: What to Check
- The Most Important Step: Verify Your Interior Color
- Inspection Checklist for a Used Part
- Known Issues, TSBs, and Recalls
- Cost Comparison
- Frequently Asked Questions
- 🎟️ Get 5% Off