

2011-2020 Honda Odyssey Console Guide: Center vs. Overhead & Compatibility
Learn to distinguish between center and overhead consoles, identify common failures like broken latches, and choose the correct used part for your Odyssey's trim and options.
- First, identify if you need the 'Center Floor Console' or the 'Overhead Console'—they are different parts.
- Compatibility is critical and depends on the vehicle's generation (2011-2017 vs. 2018-2020), trim level (LX, EX, etc.), and options (sunroof, wireless charging).
- Most console failures are physical, not electrical. Carefully inspect latches, hinges, and plastic surfaces on any used part.
- For 2011-2017 models, the full center console is easily removable, while the 2018-2020 console is fixed and requires more work to replace.
Understanding Your 2011-2020 Honda Odyssey Console

When searching for a replacement "Console Panel" for a 2011-2020 Honda Odyssey, it's crucial to first identify which console you need. Honda uses this term for parts in two different locations: the Center Floor Console between the front seats and the Overhead Console on the ceiling. They are not interchangeable and have completely different functions, failure points, and compatibility requirements.
Warning: The 2011-2017 (Fourth Generation) and 2018-2020 (Fifth Generation) Odyssey models have different interior designs. Console parts are NOT interchangeable between these two generations.
Center Floor Console

This is the large assembly between the driver and front passenger seats. Its design and features vary significantly by generation and trim level.
Generation & Trim Level Differences
- 2011-2017 (4th Gen): Most trims (EX, EX-L, Touring, Elite) feature a large, removable center console with multiple cup holders and a storage bin. A common complaint for this generation is the foam inserts in the cup holders breaking down over time, causing drinks to slide around. Base LX models often came with a much smaller, floor-mounted tray with cup holders instead of the full console assembly. Owners can often upgrade by purchasing a used full console from a higher trim model.
- 2018-2020 (5th Gen): The console is a more integrated, non-removable part of the dashboard structure. It features a sliding top cover on higher trims, a deep storage well, and various electronic ports. A key variation is the presence or absence of the factory wireless phone charging pad, which affects the wiring and the console's top assembly.
Common Problems and Symptoms
- Broken Latches: The latch securing the main storage compartment lid or armrest can break, preventing it from staying closed.
- Worn or Torn Foam Cup Holder Inserts (2011-2017): The original foam inserts degrade, tear, and lose their ability to hold beverages securely.
- Inoperative USB/Power Ports: The USB ports for charging or connecting to the infotainment system (like Android Auto/Apple CarPlay) can fail. This can be due to a faulty port module, damaged wiring from items being shoved into the console, or a blown fuse.
- Peeling or Scratched Trim: The plastic or vinyl surfaces can become scratched, worn, or delaminated from use.
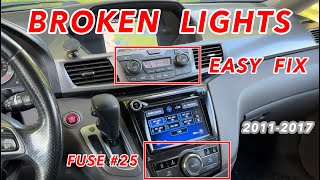
- Blown Illumination Fuse (2011-2017): If all the button backlights around the radio and climate controls go out at once, it is often due to a blown #25 fuse in the passenger-side fuse box. 🎬 Watch: How to fix broken climate lights by replacing fuse #25.
Overhead Console

Located on the ceiling between the sun visors, this smaller console houses lights and switches.
Key Compatibility Factors
- Sunroof: This is the most important factor. Odysseys equipped with a factory sunroof have a larger overhead console that includes the sunroof control switch. A console from a non-sunroof model will not fit a vehicle with a sunroof, and vice-versa.
- Rear Entertainment System (RES): On some models, the presence of a factory RES can affect the overhead console's wiring or physical shape.
- Color: Overhead consoles come in different colors (gray, beige) to match the headliner.
Common Problems and Symptoms
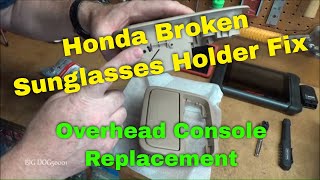
- Broken Sunglass Holder Latch: The spring-loaded door for the sunglass holder is a very common failure point. The latch mechanism breaks, causing the door to no longer stay closed. 🎬 Watch: How to replace the overhead console and fix the latch.
- Inoperative Map Lights: The push-button map lights may stop working due to a failed bulb or, more commonly, a faulty switch integrated into the console.
- Rattles and Buzzes: Plastic clips holding the console to the roof can break or loosen over time, causing annoying vibrations and noises.
Buying a Used Console Panel: What to Check

Purchasing a used OEM console is often the most cost-effective solution, as new assemblies can be prohibitively expensive. Here’s what to look for:
Step 1: Identify Your Exact Needs
- Center or Overhead? Be absolutely sure which part you are replacing.
- Year and Generation: Confirm if you need a 2011-2017 part or a 2018-2020 part.
- Trim and Options: For center consoles, know your trim (LX, EX, EX-L, etc.) and if you have a wireless charger (2018+). For overhead consoles, confirm if you have a sunroof.
- Color: Match the color (Gray, Beige/Truffle, Brown/Mocha) to your interior.
Step 2: Physical Inspection Checklist
- Latches and Hinges: Actuate every latch and hinge multiple times. Check the sunglass door on overhead consoles and the main storage lid on center consoles.
- Plastic Integrity: Look for cracks, especially around screw mounting points. Check for broken or stressed plastic clips.
- Surface Condition: Inspect for deep scratches, peeling trim, or torn armrest material that you aren't willing to live with.
- Electrical Connectors: Ensure all wiring harnesses and connector plugs are intact, with no cut wires or corroded pins. This is critical for parts with USB ports, power outlets, or switches.
- Cup Holders (2011-2017): Check the condition of the foam inserts. If they are degraded, factor in the cost of aftermarket replacements.
Pro Tip: When buying online, insist on clear photos of all sides, including the underside to see mounting points and electrical connectors. Ask the seller to confirm the donor vehicle's year, trim level, and whether it had a sunroof.
Cost Comparison
| Part | New OEM | Used OEM | Shop Labor |
|---|---|---|---|
| Center Console Assembly (Complete) | $250 - $800+ | $100 - $350 | $100 - $250 |
| Overhead Console Assembly | $150 - $400 | $50 - $150 | $50 - $100 |
| Small Components (e.g., Latch, USB Port) | $30 - $120 | N/A | $50 - $150 |
Replacement Information
- Overhead Console: Installation is generally easy. It is typically held in by clips and a few screws. The main task is carefully prying it down without damaging the headliner and disconnecting one or two electrical harnesses. Difficulty: 2/5
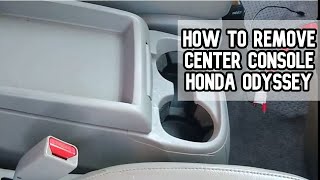
- Center Console (2011-2017 Removable): On trims with the full console, this is extremely easy. You lift a lever and pull the entire unit out. Difficulty: 1/5
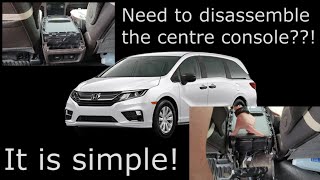
- Center Console (2018-2020 Fixed): Replacement is more involved. It requires removing multiple side trim panels, unscrewing bolts from the floor, and disconnecting several electrical connectors for USB, power, and lighting. 🎬 See this walkthrough for disassembling the 2018+ fixed center console. Difficulty: 3/5
Known Issues, TSBs, and Recalls
While there are no major safety recalls specifically for the console structures themselves, some related electronic issues have been addressed by Honda.
- NHTSA Campaign 20V043000 (Service Bulletin 20-012): Affects 2018-2020 models. The wiring for the 3rd-row accessory power outlet could be pinched, creating a fire risk. While not part of the front console, it highlights potential wiring issues.
- Service Bulletin 20-047: For 2018-2020 models, a software issue in the gauge control module could cause the instrument panel to go blank or reboot. This is an electronic issue related to the vehicle's data network (MOST bus), which also connects to the infotainment unit housed near the console.
- Service Bulletin 21-012: For 2018-2021 models, Honda extended the warranty for MOST bus network connectors due to issues causing popping/crackling speakers or no audio. The repair involves accessing the infotainment unit behind the center stack.
Can I upgrade my LX trim's basic console tray to a full center console?
Yes, for the 2011-2017 generation, this is a popular and relatively easy upgrade. You can purchase a complete center console assembly from a higher trim level (EX, EX-L, etc.) from a salvage yard or online seller. It typically clips into the same mounting points used by the basic tray.
My USB port stopped working. Is it the fuse or the port?
It could be either. First, check other power outlets to see if they work. If multiple ports are dead, check the fuse panel. If only one port is dead, and you've tried multiple cables and devices, the USB port module itself has likely failed. On 2018+ models, this is a common complaint.
The lights on my climate control and radio buttons are out. Is this a console problem?
For 2011-2017 models, if all the button backlights go out simultaneously, the first thing to check is the 7.5A fuse labeled 'illumination' (position #25) in the interior fuse box on the passenger side. This is a very common and easy fix.
Why won't my sunglass holder stay closed?
The plastic latch mechanism inside the overhead console has likely broken. This is a very common failure. Unfortunately, the latch is not typically sold separately by Honda, so the most common solution is to replace the entire overhead console assembly with a used one.
Helpful Videos
Technical Specifications
OEM Part Numbers: 77271THRA0 83250TK8A11ZA 83403-TK8-A03ZA 83404-TK8-A02ZA 83405TK8A11ZA 83409THRA01ZA 83411TK8A01ZA 83414THRA11ZA 83419THRA01ZA 83421THRA01ZA 83423THRA22ZD 83250-THR-A01ZB 83414-TK8-A03ZC 77291-SHJ-A01ZB 83413-TK8-A01ZA
Compatibility is determined by generation (2011-2017 or 2018-2020), trim level (LX, EX, EX-L, Touring, Elite), color (Gray, Beige, Truffle, Brown), and options (Sunroof, Rear Entertainment, Wireless Charging).
We Have This Part in Stock



The information in this article is provided for general reference and educational purposes only. Vehicle specifications, procedures, and part compatibility can vary by production date, trim level, and region. Always consult your vehicle's factory service manual and verify part numbers before purchasing or performing repairs. Safety-critical components such as airbags, seat belts, and braking systems should be installed by a qualified professional.
- Honda Odyssey:
- 🎬 Helpful Videos
- 🛍️ Shop This Part
- Understanding Your 2011-2020 Honda Odyssey Console
- Center Floor Console
- Generation & Trim Level Differences
- Common Problems and Symptoms
- Overhead Console
- Key Compatibility Factors
- Common Problems and Symptoms
- Buying a Used Console Panel: What to Check
- Step 1: Identify Your Exact Needs
- Step 2: Physical Inspection Checklist
- Cost Comparison
- Replacement Information
- Known Issues, TSBs, and Recalls
- 🎟️ Get 5% Off