

2013-2016 Encore & 2012-2013 Mokka Console Panel: Check the K16 Power Outlet Before You Buy
This guide explains the critical difference between console panels and ensures you buy the correct part for your Buick Encore or Opel Mokka.
- Compatibility is determined by the presence of the optional 110V power outlet (option code K16); you must buy a console that matches your car's setup.
- Failure is almost always physical damage like broken mounting tabs, a broken armrest latch, or peeling trim—not an electrical problem.
- When buying a used part, the most important inspection is of the mounting tabs on the underside to ensure it will fit securely.
- Replacement is a straightforward DIY job that can be completed in about an hour with basic trim removal tools.
The Single Most Important Check: The 110V Power Outlet (K16)
Compatibility Warning: Before purchasing a replacement console panel for a 2013-2016 Buick Encore or a 2012-2013 Opel Mokka, you MUST determine if your vehicle is equipped with the optional 110-volt (or 120-volt) household-style power outlet. This feature is identified by the GM option code K16.
The console panels are physically different and are not interchangeable. A console from a vehicle with the standard 12V 'cigarette lighter' port will not have the square cutout required for the three-prong 110V outlet.
- Vehicles with Option K16: Have a three-prong, household-style electrical outlet on the rear of the center console, accessible to backseat passengers. You must purchase a console panel that has the specific opening for this outlet.
- Vehicles without Option K16: Have a standard, round 12V power port instead. The console panel for this version is solid where the 110V outlet would be.
Always visually inspect your current console and the potential replacement part to ensure they match. This is the most common and costly mistake buyers make.
Symptoms of a Failing Console Panel
Failure of this part is almost always related to physical damage and cosmetic wear, not mechanical or electrical issues. The power outlet itself is a separate component. Common symptoms include:
- Cracked Plastic: Stress cracks can form over time, especially around the cup holders or where the console meets the dashboard.
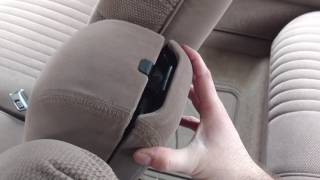
- Broken Armrest Latch: The latch for the main storage compartment lid is a common failure point, preventing the armrest from staying closed. 🎬 Watch: How to fix a broken GM armrest latch
- Peeling Chrome Trim: The chrome-like finish on the trim around the gear shifter and other areas is known to bubble, peel, or flake off, leaving sharp edges.
- Deep Scratches and Gouges: Daily use can lead to significant cosmetic damage that is difficult to repair.
- Broken Mounting Tabs: The plastic tabs on the underside of the console that secure it to the vehicle's floor can break during removal or from stress, causing the console to become loose or rattle.
Buying a Used Console Panel: A Buyer's Checklist
Since new OEM console assemblies are often discontinued or expensive and aftermarket versions are not typically available, a used OEM part is the most practical solution. Here’s what to inspect before you buy:
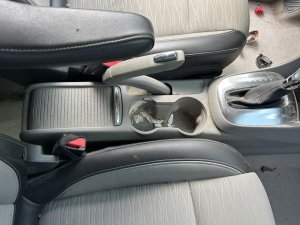
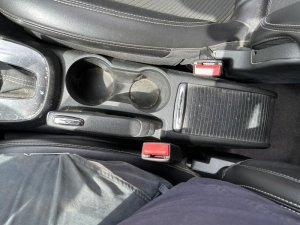
- Verify the Power Outlet Configuration: This is the most important step. Get clear photos from the seller of the rear of the console to confirm it has the correct opening (or lack thereof) for your vehicle's power outlet.
- Inspect the Mounting Points: Ask the seller to flip the console over and provide pictures of the underside. Look for any broken, cracked, or repaired plastic tabs and screw bosses. A console with broken tabs will never fit securely.
- Check the Armrest Latch: If the console includes the armrest, confirm that the latching mechanism works correctly. Ask the seller to test it and ensure it clicks shut and stays closed.
- Assess Cosmetic Condition: Look for deep scratches, cracks, and peeling trim. Be realistic about wear and tear on a used part, but avoid units with major cosmetic flaws that you aren't willing to live with.
- Confirm the Color: These consoles came in several interior colors, such as Black, Titanium, and Cocoa. Check your vehicle's interior trim code and match it to the part you are buying.
Vehicle-Specific Information: Encore vs. Mokka
The 2013-2016 Buick Encore and the 2012-2013 Opel Mokka are built on the same GM Gamma II platform, and they share the same basic interior structure, including the center console. The information and compatibility warnings in this guide apply to both vehicles. While the Encore is the North American model, the Opel Mokka was its European counterpart. Both offered the upgraded power outlet option, making verification essential for owners of either vehicle.
Replacement Overview
Replacing the center console is a manageable DIY job for most beginners and requires basic tools.
- Difficulty: 2/5 (Beginner to Intermediate)
- Estimated Time: 1 Hour
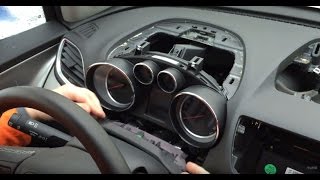
- Tools Required: Plastic trim removal tools, Phillips head screwdriver, socket set. 🎬 Watch: Step-by-step Buick Encore console removal walkthrough
Basic Steps:
- Use plastic pry tools to carefully remove the side trim panels from the console and the trim piece around the gear shifter.
- Open the armrest storage bin and remove any screws found at the bottom.
- Gently lift the console panel up and back. It is secured by clips that will release with steady pressure.
- Before fully removing the panel, reach underneath and disconnect the electrical connector(s) for the power outlet(s).
- Installation is the reverse of removal. Be sure to reconnect the electrical plugs before snapping the new console into place.
Pro Tip: When installing the replacement console, do not fully tighten the screws until all panels are aligned and the clips have been snapped into place. This allows for minor adjustments to ensure a perfect fit.
Cost of a Replacement Console Panel
Pricing can vary based on condition, color, and the inclusion of the armrest assembly.
| Part Type | Estimated Cost |
|---|---|
| New OEM | $350 - $600+ (Often sold in multiple pieces) |
| New Aftermarket | Not Available |
| Used OEM | $75 - $150 |
| Shop Labor | $100 - $200 |
Frequently Asked Questions
Can I add the 110V outlet to my car if it didn't come with it?
This is not a simple swap. It would require the new console panel, the outlet itself, a power inverter module, factory wiring harnesses, and potentially reprogramming. It is generally considered too complex and expensive to be a practical modification.
Is the armrest lid or cup holder available separately?
Sometimes, yes. GM often sells individual components of the console, but for older vehicles, it may be more cost-effective to purchase a complete used console assembly, especially if multiple parts are broken.
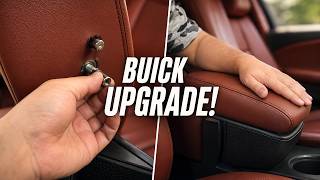
🎬 See this guide on upgrading your Encore armrestMy power outlet doesn't work. Do I need to replace the whole console?
No. A non-functional power outlet is almost always a separate issue. The problem is likely a blown fuse, a bad power inverter (for the 110V option), or the outlet component itself, not the plastic console panel.
Are there any recalls on the center console?
No, there are no specific recalls or Technical Service Bulletins (TSBs) for the console panel itself. While the 2013-2016 Buick Encore was subject to several recalls for other components like seat belts and airbags, the console was not one of them.
Helpful Videos
Technical Specifications
OEM Part Numbers: 13332853 95101827 95270228 95080118 95299713 95300723 95300726 95386968
Varies by color (Black, Titanium, Cocoa) and power outlet configuration (with or without K16 110V outlet).
We Have This Part in Stock


The information in this article is provided for general reference and educational purposes only. Vehicle specifications, procedures, and part compatibility can vary by production date, trim level, and region. Always consult your vehicle's factory service manual and verify part numbers before purchasing or performing repairs. Safety-critical components such as airbags, seat belts, and braking systems should be installed by a qualified professional.
- Buick Encore:
- Opel Mokka:
- 🎬 Helpful Videos
- 🛍️ Shop This Part
- The Single Most Important Check: The 110V Power Outlet (K16)
- Symptoms of a Failing Console Panel
- Buying a Used Console Panel: A Buyer's Checklist
- Vehicle-Specific Information: Encore vs. Mokka
- Replacement Overview
- Cost of a Replacement Console Panel
- Frequently Asked Questions
- 🎟️ Get 5% Off