

BMW F30, F32 & M3 Center Console Trim (2012-2020): Fixing Peeling, Sticky Surfaces and Broken Buttons
Your definitive guide to diagnosing and replacing the easily-damaged center console trim and switches in BMW 3-Series, 4-Series, and M3 models.
- The most common failure is the soft-touch coating becoming sticky and peeling; replacement is the only permanent fix.
- Spilling drinks can destroy the expensive iDrive controller and potentially the SRS airbag module underneath the console.
- When buying a used panel, verify the finish is not sticky and that all mounting clips on the back are intact.
- Replacing the trim is a simple DIY job requiring only plastic pry tools and a T20 Torx driver.
Symptoms of a Failing Console Panel

Failure of the center console panel on these BMWs is typically cosmetic or related to the electronic components it houses. Here are the most common symptoms owners report:
1. Sticky, Gummy, or Peeling Surface
The most notorious issue with this console panel is the degradation of its soft-touch rubberized coating. Over time, exposure to heat, UV rays, and cleaning products causes the material to break down, resulting in a sticky, gummy, or tacky surface that attracts dirt and is unpleasant to touch. In advanced stages, the coating will begin to peel or scratch off with just a fingernail, revealing the shiny black plastic underneath.
2. Cracked or Worn Buttons
The plastic buttons for the iDrive controller, driving mode selector, and traction control can become brittle and crack over time. This is often a cosmetic issue, but severe cracks can make the buttons uncomfortable to use or lead to complete failure of the switch underneath.
3. Malfunctioning iDrive Controller or Switches
Spilled drinks are the primary enemy of the center console electronics. Coffee, soda, or even water can seep into the seams around the iDrive controller and shortcut the internal circuit board. Symptoms include an unresponsive iDrive knob (won't click or scroll), buttons that don't light up, or buttons that perform the wrong action. Often, this is caused by liquid damage creating sticky contacts or corrosion on the circuit board.
4. Rattles, Creaks, and Squeaks
As these vehicles age, it's common to hear rattles or creaking noises coming from the center console area. These sounds are often caused by the plastic trim pieces rubbing against each other or by loose mounting clips. While not a functional failure, these noises can be a significant annoyance.
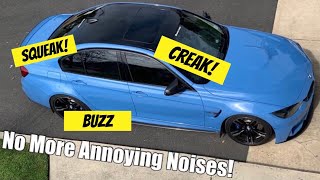
🎬 Watch this video for a fast DIY fix for interior squeaksWarning: Spilled liquids in the cupholder or on the console can migrate underneath and damage the Airbag Control Module (SRS Module). This is a very expensive and safety-critical repair. If you have an airbag warning light on after a spill, have the vehicle inspected immediately.
Buying a Used Console Panel: What to Check

A used OEM console panel is often the most cost-effective solution, especially if your original is just cosmetically damaged. Cheap aftermarket parts often have a poor fit and finish. Here’s what to inspect before buying a recycled part:
- Inspect the Finish: This is the most important check. Look at photos closely or inspect the part in person. Ask the seller if the surface is sticky or tacky. Avoid any panels that already show signs of peeling or deep scratches, as the problem will only get worse.
- Check All Mounting Clips: Turn the panel over and inspect every single mounting tab and clip. These are essential for a secure, rattle-free installation. Even one or two broken clips can cause a poor fit. If buying online, ask the seller to confirm all clips are intact.
- Verify the Exact Configuration: These consoles came in many variations. Ensure the used part has the correct cutouts for your vehicle's options. Check for things like: the shape of the iDrive controller cutout (standard or larger touch controller), and button cutouts for options like Parking Assist or the convertible top switch.
- Look for Stains or Residue: Check for any signs of liquid damage, especially on the underside of the panel and around the electronic switch cutouts. Dark stains or a sticky residue are major red flags that the electronics may have been compromised.
Known Issues, TSBs, and Recalls
While there are no official recalls or Technical Service Bulletins (TSBs) for the cosmetic failure of the console panel itself, several platform-wide issues are relevant to this area of the vehicle.
Vehicle Compatibility Note
This console panel and its related components are shared across a wide range of BMWs built on the 'F-chassis' platform. While the list of compatible vehicles is long, please note that the model years for the F80 M3 are 2014-2018. The 2012-2013 M3 was a previous generation (E9x) and does not share these parts. The part numbers listed have been verified to fit the F80 M3.
Airbag Recalls
Numerous BMW models from this era, including the F30 3-Series, have been subject to recalls for faulty airbag inflators. While not directly related to the console panel, it is critical to ensure all safety recalls have been performed on your vehicle. You can check your vehicle's status on the NHTSA website.
Replacement Guide

Replacing the main trim pieces is a relatively simple DIY task that requires basic tools.
Tools Required:
- Plastic Trim Removal Tool Kit
- Torx Screwdriver (T20)
Basic Procedure (Trim Panel Only):
- Open the Armrest: Open the center armrest to get a starting point.
- Pry Up the Main Trim: Using a plastic pry tool, start from the rear edge of the main console trim (the large piece holding the iDrive controller) and gently pry upwards. Work your way around the perimeter, releasing the clips.
- Disconnect Electronics: Once the panel is loose, carefully lift it up. You will see wiring harnesses connected to the iDrive controller and switch unit. Press the tabs on the connectors to release them and set the panel aside.
- Swap Components: The iDrive controller and switch unit are typically held into the trim panel with Torx screws. Unscrew them from the old panel and transfer them to the new one.
- Installation: Reconnect the wiring harnesses, align the new panel, and press down firmly around the edges to snap all the clips back into place.
Pro Tip: Use plastic pry tools only. Using a screwdriver will easily scratch or gouge the surrounding soft plastic trim.
Cost to Replace BMW Center Console Trim
| Part/Service | Estimated Cost |
|---|---|
| New OEM Console Panel (Main Trim) | $110 - $150 |
| New OEM Shifter Surround Trim | $35 - $50 |
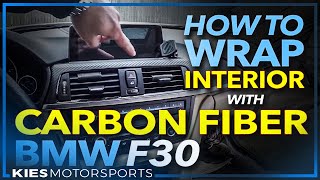
| New Aftermarket (Carbon Fiber/Alcantara) | 🎬 Watch: How to wrap your interior trim with carbon fiber vinyl$150 - $300+ |
| Used OEM (Recycled) | $50 - $100 |
| Shop Labor to Replace Trim Panel | $75 - $150 |
| Shop Labor to Replace iDrive Controller | $125 - $250 |
Frequently Asked Questions (FAQ)

Can I just clean the sticky residue off my console?
Some owners have had temporary success using rubbing alcohol or specific degreasers to remove the sticky top layer. However, this is a temporary fix. The process often leaves a blotchy, uneven finish and the stickiness may return. The only permanent solution is to replace the affected trim piece.
Do I need to disconnect the battery to replace the console trim?
For a simple trim swap, it is not strictly necessary to disconnect the battery. However, it is always the safest practice when working with vehicle electronics to prevent any accidental shorts. If you are replacing the iDrive controller or any electronic module, disconnecting the battery is highly recommended.
Will a replacement iDrive controller need to be programmed?
In most cases, if you replace a faulty iDrive controller with an identical used part number, it is a plug-and-play swap and will not require programming. However, if you upgrade to a different type of controller (e.g., from the standard knob to the larger touch-enabled one), coding will be required for it to function correctly.
Why are my new buttons sticky after a sugary drink spill?
Even after cleaning the surface, the sugary liquid has likely seeped into the switch mechanism itself. The only way to resolve this is to remove the switch unit, disassemble it for a thorough cleaning of the internal contacts, or replace the entire switch unit.
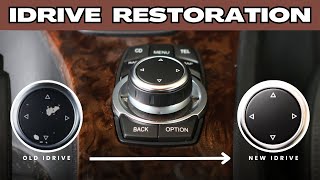
🎬 See this guide on fixing peeling or stuck iDrive buttonsHelpful Videos
Technical Specifications
OEM Part Numbers: 51169218919 51169234131 51169235431 51169323675 51169360528 61316999744
Material: Plastic with rubberized soft-touch coating. Variations exist based on trim finish (Satin Silver, Black, Wood Grain) and vehicle options.
We Have This Part in Stock



The information in this article is provided for general reference and educational purposes only. Vehicle specifications, procedures, and part compatibility can vary by production date, trim level, and region. Always consult your vehicle's factory service manual and verify part numbers before purchasing or performing repairs. Safety-critical components such as airbags, seat belts, and braking systems should be installed by a qualified professional.
- BMW M3:
- BMW 330i:
- BMW 330e:
- BMW 430i:
- BMW 320i:
- BMW 328i:
- BMW 335i:
- BMW 340i:
- BMW 428i:
- BMW 435i:
- BMW 328i GT xDrive:
- BMW 330i GT xDrive:
- BMW 335i GT xDrive:
- BMW 340i GT xDrive:
- BMW 440i:
- BMW ActiveHybrid 3:
- 🎬 Helpful Videos
- 🛍️ Shop This Part
- Symptoms of a Failing Console Panel
- 1. Sticky, Gummy, or Peeling Surface
- 2. Cracked or Worn Buttons
- 3. Malfunctioning iDrive Controller or Switches
- 4. Rattles, Creaks, and Squeaks
- Buying a Used Console Panel: What to Check
- Known Issues, TSBs, and Recalls
- Vehicle Compatibility Note
- Airbag Recalls
- Replacement Guide
- Cost to Replace BMW Center Console Trim
- Frequently Asked Questions (FAQ)
- 🎟️ Get 5% Off