

2009-2019 Bentley Continental & Flying Spur Console Panel: Fixing Sticky Buttons & Matching Veneer
A complete guide to identifying, replacing, and troubleshooting the center console panels, switches, and trim in the Bentley Continental and Flying Spur.
- The most common failure is cosmetic: the soft-touch coating on buttons becomes sticky. This can be cleaned off with isopropyl alcohol.
- When buying a used panel, it is absolutely critical to match the part number, wood veneer, and leather color to your specific vehicle.
- Many electronic issues, like unresponsive buttons, are often caused by a weak secondary battery in the trunk, not a faulty console panel.
- Panels for coupe (GT), sedan (Flying Spur), and convertible (GTC) models are different and not interchangeable.
Key Variants and Part Numbers

When searching for a replacement console panel, it's crucial to understand that several different parts make up the complete assembly. The part you need depends on the specific issue and your vehicle's configuration. Always verify part numbers and visually match the wood veneer and leather color before purchasing.
Warning: Compatibility is complex. Panels for the Continental GTC (Convertible) are different from the GT (Coupe) and Flying Spur (Sedan) to accommodate controls for the convertible top. Finishes like Piano Black, Dark Stained Burr Walnut, and various leather colors must be matched perfectly to your car's original specification.
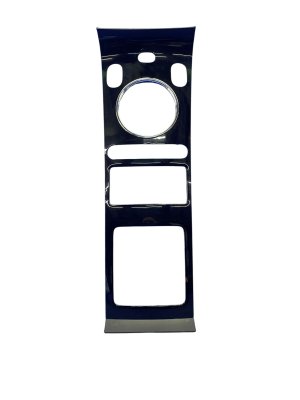
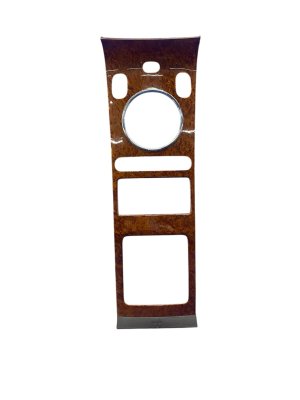
- Shifter Trim Bezel (Part numbers may include 3W3863249B): This is the trim piece directly surrounding the gear shift lever. It is one of the most common pieces to show wear.
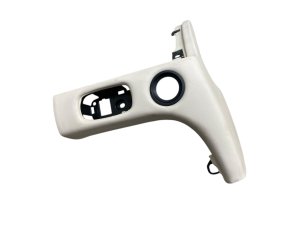
- Main Console Frame/Carrier (Part numbers may include 3W3863304A): This is the larger underlying structure or base of the console that other trim pieces and components mount to.
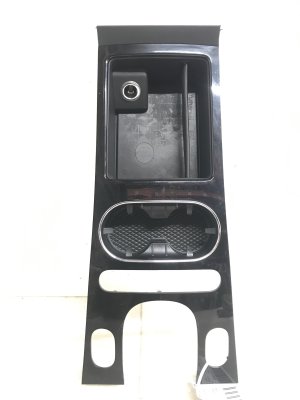
- Front Cup Holder Assembly (Part numbers may include 3W0858192D): This component, which includes the cup holders, is often integrated into the main console veneer panel.
Symptoms of a Failing Console Panel

Problems with the console panel are most often cosmetic, but can sometimes involve electronic failures.
1. Sticky or Tacky Buttons
By far the most common issue is the degradation of the soft-touch rubberized coating on the buttons. Over time, exposure to heat, humidity, and oils from skin causes this coating to break down, resulting in a sticky, gummy surface that attracts dust and fingerprints. This is a material failure, not the result of a spill.
2. Peeling or Cracked Wood Veneer
The clear coat on the wood veneer panels can begin to peel, crack, or delaminate, especially around the edges. This is often due to age and exposure to temperature fluctuations. Deep scratches or chips in the veneer can also occur from normal use.
3. Worn Leather Surfaces
Leather-wrapped sections of the console, particularly the armrest, can show signs of wear, discoloration, or cracking over time.
4. Malfunctioning Switches or Ignition
The console houses the ignition switch and buttons for suspension, hazard lights, and other functions. Symptoms of electronic failure can include:
- The engine not starting or stalling intermittently (related to the ignition switch).
- Buttons for suspension settings, spoiler control, or hazard lights being unresponsive.
- Flickering dashboard lights or accessories not working correctly.
Pro Tip: Before blaming the console switches for any electronic issue, check the vehicle's electronics battery. These Bentleys use a dual-battery system, and the right-side battery in the trunk powers the car's accessories. 🎬 See how to maintain and test your Bentley's dual batteries. A weak or dying electronics battery is a very common cause of seemingly random electrical faults and unresponsive switches.
Buying a Used Console Panel: What to Check

Buying a used OEM panel is often the most cost-effective way to restore your interior, but careful inspection is key.
- Verify the Part Number: Double-check that the part number matches the one you are replacing. Do not rely on vehicle year and model alone.
- Match the Finish EXACTLY: This is the most critical step. Obtain high-resolution photos from the seller to perfectly match the wood veneer and leather color to your car's interior. There are many variations, and a mismatched panel will significantly detract from the car's appearance.
- Inspect for Intact Mounting Clips: Ask for clear photos of the back of the panel. The plastic mounting clips and tabs are fragile and can easily break during removal. A panel with broken clips will not sit flush and may rattle.
- Examine the Surface Condition: Look closely for peeling clear coat, deep scratches, or cracks in the veneer. For panels with buttons, check for wear on the button graphics, although the sticky coating itself can be cleaned off.
- Check for Convertible-Specific Parts: If you have a Continental GTC, ensure the panel has the correct cutouts and switches for the convertible top controls.
Cost Comparison
| Part Type | Estimated Cost |
|---|---|
| New OEM | $2,000 - $5,000+ (Varies by specific panel and finish) |
| New Aftermarket | Not commonly available |
| Used OEM | $300 - $900 |
| Shop Labor | $250 - $600 |
Replacement Procedure

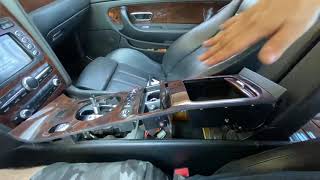
Replacing the main center console trim panel is a manageable DIY task for those comfortable working on car interiors. The process generally takes 1.5 to 2.5 hours.
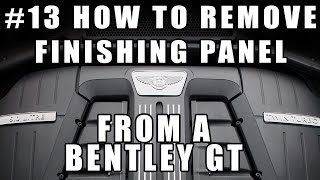
🎬 Watch a full walkthrough of the center console removal process.Warning: Before beginning any work, disconnect the vehicle's batteries (both of them) to prevent electrical faults or short circuits.
Required Tools:
- Plastic Trim Removal Tool Kit
- Torx Screwdriver Set (T20 is commonly needed)
- Small Flathead Screwdriver or Pick
Step-by-Step Guide:
- Remove Shift Knob: Carefully use a plastic pry tool to lift the trim cap on top of the gear shift knob. Once the cap is off, you can access the mechanism to release the knob itself.
- Set Gear Selector to Neutral: With the ignition on (but engine off), move the gear selector to the Neutral (N) position. This provides the clearance needed to lift the console panel out.
- Pry Up the Console Panel: Start from the rear of the main console panel (near the armrest) and use plastic pry tools to gently lift the edges. The panel is held in by clips. Work your way around the panel, releasing the clips as you go.
- Disconnect Electrical Connectors: Do not pull the panel all the way off. Lift it just enough to access the multiple electrical connectors on the underside for the various switches. Carefully disconnect each one.
- Install the New Panel: Connect all electrical connectors to the replacement panel. Align the panel carefully, ensuring all clips line up with their respective slots, and press it firmly into place. Reinstall the shift knob.
- Reconnect Batteries and Test: Reconnect the vehicle's batteries. Start the car and test all functions on the new console panel, including the ignition, suspension settings, and hazard lights.
Frequently Asked Questions (FAQ)
How do I fix the sticky buttons on my existing console panel?
You can remove the sticky coating without replacing the panel. Lightly dampen a microfiber cloth with high-concentration (70%+) isopropyl alcohol or use an oil-free makeup remover wipe. Gently rub the sticky surface. The coating will dissolve and come off, leaving the clean hard plastic underneath. Be careful not to rub too hard, as this can remove the white graphics on the buttons.
🎬 Watch this guide on cleaning sticky buttons without damage.Why don't my suspension or hazard buttons work after replacing the panel?
First, ensure all electrical connectors were securely re-attached. If the problem persists, the issue is likely not the switch panel itself. The most common culprit for such electrical issues in these cars is a weak electronics battery (the one on the right side of the trunk). Have the battery tested before pursuing more complex diagnostics.
Can I install a console panel with a different wood trim?
Physically, a panel from a similar model will likely fit, but mixing wood veneers (e.g., putting a Piano Black panel in a car with Burr Walnut trim) will look out of place and negatively impact the vehicle's resale value. It is highly recommended to find a used panel that perfectly matches your car's original interior specification.
Is the console panel the same for a Continental GT (Coupe) and GTC (Convertible)?
No, they are different. The Continental GTC has additional buttons and a different layout on its console to control the convertible top. You must purchase a panel that is specific to your vehicle's body style.
Helpful Videos


Technical Specifications
OEM Part Numbers: 3W0858192D 3W3863249B 3W3863304A
Varies by vehicle configuration. Includes wood veneer (e.g., Piano Black, Dark Stained Burr Walnut, etc.), leather trim, and integrated electronic switches for ignition, suspension, and other vehicle functions.
We Have This Part in Stock



The information in this article is provided for general reference and educational purposes only. Vehicle specifications, procedures, and part compatibility can vary by production date, trim level, and region. Always consult your vehicle's factory service manual and verify part numbers before purchasing or performing repairs. Safety-critical components such as airbags, seat belts, and braking systems should be installed by a qualified professional.
- Bentley Continental:
- Bentley Flying Spur:
- 🎬 Helpful Videos
- 🛍️ Shop This Part
- Key Variants and Part Numbers
- Symptoms of a Failing Console Panel
- 1. Sticky or Tacky Buttons
- 2. Peeling or Cracked Wood Veneer
- 3. Worn Leather Surfaces
- 4. Malfunctioning Switches or Ignition
- Buying a Used Console Panel: What to Check
- Cost Comparison
- Replacement Procedure
- Required Tools:
- Step-by-Step Guide:
- Frequently Asked Questions (FAQ)
- 🎟️ Get 5% Off