

2017-2020 Model 3 & 2020 Model Y Center Console: A Guide to Scratches, Latch Issues, and Replacement
This guide covers the common failure points, costs, and critical design differences for the first-generation 'piano black' center console in the Tesla Model 3 and Model Y.
- The primary complaint is the glossy 'piano black' finish, which scratches and smudges very easily; a vinyl wrap is a common and effective fix.
- This console fits 2017-2020 Model 3 and 2020 Model Y only. It is NOT interchangeable with the matte, sliding-door console from 2021+ models.
- Common mechanical failures include a broken armrest latch that won't stay closed or gets stuck.
- When buying a used console, the most important checks are the integrity of the lid latch mechanism and ensuring all plastic mounting tabs are intact.
Known Issues with the First-Generation Console

The first-generation center console, fitted in the 2017-2020 Tesla Model 3 and the inaugural 2020 Tesla Model Y, is well-known for a few specific issues, primarily cosmetic and mechanical wear. Understanding these common problems is key to diagnosing issues or deciding on a replacement.
The "Piano Black" Finish Problem
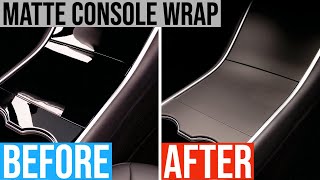
The most widespread complaint about this console is its high-gloss "piano black" finish. This surface is made from a soft acrylic plastic that is extremely susceptible to showing fingerprints, dust, and, most notably, scratches. Merely wiping dust with a dry towel can create fine microscopic abrasions, often called swirl marks. Heavier contact from keys, phone cases, or bags can easily cause deeper, more permanent scratches, leading many owners to seek solutions. This cosmetic issue is so prevalent that applying a protective vinyl wrap is one of the most common modifications for these vehicles.
Lid and Latch Failures
The mechanical components of the console can also fail over time. The main storage compartment's flip-up lid is operated by a latch mechanism that can break or become misaligned from physical stress or wear. This can result in a lid that refuses to stay closed or sits unevenly. In some cases, the latch mechanism can get stuck, preventing the armrest from opening. 🎬 Watch: How to fix a stuck center console latch This is often caused by debris jamming the mechanism or simple mechanical failure of the latch itself.
Electronic Failures
The console houses two front USB ports and a 12V power outlet. A common electronic issue is the failure of these USB ports, which may stop providing power, data, or both. This can be caused by a faulty USB hub within the console, loose connections, or sometimes a software glitch that can be resolved with a vehicle reboot. If a reboot doesn't work, the internal USB hub often needs to be replaced.
Critical Compatibility Warning: This first-generation console (2017-2020 Model 3, 2020 Model Y) has a glossy finish and a flip-up lid. It is NOT interchangeable with the redesigned "Gen 2" console introduced in 2021 models, which features a matte finish and a sliding door. The mounting points and some electrical connectors are different.
Symptoms of a Failing Center Console

- Visible Scratches and Smudges: The most obvious symptom is the cosmetic degradation of the piano black finish.
- Lid Won't Stay Closed: The main storage lid pops open on its own or will not latch securely when closed.
- Stuck Armrest/Lid: The latch release button does not work, and the storage compartment cannot be opened.
- Inoperative USB Ports: Devices connected to the front USB ports do not charge or are not recognized by the vehicle's infotainment system.
- Loose or Rattling Components: The console assembly or its lids may feel loose and create rattling noises while driving, often due to broken mounting tabs or worn hinges.
Buying a Used 2017-2020 Center Console

A used OEM console can be a cost-effective replacement, but careful inspection is crucial to ensure you get a quality part. Given the known issues, here’s what to check before you buy.
What to Inspect on a Used Unit
- Verify the Generation: First, confirm you are buying a Gen 1 console. It should have a glossy black finish and a flip-up lid. A matte finish or sliding door indicates it's from a 2021 or newer model and will not fit.
- Inspect the Surface Finish: Expect minor swirl marks, but look closely for deep scratches or gouges that have penetrated the plastic. Polishing can remove fine swirls, but deep scratches are permanent.
- Test the Lid and Latch: Open and close the main lid multiple times. It should operate smoothly and latch with a definitive click. Press on the closed lid to ensure it doesn't pop open.
- Check the Hinges: Inspect the hinge points for the flip-up lid. Look for stress marks (white-ish lines in the plastic) or cracks, which indicate the hinge is weakened and may fail soon.
- Examine All Mounting Tabs: Turn the console over and inspect every plastic mounting tab around the perimeter. These are critical for a secure, rattle-free installation. A console with even one broken tab may not fit correctly.
- Look at Electrical Ports: Check the USB ports and 12V socket for any signs of physical damage, corrosion, or bent pins.
Pro Tip: Many owners replace their perfectly functional Gen 1 console simply to upgrade to the newer Gen 2 style. This means you can often find used Gen 1 consoles in excellent condition with very little wear.
Replacement and Repair Options

Replacement of the entire console is a manageable DIY project with basic tools. The difficulty is rated 2 out of 5 and typically takes about 1-2 hours.
DIY Replacement Steps
- Power down the vehicle through the main screen menu for safety.
- Move both front seats fully forward and up to access the rear of the console.
- Using a trim removal tool, carefully pry off the side panels on both sides of the console.
- Remove the rear vent panel at the back of the console.
- Unscrew the bolts securing the console to the vehicle frame. There are typically two at the front (under the side panels) and two at the rear.
- Disconnect the electrical connectors for the USB hub and 12V outlet.
- Carefully lift the console assembly out of the vehicle.
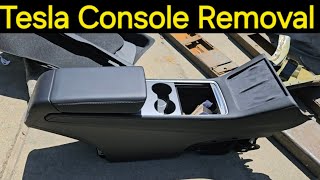
- Installation is the reverse of removal. 🎬 See this step-by-step center console removal video Ensure all electrical connectors are securely reconnected before powering the vehicle back on.
Alternative Solution: Vinyl Wraps & Covers
For purely cosmetic issues like scratches, a full replacement isn't necessary. A popular and affordable solution is to apply a vinyl wrap or a hard plastic cover. These kits are designed to fit perfectly over the existing piano black surfaces, changing the finish to matte black, carbon fiber, or other styles. This not only hides existing damage but also protects the console from future scratches.
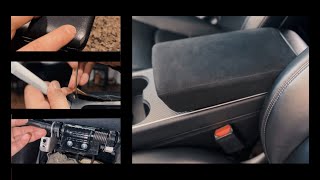
🎬 Watch: How to apply a center console vinyl wrapKnown Issues, TSBs, and Recalls
As of mid-2024, there are no specific NHTSA recalls or Technical Service Bulletins (TSBs) for the center console assembly, latch, or lid on the 2017-2020 Model 3 or 2020 Model Y. Issues with the console are generally considered cosmetic or wear-and-tear items handled under warranty or as owner-paid repairs. Recalls for these vehicles typically involve software, suspension components, or lighting systems.
Cost Comparison
| Part or Service | Estimated Cost |
|---|---|
| New OEM Console Assembly | $800 - $1,000 |
| Used OEM Console Assembly | $100 - $250 |
| Aftermarket (Vinyl Wrap Kit) | $20 - $60 |
| Aftermarket (Hard Cover Kit) | $30 - $70 |
| Shop Labor for Replacement | $150 - $300 |
Frequently Asked Questions (FAQ)
Can I install a 2021+ 'refreshed' console in my 2019 Model 3?
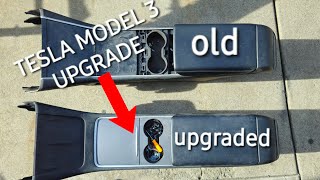
Yes, it is a popular upgrade, but it is not a direct swap. The newer console has different electrical connectors and requires swapping the security controller module from your original console into the new one to avoid bricking the car's security system. It is a more involved project than a like-for-like replacement.
How can I clean the piano black finish without scratching it?
To clean the glossy surface safely, never wipe it when it's dry. Lightly mist a high-quality, plush microfiber towel with a pH-balanced interior cleaner. Gently wipe the surface in straight lines, not circles, to lift dust and fingerprints without causing swirl marks.
My console lid won't stay closed. Can I just fix the latch?
Sometimes, yes. The issue can be caused by debris in the mechanism, which can be cleaned out with compressed air. If the latch itself is broken, it is not typically sold as a separate part by Tesla. In most cases, you would need to replace the entire armrest lid assembly or the full console.
The front USB ports stopped working. What's the first thing to check?
First, try rebooting the car's main screen by holding down both scroll wheels on the steering wheel until the screen turns off and back on. This can often resolve software-related glitches affecting the USB hub. If that doesn't work, and you've tested with different cables, the internal USB hub likely needs replacement.
Helpful Videos

Technical Specifications
OEM Part Numbers: 108681400F 108681600G 109561700C 111239200C
Finish: High-Gloss 'Piano Black' Plastic. Lid Type: Flip-up armrest lid. Electronics: Integrates two front USB ports and one 12V power outlet.
We Have This Part in Stock




The information in this article is provided for general reference and educational purposes only. Vehicle specifications, procedures, and part compatibility can vary by production date, trim level, and region. Always consult your vehicle's factory service manual and verify part numbers before purchasing or performing repairs. Safety-critical components such as airbags, seat belts, and braking systems should be installed by a qualified professional.
- TESLA TESLA MODEL 3:
- TESLA TESLA MODEL Y:
- 🎬 Helpful Videos
- 🛍️ Shop This Part
- Known Issues with the First-Generation Console
- The "Piano Black" Finish Problem
- Lid and Latch Failures
- Electronic Failures
- Symptoms of a Failing Center Console
- Buying a Used 2017-2020 Center Console
- What to Inspect on a Used Unit
- Replacement and Repair Options
- DIY Replacement Steps
- Alternative Solution: Vinyl Wraps & Covers
- Known Issues, TSBs, and Recalls
- Cost Comparison
- Frequently Asked Questions (FAQ)
- 🎟️ Get 5% Off