

Tesla Model S, 3, X, Y Parking Sensor Guide (2015-2023): Fixing 'Park Assist Unavailable'
This guide covers diagnosing and replacing the ultrasonic parking sensors on the Tesla Model S, 3, X, and Y, focusing on common failures and how to buy a reliable used replacement.
- The primary symptom of failure is a 'Park Assist Unavailable' message, which disables the entire system even if only one sensor is bad.
- You can diagnose the specific faulty sensor using the hidden 'Service Mode' on the touchscreen.
- Replacement requires removing the front or rear bumper cover, making it a moderately difficult DIY job.
- After installation, the system may require a reset or programming procedure via Service Mode to clear the fault.
- A used OEM sensor is a reliable and cost-effective option, but ensure the part number matches and inspect it for damage before purchase.
Understanding the 'Park Assist Unavailable' Warning

The most common sign of a parking sensor problem on a 2015-2021 Tesla Model S, 2015-2021 Tesla Model X, 2017-2023 Tesla Model 3, or 2020-2023 Tesla Model Y is the 'Park Assist Unavailable' message on the center touchscreen. When this error appears, you will lose the distance visualizations and audible alerts while parking. Features like Autopark and Summon will also be disabled. This happens because if even one of the twelve ultrasonic sensors fails or its wiring is compromised, the entire system shuts down as a precaution.
Pro Tip: Before assuming a sensor is broken, thoroughly clean all twelve sensor pods on the front and rear bumpers with a soft cloth and mild soap. Dirt, road salt, ice, or even a peeling paint protection film (PPF) can block the sensor and trigger a system fault.
Common Symptoms of a Failing Tesla Parking Sensor


Aside from the main error message, other symptoms can point to a sensor issue:
- Constant Beeping: A sensor may falsely detect an obstacle that isn't there, causing continuous beeping.
- No Alerts: The system may fail to detect an object, providing no warning as you approach it.
- Intermittent Failure: The 'Park Assist Unavailable' message may appear randomly, sometimes working for days and then failing again. This can indicate a loose connection or a sensor that is beginning to fail.
How to Diagnose a Faulty Sensor
You can often identify the specific failing sensor yourself using Tesla's built-in Service Mode.
- Put the car in Park.
- On the touchscreen, navigate to 'Controls' > 'Software'.
- Press and hold the vehicle model name (e.g., 'Model 3') for about three seconds, then release.
- When prompted for an access code, type 'service'.
- In the Service Mode menu, find the section for Driver Assist or Sensors.
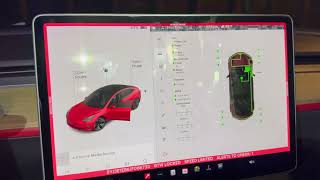
- This screen will show a diagram of the car and the status of each sensor. A faulty sensor will typically be flagged with a red error or a 'lost communication' message.
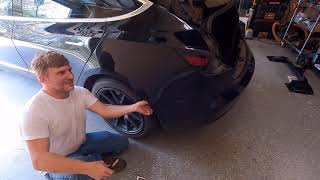
Another simple, low-tech method is the 'clicking test'. Engage the reverse gear (with the brake on) to activate the sensors. Place your ear or a finger very close to each sensor; a healthy sensor will emit a faint, high-frequency clicking or buzzing sound. If one is silent, it's likely the culprit.
Known Issues, Recalls, and Technical Service Bulletins (TSBs)
While there are no widespread recalls specifically for the ultrasonic sensors themselves, Tesla has faced NHTSA investigations and issued recalls for related software issues, such as 'phantom braking'. These events, where the car brakes suddenly for no reason, are generally attributed to the camera-based 'Tesla Vision' system or the forward-facing radar, not the ultrasonic parking sensors. The transition to Tesla Vision, which began in 2021 for Model 3/Y and later for Model S/X, involved removing both radar and ultrasonic sensors from new vehicles, which is important context for owners of newer models.
Buying a Used Tesla Parking Sensor
For this part, a used OEM sensor is an excellent, cost-effective choice compared to a new one from the dealer. Aftermarket sensors are available but are not recommended, as they can have compatibility and reliability issues. Here’s what to check when buying used:
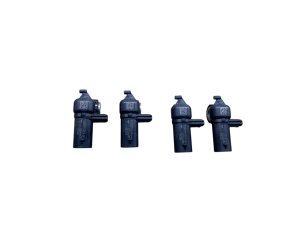
- Verify the Part Number: The primary OEM part number is 1036761-00-A. However, several other part numbers like 1127502-xx-x and 1048473-xx-x have been used across these models. It's critical to match the part number exactly or confirm compatibility. Note that the outer sensors on the corners of the bumper are often a different part number than the inner sensors.
- Physical Inspection: Check the face of the sensor for any cracks, deep scratches, or damage. Inspect the plastic housing and connector pins for any signs of corrosion, breakage, or moisture damage.
- Check the O-Ring: Ensure the small rubber O-ring or gasket is present and in good condition. This is crucial for sealing the sensor against the elements.
- Source and Mileage: Purchase from a reputable seller that specializes in recycled auto parts. While mileage isn't a primary failure factor, a sensor from a lower-mileage, newer vehicle is always preferable.
Replacement Difficulty and Procedure
Replacing a Tesla parking sensor is a moderately difficult task for a DIYer, primarily because it requires removing the front or rear bumper cover (fascia).
- Difficulty Rating: 3 out of 5
- Estimated Time: 1.5 - 3 hours
- General Steps:
- Disconnect the 12V power supply as a safety precaution.
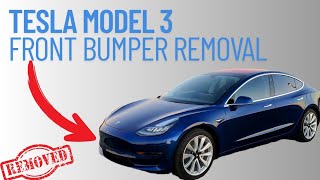
- Depending on the sensor location, you may need to remove the frunk liner (for front sensors) or wheel arch liners. 🎬 See: How to remove a Tesla Model 3 rear bumper
- Carefully unfasten the numerous clips, 10mm bolts, and Torx screws holding the bumper cover in place.
- Once the bumper is loose, disconnect the main sensor harness connector before fully removing it.
- The individual sensor is held in a bracket by small plastic tabs. Disconnect its electrical plug, release the tabs, and push it out.
- Install the new sensor, ensuring it clicks securely into its bracket, and reverse the process.
Warning: The outer sensors on the corners of the bumpers on some models (like the Model 3 and Y) can sometimes be accessed by partially removing the wheel well liner, avoiding a full bumper removal.
🎬 Watch: Tesla Model 3/Y parking sensor replacement guideCalibration and Programming
After replacing a sensor, a calibration or programming step is often required to make the system recognize the new part. This can be done through the same Service Mode used for diagnosis. Look for an option like 'Program Front/Rear USS'. 🎬 Watch: Tesla Model S park assist calibration and fix In some cases, simply performing a system reset by holding both steering wheel scroll wheels until the screen reboots may be sufficient. If these steps don't clear the fault, a visit to a Tesla Service Center or a qualified independent shop with Tesla's Toolbox software may be necessary.
Cost Comparison
| Part/Service | Estimated Cost |
|---|---|
| New OEM Sensor | $100 - $150 |
| New Aftermarket Sensor | $25 - $50 |
| Used OEM Sensor | $20 - $60 |
| Shop Labor Cost | $150 - $300 |
Frequently Asked Questions
Do I need to paint a replacement sensor?
For a perfect cosmetic match, yes. Sensors often come in unpainted black plastic or a standard color. A body shop can paint it to match your vehicle's color. However, applying paint too thickly can interfere with the sensor's operation, so it must be done professionally.
Can I drive with a 'Park Assist Unavailable' warning?
Yes, but with caution. The car is perfectly safe to drive, but you will have no audible or visual assistance for low-speed parking and maneuvering. Rely on your mirrors and cameras, and be extra careful in tight spaces.
Why did Tesla stop using these sensors on newer cars?
Starting in late 2021 and 2022, Tesla began removing ultrasonic sensors (and radar) from its vehicles, transitioning to a camera-only system called 'Tesla Vision' for all driver-assist functions, including parking. This decision was aimed at simplifying manufacturing and relying on a single sensor suite.
Is a single broken sensor retainer clip repairable?
Yes. Often, a sensor fails not because it's faulty, but because the plastic retainer clip holding it to the bumper has broken, causing it to fall out of position. It is possible to plastic-weld a new retainer onto the bumper, but this requires removing the bumper cover for access.
Helpful Videos
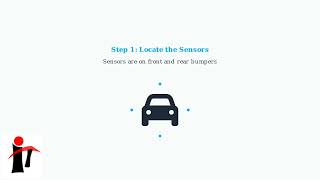
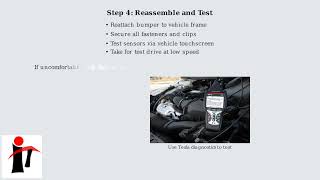
Technical Specifications
OEM Part Numbers: 1036761-00-A 1127502-01-D 1127502-11-D 1048473-01-A
Ultrasonic proximity sensor, typically 3-pin connector.
We Have This Part in Stock




The information in this article is provided for general reference and educational purposes only. Vehicle specifications, procedures, and part compatibility can vary by production date, trim level, and region. Always consult your vehicle's factory service manual and verify part numbers before purchasing or performing repairs. Safety-critical components such as airbags, seat belts, and braking systems should be installed by a qualified professional.
- TESLA X:
- TESLA 3:
- TESLA S:
- TESLA Y:
- 🎬 Helpful Videos
- 🛍️ Shop This Part
- Understanding the 'Park Assist Unavailable' Warning
- Common Symptoms of a Failing Tesla Parking Sensor
- How to Diagnose a Faulty Sensor
- Known Issues, Recalls, and Technical Service Bulletins (TSBs)
- Buying a Used Tesla Parking Sensor
- Replacement Difficulty and Procedure
- Calibration and Programming
- Cost Comparison
- Frequently Asked Questions
- 🎟️ Get 5% Off