

Mazda 3 & Mazda 6 Blind Spot Sensor Failure: Solving the 'BSM OFF' Warning
A complete guide to diagnosing, replacing, and buying a used Blind Spot Monitoring (BSM) sensor for the 2012-2017 Mazda 3, 2012-2013 Mazda 3 Sport, and 2014-2021 Mazda 6.
- The most common cause of failure is water intrusion or minor physical damage due to the sensor's location behind the rear bumper.
- You MUST match the OEM part number from your old sensor exactly. Some sensors are side-specific, and some require replacement as a matched pair.
- Professional ADAS calibration is REQUIRED after replacement. This is a separate cost from installation and cannot be done at home.
- A used OEM sensor is a cost-effective option, but must be carefully inspected for cracks or corrosion before purchase.
Symptoms of a Failing Blind Spot Sensor

When a blind spot sensor fails on your Mazda 3 or Mazda 6, the symptoms are usually very clear. You will almost certainly see a warning message on your instrument cluster.
- "Blind Spot Monitoring System Malfunction" Message: This is the most common indicator of a problem. The message will appear on the multi-information display.
- Flashing "BSM OFF" Light: A flashing orange "BSM OFF" light on the dashboard indicates a system fault. If the light is solid, the system may have been turned off manually, but a persistent flashing light means there's a hardware or communication error.
- BSM System Turns Off Randomly: The system may work intermittently, shutting off during a drive only to work again the next time you start the car. This often points to an impending failure, usually from moisture inside the sensor causing intermittent shorts.
- Side Mirror Indicator Stays On or Never Turns On: A faulty sensor can cause the warning light in one of the side mirrors to stay illuminated constantly or never light up at all, even when a car is present.
- Rear Cross Traffic Alert (RCTA) Inoperative: Since the BSM sensors also run the RCTA system, a BSM failure will also disable the cross-traffic alerts when you are in reverse.
Known Issues, Recalls, and Technical Service Bulletins (TSBs)

While there are no major safety recalls specifically for BSM sensor failure on these models, there are known issues and service bulletins that owners should be aware of.
- Water Intrusion: The number one cause of failure is moisture getting past the sensor's seals. The sensors live in a harsh environment behind the rear wheels, constantly being sprayed with water, salt, and road grime. Over time, the seals on the sensor's housing can degrade, allowing water inside and corroding the delicate circuit board.
- Physical Damage: Because of their location in the bumper corners, the sensors are highly susceptible to damage from minor parking lot bumps, even if the bumper cover itself shows no visible cracks. A slight impact can crack the sensor's housing or knock its internal radar antenna out of alignment.
- Software Glitches: On some models, Mazda has issued TSBs to update the BSM control module software to prevent false alerts, such as the mirror indicator lighting up when no vehicle is present. However, this is distinct from a total system malfunction indicated by the "BSM OFF" light.
- TSB on Replacing Sensors in Pairs: For some Mazda models, technical service bulletins and repair industry documents state that if the driver's side (Left Hand) sensor is replaced, the passenger side (Right Hand) sensor must also be replaced as a matched pair for the system to configure properly. This is a critical point to consider when purchasing a replacement.
Warning: If you are replacing the driver's side (LH) sensor, you may need to replace both the left and right sensors as a pair. Attempting to replace only the driver's side unit can result in a configuration failure. Always check the specific requirements for your vehicle's year and part number.
Buying a Used Collision Avoidance Sensor: What to Check

Given the high cost of a new OEM sensor, a used part from a reputable recycler is a smart choice. However, these are sensitive electronic modules, and you must inspect a used one carefully before buying.
- Match the Part Number EXACTLY: This is the most important rule. Do not buy a sensor just because it came from the same model year. Mazda used many different part numbers, some of which are side-specific or require replacement in pairs. Remove your old sensor first and find the part number printed on the label. Buy a used sensor with the identical number to ensure compatibility.
- Inspect the Casing for Cracks: Carefully examine the entire black plastic housing. Look for any hairline cracks, especially around the seams and mounting points. Any crack, no matter how small, is a sign that moisture may have entered the unit, and you should reject the part.
- Check the Electrical Connector: Look at the pins inside the connector port. They should be clean, straight, and shiny. Any signs of green or white corrosion, or any bent or broken pins, mean the sensor is junk.
- Examine the Potting Material: The back of the sensor is typically filled with a black epoxy material called potting. This material should be smooth and flat. If it looks swollen, bubbled, or is flaking away, it's a sign of internal heat or water damage.
- Ask About the Donor Vehicle: If possible, find out if the donor vehicle had a rear-end collision. While a sensor from a front-end collision is likely fine, one from a car that was rear-ended carries a higher risk of hidden damage, even if it looks okay externally.
Replacement and Calibration
Replacing the sensor is a two-part process: physical installation and electronic calibration.
Installation (Difficulty: 3/5)
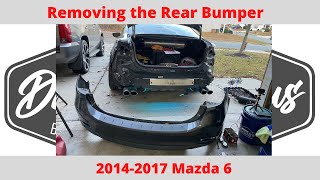
The physical replacement requires removing the rear bumper cover. 🎬 See how to remove the rear bumper on a Mazda 6 While not technically difficult, it is a tedious job that requires care to avoid scratching paint or breaking plastic clips.
- Disconnect the negative battery terminal.
- Remove the tail lights, as they often hide fasteners for the bumper cover.
- Remove all screws and plastic clips holding the bumper cover in place. These are typically found in the wheel wells, under the trunk sill, and underneath the vehicle.
- Carefully unsnap the bumper cover from the retaining brackets along the sides of the vehicle.
- With the cover loose, disconnect the electrical harness for the license plate lights and the BSM sensors.
- The BSM sensor is a black box bolted to the vehicle's body or a bracket in the corner. Unbolt it, disconnect the plug, and install the new one.
Calibration (Professional Service Required)
This is the step most DIYers miss. While some forum users report success with a simple swap, Mazda's official repair procedures—and the procedures for all modern cars with ADAS (Advanced Driver-Assistance Systems)—require a precise calibration after a sensor is replaced or the bumper is removed.
Why is calibration needed? The sensor's radar beam must be aimed with millimeter precision. A slight misalignment can cause the system to miss a car in your blind spot or trigger false alerts, making the system unreliable and unsafe.
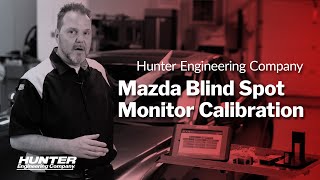
Calibration is a complex process that involves setting up special radar reflectors, lasers, and plumb bobs at exact distances and angles from the vehicle. This is not something that can be done at home. It must be performed by a dealership or a qualified independent shop with expensive ADAS calibration equipment. 🎬 Watch how a professional Mazda blind spot sensor calibration is performed Expect to pay an additional fee for this service on top of the installation labor.
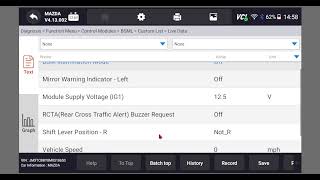
Pro Tip: When diagnosing a "BSM OFF" light, a common trick 🎬 Watch this step-by-step video on diagnosing Mazda BSM faults using a scanner is to swap the left and right sensors. Clear the codes and see if the fault code moves to the other side. If it does, you've confirmed that one sensor is bad. This can save you from replacing a good sensor. Note that this only works if your vehicle uses the same part number for both sides.
Cost Comparison for a Single BSM Sensor
| Part Type | Estimated Cost (Part Only) |
|---|---|
| New OEM | $700 - $1,050 |
| New Aftermarket | Not Generally Available |
| Used OEM | $75 - $200 |
Labor and Calibration Costs
| Service | Estimated Cost |
|---|---|
| Shop Labor (Sensor Replacement) | $150 - $450 |
| ADAS Calibration (Per-system) | $250 - $400 |
OEM Part Number Reference
Part numbers are critical. Always verify the number on your existing part before ordering. Below is a general guide based on vehicle generation.
| Vehicle | Part Number(s) | Notes |
|---|---|---|
| 2012-2013 Mazda 3 / 3 Sport | BFD1-67-Y30 | Right (Passenger) Side Specific |
| 2014-2017 Mazda 3 / 2014-2017 Mazda 6 | GJR9-67-Y30, GJR9-67-Y30A through GJR9-67-Y30H | These are often superseded numbers. Listed for Left or Right. |
| 2017-2021 Mazda 6 | GRT6-67-Y30, GRT6-67-Y30A through GRT6-67-Y30E | Often listed as fitting either side. |
Note: This list is not exhaustive. Many other part numbers from the initial prompt may be applicable as superseded versions. The best practice is always to match your old part number.
Frequently Asked Questions (FAQ)
Do I really need to calibrate the new sensor?
Yes. While the car may not show an error code without it, the accuracy of the blind spot detection is not guaranteed. For the system to function safely as designed, a professional ADAS calibration is required by the manufacturer. Skipping this step could lead to the system failing to detect a vehicle when you need it most.
Can I replace a blind spot sensor myself?
A skilled DIY mechanic can perform the physical installation, which involves removing the rear bumper cover. However, the final, mandatory calibration step must be done by a shop with specialized ADAS equipment. Because of this, it is not a fully DIY-feasible job.
Why did my sensor fail? There was no accident.
The most common reason for failure is water intrusion. The sensors are located in an area that gets blasted with road spray. Over many years, the seals can fail, allowing moisture to corrode the internal electronics. This is why even cars with no accident history can experience this issue.
Why does the dealer say I need to replace both sensors if only one is bad?
On many Mazda vehicles, if the driver's side (LH) sensor fails, it must be replaced along with the passenger side (RH) sensor as a matched pair. This is due to how the modules are programmed and configured to work together. Attempting to replace just one may result in a system that will not initialize or calibrate.
Helpful Videos
Technical Specifications
OEM Part Numbers: BANE-67-Y30D BANE67Y30A BFD1-67-Y30 BFD167Y30 GJR967Y30 GJR967Y30A GJR967Y30B GJR967Y30G GJR967Y30H GRT667Y30 GRT667Y30A GRT667Y30B GRT667Y30C GRT667Y30D GRT667Y30E
24GHz Microwave Radar Sensor
We Have This Part in Stock



The information in this article is provided for general reference and educational purposes only. Vehicle specifications, procedures, and part compatibility can vary by production date, trim level, and region. Always consult your vehicle's factory service manual and verify part numbers before purchasing or performing repairs. Safety-critical components such as airbags, seat belts, and braking systems should be installed by a qualified professional.
- Mazda 3:
- Mazda 6:
- Mazda 3 Sport:
- 🎬 Helpful Videos
- 🛍️ Shop This Part
- Symptoms of a Failing Blind Spot Sensor
- Known Issues, Recalls, and Technical Service Bulletins (TSBs)
- Buying a Used Collision Avoidance Sensor: What to Check
- Replacement and Calibration
- Installation (Difficulty: 3/5)
- Calibration (Professional Service Required)
- Cost Comparison for a Single BSM Sensor
- Labor and Calibration Costs
- OEM Part Number Reference
- Frequently Asked Questions (FAQ)
- 🎟️ Get 5% Off