

Audi Q7, A4, S4 & Q5 Rear Radar Sensor Faults: A Guide to 4M0907566B
Diagnosing 'Audi pre sense' and 'Side assist fault' warnings and replacing the common rear blind spot radar module in your 2016-2020 Audi.
- This is NOT a plug-and-play part. Replacement requires both 'Component Protection' removal and radar calibration by a dealer or specialist with Audi-specific online tools.
- The most common cause of failure is water intrusion causing corrosion. When buying a used part, carefully inspect the connector pins for any green or white residue.
- Common symptoms include "Audi side assist: system fault" and "Audi pre sense: currently limited" warnings on the dash.
- A DIYer can save on labor by physically swapping the sensor (which requires rear bumper removal), but a visit to a properly equipped shop is mandatory to make the part functional.
Vehicles Covered

This guide applies to the following vehicles, which share a common blind spot radar sensor system. This part is located behind the rear bumper cover in the corners of the vehicle.
- 2016-2019 Audi Q7
- 2017-2019 Audi A4
- 2018-2019 Audi S4
- 2020-2020 Audi Q5
Most Common Symptoms of Failure

When a rear radar sensor fails, you will lose multiple driver assistance features at once. The failure is almost always announced by a clear warning message on the instrument cluster display.
- "Audi side assist: system fault" Message: This is the most direct and common symptom. It indicates the blind spot monitoring system has detected an internal failure and has shut down.
- "Audi pre sense: currently limited" Message: This more general warning can appear because the side assist sensors provide data to the wider Pre Sense safety system. This message can also be caused by other issues, so a diagnostic scan is needed to confirm the source.
- Inoperative Mirror Lights: The amber warning lights located in your side-view mirror housings will no longer illuminate when a car is in your blind spot. They may also fail to do their initial flash when you start the car.
- System Unavailable in MMI: When you navigate to the Driver Assistance menu in your car's MMI (infotainment) system, the option for Side Assist may be grayed out or show a "not available" message.
- Intermittent Operation: Before a complete failure, the system might work sporadically, often failing after a car wash or during heavy rain. This is a strong indicator of water getting into the sensor's electronics.
Pro Tip: Before assuming the sensor has failed, thoroughly wash the rear corners of your bumper. Mud, ice, or road grime can sometimes block the sensor's view and trigger a temporary fault. After cleaning, cycle the ignition to see if the error clears.
Diagnosing the Problem with Fault Codes

The only way to be certain of the failure is to scan the vehicle's control modules with a compatible diagnostic tool like VCDS or OBDeleven. Look for faults in the Lane Change Assistance control module (address word 3C).
| Fault Code | Meaning | Common Cause |
|---|---|---|
| B200000 / B200047 | Control Module Faulty | Often indicates an internal hardware failure within the sensor module itself. |
| C111504 | Lane Change Assistance Control Module 2 - Faulty | A specific code pointing to a failure in the slave (usually driver's side) module. |
| C1114F3 / C1115F5 | Restricted View | Can be caused by a physical obstruction, but if the bumper is clean, it points to an internal sensor fault. |
| C1114F0 / C1115F0 | Automatic Calibration Not Possible | The module is trying to self-calibrate but cannot, indicating a hardware or alignment issue. |
A Technical Service Bulletin (TSB 2043428/1) suggests that if codes like B200000 or C111504 are present, both the master and slave modules should be replaced together to ensure proper system function.
Buying a Used Collision Avoidance Sensor

Given the high cost of a new OEM sensor, a quality used unit from a reputable recycler is an excellent value. However, these are sensitive electronic parts, and careful inspection is key.
- Verify the Part Number: You must match the part number exactly. The primary part number for the right (passenger) side is 4M0907566B, which replaces the older 4M0907566A. The left (driver) side is typically 4M0907590B. Do not install a sensor from a different vehicle platform, even if it looks identical.
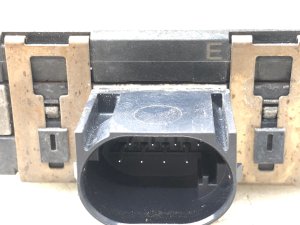
- Inspect the Connector Pins: This is the most critical check. Carefully examine the electrical connector pins on the sensor. Look for any signs of green or white powder, which is evidence of corrosion from water intrusion. A sensor with corroded pins should be rejected, as it has already failed or will fail shortly.
- Check the Housing: Inspect the black plastic housing for any cracks, especially around the seams. A cracked housing allows moisture to enter and destroy the internal circuit board.
- Understand the Master/Slave Relationship: These vehicles use a master (right/passenger side) and slave (left/driver side) sensor. They are not interchangeable. Ensure you are ordering the correct part for the side you are replacing.
- Why Used OEM is a Smart Choice: For sensitive electronics like radar modules, a used OEM part is often superior to a new aftermarket one. The OEM unit is designed to integrate perfectly with your vehicle's software and has been proven reliable. Aftermarket versions can have compatibility and quality control issues, leading to calibration problems and a repeat repair.
Warning: This part is NOT plug-and-play. It requires special programming and calibration after installation. Do not attempt to replace it unless you have a plan for this essential final step.
Replacement and Calibration Guide
Physically swapping the sensor is a manageable DIY job for someone comfortable with basic tools, but the final, mandatory steps require professional equipment.
Step 1: Rear Bumper Cover Removal (DIY)
🎬 Watch: Audi Q7 rear bumper removal walkthroughThe sensor is located behind the rear bumper cover. While specific steps vary slightly between the Q7 and the A4/S4/Q5, the general process is similar.
- Disconnect the Battery: As a safety precaution, disconnect the negative terminal of the battery.
- Empty the Trunk: Remove the trunk floor and any side trim panels to access fasteners.
- Remove Wheel Well Fasteners: In each rear wheel well, remove the Torx screws (typically T-25) that secure the bumper cover to the liner and body.
- Remove Underside Fasteners: Look underneath the bumper for several more Torx screws connecting the cover to the underbody trays.
- Remove Taillights and Upper Fasteners: On many models, the taillights must be removed to access the final bolts holding the top of the bumper. These are usually accessed from inside the trunk.
- Unclip and Pull: With all fasteners removed, firmly pull the sides of the bumper cover outward to release it from the plastic guide clips on the quarter panel. Then, with a helper, pull the bumper cover straight back.
- Disconnect Wiring: Do not pull the bumper far. Reach behind it and disconnect the main electrical harness(es) for the parking sensors and radar modules before setting the cover aside on a soft surface.
Step 2: Swap the Sensor (DIY)
- Locate the Sensor: You will see the black radar module bolted to a bracket in the corner of the vehicle.
- Unplug and Unbolt: Disconnect the electrical plug from the old sensor. Remove the bolts holding it to its bracket.
- Install the New Sensor: Bolt the replacement sensor onto the bracket and plug in the electrical connector. Ensure it is seated securely.
Step 3: Component Protection and Calibration (Professional Shop)
After reinstalling the bumper cover, the car must go to an Audi dealer or a qualified independent specialist with the right tools and online access.
- Component Protection (CP) Removal: Audi uses an anti-theft system called Component Protection. A used sensor will not function until it is 'adapted' to your car's VIN. This is done using Audi's ODIS diagnostic software connected to their factory servers.
- Sensor Calibration: Once CP is removed, the sensor's radar beam must be precisely aimed. This requires a special calibration rig with target boards and sometimes a Doppler generator. The technician uses the diagnostic tool to put the system into calibration mode and aligns the sensor until the system confirms it is aimed correctly. Failure to calibrate the sensor can make the system unreliable or even dangerous.
Cost Comparison
The total cost involves the part, the physical labor to swap it, and the separate electronic programming/calibration.
| Item | Estimated Cost (USD) |
|---|---|
| New OEM Sensor | $1,050 - $1,400 |
| Used OEM Sensor | $150 - $350 |
| New Aftermarket Sensor | Not commonly available / Not recommended |
| Shop Labor (Bumper R&R) | $250 - $450 |
| Component Protection & Calibration | $300 - $800 |
Frequently Asked Questions (FAQ)
Can I just replace one sensor if only one is bad?
Yes, you can replace only the failed sensor. However, some Audi technical service bulletins recommend replacing both the master and slave modules at the same time if certain fault codes are present, as an improved hardware version may be available.
Do I really have to go to the dealer for calibration?
Not necessarily, but you must go to a shop that has invested in official Audi diagnostic tools (ODIS) with an active online subscription and the physical ADAS calibration equipment. Many high-end independent European auto repair shops and some specialized auto glass shops now have this capability. A standard mechanic's shop will not be able to complete the job.
What is Component Protection (CP)?
Component Protection is an anti-theft feature used by Audi that electronically links important control modules to the car's original Vehicle Identification Number (VIN). If you install a part with CP from another car, it will be in a locked state with limited or no function until a dealer or authorized specialist uses their online connection to Audi's servers to register the part to your vehicle's VIN.
Will a minor bumper impact cause the sensor to fail?
It can. Even if the bumper cover isn't cracked, a minor impact can damage the delicate sensor mounted behind it or knock it out of alignment. If a fault appears after a minor rear-end collision, a damaged or misaligned sensor is a likely cause.
Helpful Videos

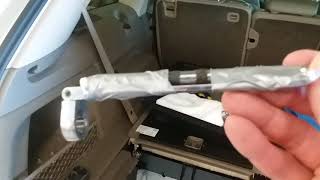

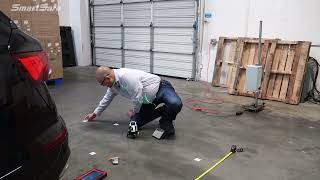
Technical Specifications
OEM Part Numbers: 4M0907566B 4M0907566A 4M0907566D 4M0907566E 4M0907566F 4M0907590B
The system uses 77GHz radar sensors located in the rear bumper corners. The right side (4M0907566B) is the 'master' control unit and the left side (4M0907590B) is the 'slave' unit.
We Have This Part in Stock

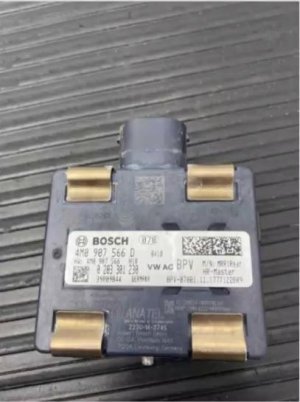


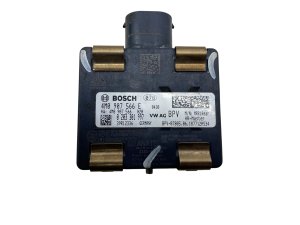

The information in this article is provided for general reference and educational purposes only. Vehicle specifications, procedures, and part compatibility can vary by production date, trim level, and region. Always consult your vehicle's factory service manual and verify part numbers before purchasing or performing repairs. Safety-critical components such as airbags, seat belts, and braking systems should be installed by a qualified professional.
- Audi Q7:
- Audi A4:
- Audi S4:
- Audi Q5:
- 🎬 Helpful Videos
- 🛍️ Shop This Part
- Vehicles Covered
- Most Common Symptoms of Failure
- Diagnosing the Problem with Fault Codes
- Buying a Used Collision Avoidance Sensor
- Replacement and Calibration Guide
- Step 1: Rear Bumper Cover Removal (DIY)
- Step 2: Swap the Sensor (DIY)
- Step 3: Component Protection and Calibration (Professional Shop)
- Cost Comparison
- Frequently Asked Questions (FAQ)
- 🎟️ Get 5% Off