

Tesla Model 3 & Y Body Controller Failure: Your Guide to VCFRONT, VCLEFT & VCRIGHT Modules (2017-2026)
Diagnosing electrical gremlins like a dead 12V battery or failing windows in your 2017-2026 Model 3 or 2020-2026 Model Y often leads to one of three critical body controllers.
- The Model 3 & Y use three separate body controllers (VCFRONT, VCLEFT, VCRIGHT), not a single BCM. Failure symptoms are typically isolated to one zone of the car.
- Any replacement body controller (new or used) MUST be programmed to the vehicle using Tesla's proprietary Toolbox 3 software. The car will not function without this step.
- Tesla Service Centers will refuse to program or install a used body controller. You must find a qualified independent shop with Toolbox 3 access BEFORE purchasing a used part.
- A common failure symptom is a parasitic draw that kills the 12V battery, making the car seem completely dead. Water intrusion is a leading cause of module failure, especially in the passenger footwell.
Symptoms of a Failing Tesla Body Controller

Failure in a Tesla body controller often presents as confusing and specific electrical issues. Because the system is zonal, the symptoms usually point directly to the location of the faulty module.
Unresponsive Controls on One Side of the Car
This is the most common and telling symptom. A failure in the VCLEFT or VCRIGHT module will typically disable all functions on that side. For example, if the VCLEFT (driver's side) fails, you may experience a complete loss of power to the driver's door lock, window controls, side mirror adjustments, and even the turn signal and drive selector stalks. The affected side will seem completely dead.
Parasitic 12V Battery Drain
A critical symptom of a failing body controller is a parasitic power draw that drains the 12V auxiliary battery. The faulty module fails to enter its low-power "sleep" mode, staying active and continuously drawing current. This often leads to a situation where the owner finds their car completely unresponsive, unable to wake, unlock, or charge. The main high-voltage battery may be full, but a dead 12V battery will render the entire vehicle inoperable.
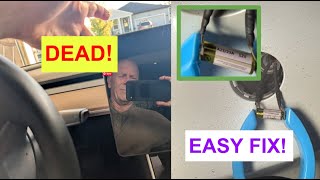
🎬 Watch: How to troubleshoot and reset a dead 12V batteryFront-End Electrical Glitches (VCFRONT Failure)
When the VCFRONT module fails, symptoms are concentrated at the front of the vehicle. You might see persistent but false "Frunk Open" warnings on the touchscreen, even when the front trunk is securely latched. Other signs include erratic behavior from the headlights, windshield wipers that don't respond correctly, or issues with the car's thermal management system, like cooling pumps.
Water Intrusion Damage
Water damage is a leading cause of body controller failure, particularly for the VCRIGHT module located in the passenger footwell. Leaks from a poorly sealed windshield, A-pillar, or a clogged HVAC drain can allow water to drip directly onto this module, causing corrosion and short circuits. Similarly, known trunk lid seal issues on the Model 3 can lead to water pooling in the trunk, potentially damaging rear-mounted electronics like the audio amplifier.
Diagnostic Trouble Codes (DTCs)
Standard OBD-II scanners cannot read Tesla's proprietary fault codes. Diagnosis requires accessing the vehicle's onboard Service Mode or using a specialized tool like the "Scan My Tesla" app. Fault codes are prefixed with the name of the failing module, making diagnosis easier. Examples include:
- VCFRONT_a191: A fault related to the front controller.
- VCLEFT_a015: Indicates a driver door latch fault.
- VCRIGHT_a022: Points to a stalled right rear window motor.
The letter in the code indicates severity: 'a' for an active alert, 'w' for a warning, and 'n' for an informational notice.
Warning: A failing body controller can disable critical safety systems like exterior lights, turn signals, door latches, or even the ability to shift into drive. Driving the vehicle with these symptoms is not recommended.
Buying a Used Tesla Body Controller: What You MUST Know

Purchasing a used body controller for a Model 3 or Model Y is complex and requires careful planning. Unlike a simple mechanical part, these modules are tied into the vehicle's software and security systems.
1. Identify the Correct Module: VCFRONT, VCLEFT, or VCRIGHT
First, diagnose which of the three controllers has failed. Symptoms are your best clue. If only the driver's side is acting up, you likely need a VCLEFT. If you have frunk warnings and headlight issues, you need a VCFRONT. Do not buy a replacement until you are confident which unit is faulty.
2. Match the Part Number EXACTLY
Tesla frequently updates hardware. The part number on your replacement module MUST match the number on your original, failed module. This includes the base number and the revision suffix (e.g., -00-F, -00-H, etc.). An incompatible hardware revision will not work, even if it is successfully programmed. When ordering, always provide your vehicle's VIN and the part number from the original module to the seller.
3. The Programming Lock-Out: Tesla vs. Independent Repair
This is the single most important factor for a used part buyer.
- Tesla Service Centers will NOT install or program a used body controller. They will only install a brand-new part that you purchase from them. If you take your car to Tesla with a used part in hand, you will be turned away.
- You MUST find an independent repair shop that has a subscription to Tesla's Toolbox 3 diagnostic software. This is the only way to get a used (or new, non-dealer) module programmed to your car. Before you buy the part, call local EV-specialty or high-end European auto repair shops and ask specifically if they can program a *used* Tesla body controller with Toolbox 3. Get a quote and confirm they are willing to do the job.
4. Physical Inspection
When you receive the used module, inspect it carefully before installation. Look for any signs of corrosion on the pins or casing, which indicates past water damage. A water-damaged replacement is likely to fail prematurely. The VCRIGHT (passenger side) module is especially susceptible.
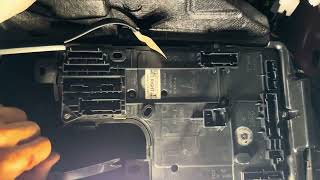
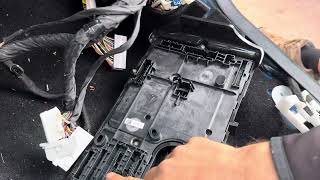
🎬 See this step-by-step Model 3 VCRIGHT replacement walkthroughPro Tip: After replacing a body controller due to water damage, you must find and fix the source of the leak. If you don't, your new module will suffer the same fate. Check windshield seals, A-pillar trim, and HVAC drains.
Programming and Installation Requirements

Replacing a body controller is not a plug-and-play repair. The physical replacement is moderately difficult, requiring removal of footwell panels, trim, and sometimes the glove box. The real challenge is the software configuration that must be performed after installation.
- Physical Installation: The old module is unbolted and its many connectors are detached. The new module is then installed in its place.
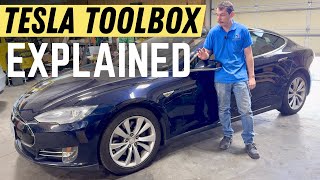
- Software Connection: A technician connects a laptop with Tesla's Toolbox 3 software to the vehicle's diagnostic port. 🎬 Watch: How to set up Tesla's Toolbox 3 software
- Firmware Reinstall: The technician will initiate a full vehicle firmware reinstall. This loads the necessary operating software onto the 'blank' replacement module.
- Module Configuration: Using Toolbox 3, the technician runs a specific post-replacement procedure (e.g., `PROC_CONTROLLER_RIGHT_POST-REPLACEMENT-PROCEDURE`). This routine pairs the module to the car's VIN and configures it for the vehicle's specific options (e.g., premium audio, seat type, etc.).
- Key Pairing: If a security-related module is replaced, all phone keys and NFC key cards must be deleted from the vehicle and re-paired to the new module for them to function.
Cost to Replace a Tesla Body Controller (Model 3 & Y)
Costs can vary significantly based on your choice of part and repair facility.
| Part/Service | Estimated Cost | Notes |
|---|---|---|
| New OEM Controller (from Tesla) | $400 - $700 | Part cost only. Price varies by module (Front/Left/Right) and hardware revision. |
| Used OEM Controller | $50 - $250 | Market price from online sellers and salvage yards. |
| Shop Labor (Installation & Programming) | $200 - $500 | Labor can range from 1-3 hours. Finding a shop capable of programming a used module is key. Tesla's flat rate time is around 0.6 hours for just the replacement. Programming adds significant time. |
Frequently Asked Questions (FAQ)
Can I drive my Tesla with a bad body controller?
No, it is not recommended. A failed controller can disable critical systems required for safe driving, such as headlights, turn signals, brake lights, door latches, and the gear selector stalk, creating a significant safety risk.
Why is my 12V battery dead? Could it be a body controller?
Yes. One of the most common failure modes for a body controller is causing a parasitic draw that drains the 12V battery. The module fails to go to sleep, and even with a fully charged main battery, the car will be completely unresponsive if the 12V system is dead.
How do I know which controller is bad: VCFRONT, VCLEFT, or VCRIGHT?
The symptoms are your best guide. If the driver's window and mirror stop working, the VCLEFT is the likely culprit. If the passenger door won't unlock and the window is stuck, suspect the VCRIGHT. If you have false frunk alerts and headlight problems, look at the VCFRONT.
Will a Tesla Service Center install a used body controller I bought online?
No. Tesla company policy is to refuse the installation and programming of used electronic modules like body controllers. You must use a qualified independent repair shop with Tesla's Toolbox 3 software.
What is Tesla Toolbox 3?
Toolbox 3 is Tesla's proprietary, web-based diagnostic software. It is required to perform software configurations, firmware updates, and part initializations after replacing most electronic modules on the vehicle. Access is available via a paid subscription to independent repair shops.
Helpful Videos

Technical Specifications
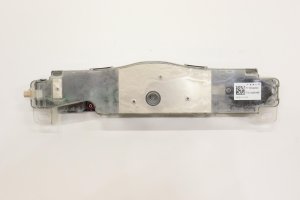
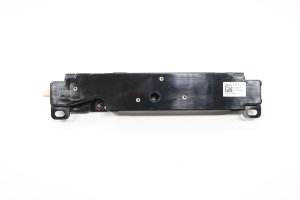
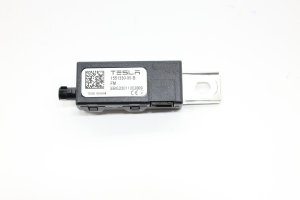
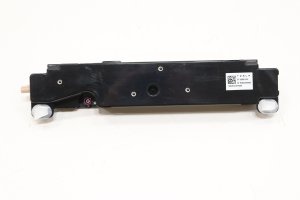
OEM Part Numbers: 1497319-00 1497319-00-E 1497846 1497846-00-D 1497846-00-F 1497846-10-E 1497847 1497847-02-D 1497847-10-D 1497847-39-D 1512876-00-B 1512876-00-E 151287600E 1537264-10-E 1569236-00-A 2022949-00-H 1899687-30-C 1852820-00-E 1899689-40-B 1918812-00-F
System consists of three primary modules: VCFRONT (Front), VCLEFT (Left/Driver), and VCRIGHT (Right/Passenger). Controls low-voltage vehicle body electronics. Communicates via CAN bus. Requires VIN-specific programming and configuration via Tesla Toolbox 3 software.
We Have This Part in Stock



The information in this article is provided for general reference and educational purposes only. Vehicle specifications, procedures, and part compatibility can vary by production date, trim level, and region. Always consult your vehicle's factory service manual and verify part numbers before purchasing or performing repairs. Safety-critical components such as airbags, seat belts, and braking systems should be installed by a qualified professional.
- TESLA Y:
- TESLA 3:
- 🎬 Helpful Videos
- 🛍️ Shop This Part
- Symptoms of a Failing Tesla Body Controller
- Unresponsive Controls on One Side of the Car
- Parasitic 12V Battery Drain
- Front-End Electrical Glitches (VCFRONT Failure)
- Water Intrusion Damage
- Diagnostic Trouble Codes (DTCs)
- Buying a Used Tesla Body Controller: What You MUST Know
- 1. Identify the Correct Module: VCFRONT, VCLEFT, or VCRIGHT
- 2. Match the Part Number EXACTLY
- 3. The Programming Lock-Out: Tesla vs. Independent Repair
- 4. Physical Inspection
- Programming and Installation Requirements
- Cost to Replace a Tesla Body Controller (Model 3 & Y)
- Frequently Asked Questions (FAQ)
- 🎟️ Get 5% Off