

2011 Buick Regal Center Pillar: Structural Repair vs. Cosmetic Trim Replacement
This guide clarifies the difference between the structural B-pillar and the cosmetic trim panels, covering symptoms, inspection of used parts, and replacement difficulty.
- The most critical step is to distinguish between the welded-in structural B-pillar (a collision part) and the cosmetic trim panels (a DIY-friendly part).
- Replacement of the structural pillar is a professional-only job requiring cutting and welding; attempting this as a DIY project is unsafe.
- When buying a used interior trim panel, the most important inspection point is the condition of the plastic mounting clips on the back.
- There are no active recalls or common TSBs specifically for the center pillar or its trim on the 2011 Buick Regal.
The Most Important Thing: Structural Pillar vs. Cosmetic Trim
When discussing the 'center pillar' on a 2011 Buick Regal, it's crucial to know which part you're dealing with, as they have vastly different purposes and repair methods.
- Structural Center Pillar: This is the heavy-gauge steel reinforcement that is part of the car's unibody frame. It is welded into place and is only ever replaced by a professional auto body shop after a significant side-impact collision.
- Pillar Trim/Appliqué: These are the plastic or fabric-covered panels on the inside of the car, and the glossy black plastic trim on the outside of the pillar. These are cosmetic and are the parts that are typically replaced due to wear, scratches, or rattling.
Warning: The structural center pillar is a critical safety component. Its replacement involves cutting the old pillar out and welding a new one in, which requires specialized equipment and training to maintain the vehicle's structural integrity. This is not a DIY job.
Symptoms of a Failing Center Pillar
Symptoms differ greatly depending on whether the issue is with the structural pillar or the cosmetic trim.
Structural Pillar Damage (Collision-Related)
- Visible Deformation: The pillar is obviously bent, crushed, or buckled after an accident.
- Poor Door Alignment: The front or rear doors do not open, close, or line up correctly with the body of the car.
- Wind Noise or Water Leaks: A bent pillar can prevent the door from sealing properly, leading to excessive noise at speed or water entering the cabin.
- Cracked Paint or Stress Marks: Fine cracks in the paint around the pillar's base or top can indicate the metal has been stressed or bent.
Failing Pillar Trim (Cosmetic Issues)
- Rattling or Buzzing Noises: 🎬 Watch: How to find and fix interior rattle noises This is the most common symptom, often caused by broken plastic mounting clips on the back of the interior trim panel.
- Peeling Fabric: The cloth or soft-touch material on the interior trim may begin to separate from the plastic base due to age and heat.
- Scratched or Faded Exterior Appliqué: 🎬 See this gloss black pillar replacement walkthrough The glossy black trim on the exterior can become dull, scratched, or damaged from car washes and sun exposure.
- Loose Trim: The panel may feel loose or pop out of place easily.
Known Issues, TSBs, and Recalls
As of mid-2026, there are no specific recalls or widespread Technical Service Bulletins (TSBs) from General Motors that directly address the center pillar structure or its associated trim panels for the 2011 Buick Regal. While several recalls exist for this model year concerning seats, lighting, and other components, none pertain to the B-pillar itself.
Buying a Used 2011 Buick Regal Center Pillar
Your inspection process will depend entirely on which part you are buying.
Inspecting a Used Structural Pillar (For Body Shops)
If you are sourcing a structural pillar from a donor vehicle for a collision repair, precision is key.
- Check for Zero Damage: The part must be from a vehicle that was not hit in that area. Look for any signs of bending, creasing, or even minor dents.
- Inspect for Rust: Check the bottom and top where it meets the rocker panel and roof rail for any signs of corrosion. Surface rust can be treated, but avoid any part with deep or pitting rust.
- Verify Clean Cuts: Ensure the body shop that removed the part made clean, long cuts, leaving plenty of extra material for you to work with and trim to fit.
- Look for Previous Repairs: Check for signs of body filler (Bondo), unusual welds, or grinder marks that would indicate the donor part was already repaired once before.
Inspecting a Used Trim Panel (For DIYers)
This is the more common scenario. When buying a used interior or exterior trim piece, focus on its cosmetic and physical condition.
- Check All Mounting Clips: This is the most critical check. Flip the panel over and inspect every single mounting clip and tab. If they are broken, the panel will not sit flush and will likely rattle.
- Examine the Surface: For interior panels, look for stains or peeling fabric. For exterior gloss black appliqués, check for deep scratches or fading that you won't be able to polish out.
- Confirm the Color: Buick offered different interior colors like black (Ebony) and beige. Make sure the part you're buying is an exact match for your interior.
- Look for Hidden Cracks: Gently flex the panel to reveal any hairline cracks in the plastic structure that might not be immediately visible.
Replacement Difficulty & Labor Costs
Structural Center Pillar Replacement
- Difficulty: 5 out of 5 (Professional Body Shop Only)
- DIY Feasible: No
- Estimated Shop Labor Cost: Labor for this repair is part of a larger collision job and is not quoted separately. It typically involves many hours of cutting, welding, fitting, and painting, often costing several thousand dollars.
Center Pillar Trim Replacement
- Difficulty: 2 out of 5 (Beginner to Intermediate)
- DIY Feasible: Yes
- Estimated Time: 0.5 - 1 hour
- Tools Required: Plastic trim removal tools, socket set or Torx driver (for seatbelt anchor).
Pro Tip: Before replacing the interior B-pillar trim, it is highly recommended to disconnect the negative battery terminal. The pillar houses the seatbelt mechanism, which can include an explosive pre-tensioner. Disconnecting the power prevents any risk of accidental deployment.
The general process involves prying away adjacent trim like the door sill plate and weatherstripping, unbolting the upper seatbelt anchor, and then carefully prying the pillar trim away from the body to release its clips.
| Part Type | Estimated Cost |
|---|---|
| New OEM (Structural Reinforcement) | $140 - $215 |
| New Aftermarket (Trim/Appliqué) | $100 - $250 |
| Used OEM (Structural or Trim) | $50 - $150 |
| Shop Labor (Trim Replacement Only) | $100 - $180 |
Part Numbers & Specifications
The part numbers for the center pillar components are specific to the side (left/driver or right/passenger) and whether it is the structural part or the trim.
- Structural Reinforcement (Right/Passenger Side): GM Part #20979350. This part supersedes older part numbers 13273056 and 20986562.
- Structural Reinforcement (Left/Driver Side): The corresponding part for the driver's side is GM Part #13268659.
- Trim Panels: Part numbers for interior and exterior trim vary by color and specific model options. It is best to verify the exact number from the back of your original part if possible.
Frequently Asked Questions (FAQ)
Is the 'center pillar' the same as the 'B-pillar'?
Yes, the terms are used interchangeably. 'B-pillar' is the more technical term in automotive design, referring to the second roof support pillar from the front of the car.
Can I just replace the shiny black tape on the outside of the pillar?
That shiny black part is typically a rigid plastic appliqué, not tape. It is a distinct part that can be replaced. It is usually held on with clips and adhesive. On some vehicles, it is integrated with the window frame trim.
Do I have to disconnect the battery to replace the interior B-pillar trim?
It is strongly recommended as a safety precaution. The seatbelt anchor in the pillar often contains a pyrotechnic pre-tensioner for safety during a crash. Disconnecting the battery minimizes any risk of it being triggered during the repair.
Why can't a body shop just bend a damaged structural pillar back into place?
Modern vehicle frames use high-strength steel designed to crumple in a specific way during a crash to absorb energy. Once this metal is bent, its structural integrity is compromised. Bending it back weakens it further, and it will not provide the same level of protection in a future collision. Replacement is the only safe repair method.
Helpful Videos
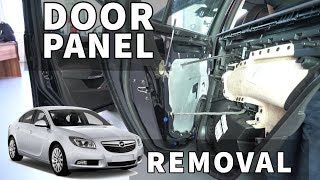
Technical Specifications
OEM Part Numbers: 20979350 (Right Structural Reinforcement) 13268659 (Left Structural Reinforcement) 13271904
Material: High-strength steel (structural); ABS Plastic/Fabric (trim)
We Have This Part in Stock


The information in this article is provided for general reference and educational purposes only. Vehicle specifications, procedures, and part compatibility can vary by production date, trim level, and region. Always consult your vehicle's factory service manual and verify part numbers before purchasing or performing repairs. Safety-critical components such as airbags, seat belts, and braking systems should be installed by a qualified professional.
- Buick Regal:
- 🎬 Helpful Videos
- 🛍️ Shop This Part
- The Most Important Thing: Structural Pillar vs. Cosmetic Trim
- Symptoms of a Failing Center Pillar
- Structural Pillar Damage (Collision-Related)
- Failing Pillar Trim (Cosmetic Issues)
- Known Issues, TSBs, and Recalls
- Buying a Used 2011 Buick Regal Center Pillar
- Inspecting a Used Structural Pillar (For Body Shops)
- Inspecting a Used Trim Panel (For DIYers)
- Replacement Difficulty & Labor Costs
- Structural Center Pillar Replacement
- Center Pillar Trim Replacement
- Part Numbers & Specifications
- Frequently Asked Questions (FAQ)
- 🎟️ Get 5% Off