

1992-1997 Acura Integra Camshafts: VTEC vs. Non-VTEC and Failure Diagnosis
A guide to identifying the correct camshaft for your GS-R or LS/RS/GS, diagnosing wear, and inspecting a used part.
- The single most important factor is engine type: VTEC (GS-R) and Non-VTEC (LS/RS/GS) camshafts are NOT interchangeable.
- When buying used, physically inspect the cam lobes for scoring or pitting and check the distributor tang on the exhaust cam for wear.
- Replacement is an advanced job; cam caps must be torqued in a specific sequence to low values (7-20 ft-lbs) to avoid damaging the cylinder head.
- A valve lash adjustment is mandatory after any camshaft replacement to prevent noise and ensure proper engine performance.
Engine and Camshaft Variations: 1992-1997 Integra

The most critical factor when purchasing a camshaft for a 1992-1997 Integra is identifying your specific engine. The camshafts for VTEC and Non-VTEC engines are completely different and are not interchangeable without extensive modification. Installing the wrong camshaft will result in poor performance or catastrophic engine damage.
Warning: Before buying, verify your car's trim level and, more importantly, the engine code stamped on the block. Many Integras have had engine swaps over the years.
| Model Years | Trim Levels | Engine Code | Engine Type | Key Camshaft Feature |
|---|---|---|---|---|
| 1992-1993 | RS, LS, GS | B18A1 | 1.8L DOHC Non-VTEC | Standard two-lobe profile per cylinder. |
| 1992-1993 | GS-R | B17A1 | 1.7L DOHC VTEC | Three-lobe VTEC profile per cylinder. |
| 1994-1997 | RS, LS, GS, SE | B18B1 | 1.8L DOHC Non-VTEC | Standard two-lobe profile per cylinder. Very similar to B18A1. |
| 1994-1997 | GS-R | B18C1 | 1.8L DOHC VTEC | Three-lobe VTEC profile per cylinder. |
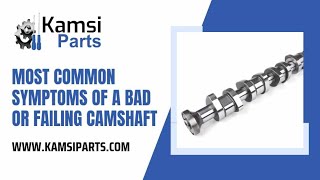
Symptoms of a Failing Camshaft 🎬 Watch this guide on common symptoms of a failing camshaft

Camshaft failure in Honda B-series engines is uncommon but typically results from high mileage or lubrication issues. Symptoms are often noticeable and should be addressed promptly to avoid further engine damage.
- Ticking or Tapping Noise: A rhythmic ticking sound from the top of the engine is a classic sign of worn cam lobes. As the lobes wear down, the clearance between the cam and the rocker arm increases, creating a noisy tap. This may also indicate a need for a valve lash adjustment.
- Engine Misfires and Rough Idle: Worn lobes disrupt valve timing, causing cylinders to misfire. This can trigger a Check Engine Light with codes like P0300 (Random Misfire) or P0301-P0304 for specific cylinders.
- Loss of Power: As the cam lobes wear, they can no longer lift the valves to their full designed height. This reduces airflow in and out of the engine, leading to a noticeable decrease in power, especially at higher RPMs.
- Metal Debris in Oil: In severe cases, material from the worn cam lobes can flake off and circulate in the engine oil. When changing your oil, look for metallic sparkles in the drained oil, which is a sign of serious internal engine wear.
- Backfiring: If valve timing is significantly off due to a worn cam, unburnt fuel can enter the exhaust, causing a backfire. 🎬 See top bad camshaft symptoms and potential fixes
Buying a Used Camshaft: Inspection Guide

A used OEM camshaft is often a high-quality, cost-effective choice, as Honda's original parts are known for their durability. However, careful inspection is essential.
1. Verify Compatibility
First, confirm the camshaft is correct for your engine. Look for casting marks on the shaft itself. Non-VTEC cams are often marked 'PR4' (for B18A/B), while VTEC cams may be marked 'P72' (B18C1) or 'PR3' (B17A/B16A). Do not rely on the seller's description alone; match the casting code to your engine's needs.
2. Inspect Cam Lobes
This is the most critical inspection step. Run your finger over every lobe surface.
- What to look for: The surfaces should be perfectly smooth and polished.
- Red Flags: Reject any camshaft with scoring (deep scratches you can feel with a fingernail), pitting (small craters), or visible discoloration (like a bluish tint from overheating). Uneven wear, where one part of the lobe is worn more than another, is also a bad sign.
3. Check Bearing Journals
The bearing journals are the smooth, machined surfaces where the camshaft rests in the cylinder head. These surfaces should be free of deep scratches or gouges. Minor surface imperfections are acceptable, but anything you can catch a fingernail on indicates potential oiling problems or contamination.
4. Examine the Distributor Tang (Exhaust Cam)
On B-series engines, the distributor is driven by a slot on the end of the exhaust camshaft. Inspect this slot for wear. If the slot appears rounded or worn, it can lead to ignition timing fluctuations. This is a common wear point on high-mileage engines.
Pro Tip: Bring a micrometer if possible. You can measure the height of the cam lobes and compare them to the service limits in a factory repair manual to quantify the amount of wear.
Known Issues, TSBs, and Recalls
The 1992-1997 Acura Integra is a very reliable vehicle, and there are no specific recalls or widespread Technical Service Bulletins (TSBs) related to camshaft failure. Most issues are age- and mileage-related.
- Oil Leaks: The camshaft seals (one at the front by the cam gears and a plug at the rear) are common sources of oil leaks. It is highly recommended to replace these seals whenever the camshafts are removed. 🎬 Watch how to replace B18B1 timing belt and camshaft seals
- Improper Installation Damage: The camshaft bearing caps are machined with the cylinder head and are not interchangeable. They must be removed and installed in a specific crisscross pattern and torqued to precise specifications. Failure to do so can break a cap or warp the camshaft, leading to catastrophic failure.
Replacement Difficulty and Cost
Replacing a camshaft is an advanced DIY job that requires precision and specialized tools.
- Installation Difficulty: 4 out of 5.
- Key Steps: The process involves removing the valve cover, setting the engine to Top Dead Center (TDC), removing the timing belt from the cam gears, carefully unbolting the cam caps in the correct sequence, swapping the camshafts, and then reassembling everything.
- Mandatory Follow-up: A valve lash adjustment is required after a camshaft installation. Incorrect valve lash can lead to noise, poor performance, or engine damage.
Warning: The cam cap bolts have very specific and low torque values (e.g., 7.2 ft-lbs for smaller bolts, 20 ft-lbs for larger bolts on VTEC heads). Over-tightening will strip the threads in the aluminum cylinder head or break the bolts.
Cost Comparison
Prices can vary significantly based on engine type (VTEC vs. Non-VTEC) and condition.
| Item | Estimated Cost |
|---|---|
| New OEM Camshaft | $250 - $500+ per camshaft |
| New Aftermarket Camshaft (Performance) | $350 - $800+ per set |
| Used OEM Camshaft | $50 - $150 per camshaft |
| Shop Labor Cost | $1,012 - $1,485 |
Can I install a VTEC camshaft in my Non-VTEC (LS/RS/GS) engine?
No, not directly. The cylinder heads are fundamentally different. To run VTEC cams, you would need to perform a complete "LS/VTEC" conversion, which involves swapping the entire cylinder head and adding the necessary oil lines and electronics. This is a complex and expensive modification.
Do I need to replace both camshafts at the same time?
Not necessarily. If only one camshaft is damaged, you can replace just that one. However, it is wise to remove and inspect both while you have the engine open. If one has failed due to oil starvation, the other is likely damaged as well.
What causes a camshaft to fail?
The most common causes are oil starvation from a low oil level or clogged oil passages, contamination from dirty oil, and simple high-mileage wear. Improper installation or a failed break-in procedure on new aftermarket cams can also cause rapid failure.
Is a valve lash adjustment really necessary after a cam swap?
Yes, it is absolutely critical. Even minor differences in manufacturing tolerances or wear between the old and new camshafts will change the valve clearance. Skipping this step will result in a noisy engine, poor performance, and potentially burned valves or other valvetrain damage.
Helpful Videos
Technical Specifications
OEM Part Numbers: 14111-P61-000 14111-P75-000 14111-PR3-000 14111-PR4-000 14111-PR4-A00 14120-P72-A00 14120-P72-A01 14120-P73-J00 14120-P75-000 14121-P61-A00 14121-P72-000 14121-P75-000 14121-P75-A00 14121-PR4-000 14121-PR4-A00
VTEC Cam Cap Torque: 8mm bolts to 20 ft-lbs, 6mm bolts to 7.2 ft-lbs. Non-VTEC Cam Cap Torque: Tighten evenly in steps, final torque approx. 18 ft-lbs (verify with service manual). Valve Lash (Cold): B18B1 Intake 0.003-0.005 in, Exhaust 0.006-0.008 in. B18C1 Intake 0.006-0.007 in, Exhaust 0.007-0.008 in.

The information in this article is provided for general reference and educational purposes only. Vehicle specifications, procedures, and part compatibility can vary by production date, trim level, and region. Always consult your vehicle's factory service manual and verify part numbers before purchasing or performing repairs. Safety-critical components such as airbags, seat belts, and braking systems should be installed by a qualified professional.
- Acura Integra:
- 🎬 Helpful Videos
- Engine and Camshaft Variations: 1992-1997 Integra
- Symptoms of a Failing Camshaft
- Buying a Used Camshaft: Inspection Guide
- 1. Verify Compatibility
- 2. Inspect Cam Lobes
- 3. Check Bearing Journals
- 4. Examine the Distributor Tang (Exhaust Cam)
- Known Issues, TSBs, and Recalls
- Replacement Difficulty and Cost
- Cost Comparison
- 🎟️ Get 5% Off