

1999-2005 Mazda Miata Front Bumper Reinforcement: Damage, Rust, and Replacement
Your complete guide to inspecting, replacing, and choosing the right used front impact bar for your NB-generation Miata.
- The front bumper reinforcement fits all 1999-2005 Mazda Miata (NB) models, making used parts easy to source.
- Failure is always from impact damage or severe rust; it is a critical safety part that should not be repaired if bent or heavily corroded.
- When buying used, inspect carefully for bends, cracks, and deep rust. A straight, clean used OEM part is a safe and cost-effective option.
- Replacement is a DIY-friendly job, with the main task being the removal of the front bumper cover.
Symptoms of a Damaged Front Bumper Reinforcement

As a passive structural part, the front bumper reinforcement doesn't have mechanical or electrical failures. Damage is almost always caused by a physical impact or long-term corrosion. The symptoms are things you can see.
- Visible Damage After Impact: This is the most common symptom. After even a minor front-end collision, the reinforcement bar can be bent, crushed, or have cracked welds. The damage may not be obvious until the plastic bumper cover is removed.
- Misaligned Bumper Cover: If the front bumper cover appears pushed in, sagging, or doesn't line up with the fenders and headlights correctly, it could be because the reinforcement bar it mounts to is bent or broken.
- Severe Rust and Corrosion: In areas with heavy road salt use, the reinforcement can rust over time. While light surface rust is common, deep, flaking rust can compromise the structural integrity of the bar, weakening it significantly. This is a major safety concern.
Warning: A bent or severely rusted reinforcement bar will not provide the intended level of protection in a future collision. It should be replaced, not repaired.
Buying a Used 1999-2005 Miata Front Bumper Reinforcement

A used OEM reinforcement is an excellent choice, offering the same fit and safety performance as a new part for a fraction of the cost. However, careful inspection is crucial.
Inspection Checklist:
- Check for Straightness: Lay the bar on a flat surface. It should sit flush with no wobbling. Look down its length from both ends to spot any subtle bends or twists.
- Inspect for Kinks or Cracks: Pay close attention to the mounting points and the center of the bar. Look for any sharp kinks, stress marks in the paint, or cracks in the metal or welds. These are signs of a previous impact.
- Evaluate Corrosion: Light surface rust can be sanded and painted, but walk away from any part with deep, pitting, or flaking rust that has reduced the thickness of the metal.
- Verify Mounting Holes: Ensure all mounting holes are round and intact. Holes that are oval-shaped or torn indicate the bar was stressed during an impact.
- Confirm Part Number (If Possible): The primary part number is NC10-50-071A, which supersedes older versions like NC10-50-070, NC10-50-070A, and NC10-50-071.
Pro Tip: Used parts sellers often use stock photos. Request pictures of the actual part you will receive to verify its condition before purchasing.
Compatibility: Does It Fit All 1999-2005 Miatas?
Yes, the metal front bumper reinforcement bar fits all 1999-2005 Mazda MX-5 Miata models (NB generation), including the 1999-2000 (NB1) and 2001-2005 (NB2) versions. While the front bumper covers, headlights, and some plastic trim pieces differ between these model years, the underlying metal impact bar is a direct fit across the entire range. This makes finding a compatible used part much easier.
Known Issues, Recalls, and TSBs

There are no recalls or Technical Service Bulletins (TSBs) issued by Mazda or the NHTSA specifically for the front bumper reinforcement on 1999-2002 Miatas. The only common issue is rust, particularly on vehicles from the salt belt. The NB Miata chassis rails are also known to rust from the inside out due to a double-skin design that traps moisture, so it's wise to inspect this area when the bumper is off.
Replacement Overview & Difficulty

Replacing the front bumper reinforcement is a straightforward job for a DIY mechanic with basic tools. The main task is removing the front bumper cover.
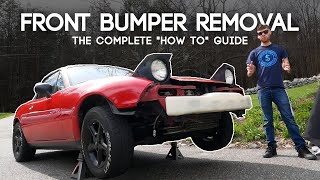
🎬 Watch: Step-by-Step Front Bumper Removal Guide- Lift and Secure the Vehicle: Safely raise the front of the car on jack stands to get access to fasteners underneath.
- Remove Fasteners: Disconnect the turn signals and side marker lights. Remove the series of bolts and plastic clips located in the wheel wells, under the front edge of the bumper, and on top inside the engine bay near the headlights.
- Remove Bumper Cover: With all fasteners removed, the bumper cover can be carefully pulled forward and off the car.
- Unbolt the Reinforcement: The reinforcement bar is held to the frame rails by a few large bolts on each side. Unbolt and remove the old bar.
- Install New Bar: Bolt the new reinforcement in place, ensuring it is properly seated. Torque the bolts to factory specifications.
- Reinstall Bumper Cover: Re-install the bumper cover and all its fasteners, and reconnect the lights.
Cost Comparison
| Part Type | Estimated Cost |
|---|---|
| New OEM | $130 - $160 |
| New Aftermarket | $70 - $120 |
| Used OEM | $75 - $125 |
| Shop Labor | $150 - $300 |
Frequently Asked Questions (FAQ)
Is the bumper reinforcement the same as the bumper cover?
No. The bumper cover is the painted plastic panel you see on the outside of the car. The reinforcement is the metal impact bar hidden behind it.
Can I drive with a bent or missing front bumper reinforcement?
While the car will still drive, it is not recommended. Your vehicle will have significantly reduced protection in a frontal collision, increasing the risk of damage to critical components like the radiator and engine, and increasing the risk of injury.
Do I need to paint a new or used reinforcement bar?
Most new and used OEM bars come with a protective black coating. It is not necessary to paint it for cosmetic reasons as it is hidden. However, if you have sanded off any surface rust from a used part, it is a good idea to apply a coat of rust-inhibiting paint to that area for protection.
What tools are needed to replace the front bumper reinforcement?
You will need basic hand tools, including a socket set (10mm is common for the bumper cover), screwdrivers, and potentially a tool for removing plastic clips. No specialty tools are required for this job.
Helpful Videos
![Mazda MX5 Miata Common Rust Spots [Fix Before It's Too Late]](https://img.youtube.com/vi/eoFtbtP2ONs/mqdefault.jpg)
Technical Specifications
OEM Part Numbers: NC10-50-070 NC10-50-070A NC10-50-071 NC10-50-071A
Material: Steel. Position: Front.

The information in this article is provided for general reference and educational purposes only. Vehicle specifications, procedures, and part compatibility can vary by production date, trim level, and region. Always consult your vehicle's factory service manual and verify part numbers before purchasing or performing repairs. Safety-critical components such as airbags, seat belts, and braking systems should be installed by a qualified professional.
- Mazda MX-5 Miata:
- 🎬 Helpful Videos
- Symptoms of a Damaged Front Bumper Reinforcement
- Buying a Used 1999-2005 Miata Front Bumper Reinforcement
- Inspection Checklist:
- Compatibility: Does It Fit All 1999-2005 Miatas?
- Known Issues, Recalls, and TSBs
- Replacement Overview & Difficulty
- Cost Comparison
- Frequently Asked Questions (FAQ)
- 🎟️ Get 5% Off