

2010-2012 Mazda CX-7 Front Bumper: Fog Lights, Fitment, and Replacement Guide
A complete guide to understanding, inspecting, and replacing the front bumper assembly on the facelifted 2010-2012 Mazda CX-7.
- The most critical compatibility check is whether your CX-7 has factory fog lights; the bumper covers are different.
- A complete bumper assembly includes the cover, foam absorber, and metal reinforcement bar; verify what's included when buying used.
- Used OEM bumpers generally offer superior fit compared to new, cheap aftermarket parts which often have alignment issues.
- Replacement is a straightforward DIY job, requiring basic tools and about 1.5-2.5 hours.
Anatomy of the 2010-2012 CX-7 Front Bumper Assembly

The front bumper on the 2010-2012 Mazda CX-7 is not a single piece. It's an assembly of several components that work together. When looking for a replacement, it's important to know which parts you need.
- Bumper Cover: This is the most visible part, the painted plastic shell that defines the vehicle's front-end styling. It is available in two main variants: one with openings for factory fog lamps and one without.
- Energy Absorber: Located directly behind the cover, this is typically a large block of styrofoam. Its job is to absorb the force of low-speed impacts to minimize damage.
- Reinforcement Bar (Impact Bar): This is the heavy-duty metal beam that mounts to the vehicle's frame rails. It provides the structural integrity and is the primary component for crash protection.
- Grilles: The bumper cover has openings for upper and lower grilles, which allow airflow to the radiator and give the vehicle its signature look. These are often separate pieces that clip into the bumper cover.
- Brackets and Hardware: A variety of plastic and metal brackets, clips, and screws are used to attach the bumper cover to the fenders, radiator support, and undertray.
Symptoms of a Damaged Front Bumper

While major collision damage is obvious, other symptoms can indicate the need for repair or replacement:
- Visible Cracks, Scuffs, or Punctures: Any break in the plastic bumper cover compromises its integrity and appearance.
- Poor Panel Alignment: Gaps between the bumper and the fenders, hood, or headlights that are uneven or wider than usual can indicate broken mounting tabs or even underlying frame damage.
- Loose or Vibrating Bumper: If the bumper cover feels loose or vibrates at driving speeds, it's a sign of broken clips, screws, or mounting brackets.
- Damaged Fog Lights: In a minor front-end impact, the fog light housings and brackets are often the first things to break.
- Hidden Damage: After a minor bump, the plastic cover may flex back into shape, hiding a crushed foam absorber or a bent reinforcement bar underneath. It's crucial to remove the cover for a full inspection after any impact.
Pro Tip: Many aftermarket bumper covers are shipped folded to save on costs. While this can be corrected with a heat gun or by leaving it in the sun, it can sometimes lead to minor imperfections. A used OEM bumper will not have this issue.
Known Issues, Recalls, and TSBs

As of mid-2026, there are no specific recalls or Technical Service Bulletins (TSBs) directly related to the front bumper assembly of the 2010-2012 Mazda CX-7. However, there are several important recalls for this vehicle you should be aware of:
- NHTSA Recall 16V-593 (Mazda #9716H): This significant recall addresses potential corrosion of the front suspension lower ball joints, which could lead to separation and a loss of steering control. This was more common in states that use road salt.
- Takata Airbag Recalls: Multiple recalls (including NHTSA 19V-782, 18V-717, etc.) were issued for defective passenger-side airbag inflators that could rupture during deployment.
While these issues don't directly involve the bumper, they are critical safety items for any owner of a 2010-2012 CX-7.
Buying a Used 2010-2012 CX-7 Front Bumper: A Buyer's Guide

A used OEM bumper is often the best choice for value and fitment. Here’s what to look for:
- Confirm Fog Light Compatibility: This is the most critical check. The bumper covers for models with and without fog lights are different and not interchangeable. Verify which version your vehicle has before you buy.
- Inspect All Mounting Points: Carefully check all the tabs and slots along the top edge where the bumper meets the headlights and grille, and especially the sides where it connects to the fenders. These plastic tabs are fragile and often break during removal or in a minor impact. A bumper with broken tabs will never align correctly.
- Check for Previous Repairs: Look at the backside of the bumper cover. Flaking paint, rough patches, or signs of plastic welding indicate a previous, possibly low-quality, repair. A professionally repaired bumper can be acceptable, but avoid anything with excessive body filler.
- Examine the Included Components: A complete used assembly should ideally include the bumper cover, foam absorber, and reinforcement bar. Verify what is included in the sale. The foam absorber is often damaged and should be replaced if it's compressed or cracked.
- Why Used OEM is Better than Cheap Aftermarket: New aftermarket bumper covers often have fitment issues right out of the box. Panel gaps can be inconsistent, the plastic may be thinner, and mounting holes may not line up perfectly. A used OEM part was made by Mazda, so you can be confident it will fit as the factory intended.
Cost of Replacing a 2010-2012 Mazda CX-7 Front Bumper
Prices can vary based on location, condition, and included components. Here are some typical cost ranges:
| Part | Price Range |
|---|---|
| New OEM Bumper Cover (Unpainted) | $550 - $740 |
| New Aftermarket Bumper Cover (Unpainted) | $140 - $220 |
| Used OEM Bumper Assembly (Cover, Bar, Absorber) | $250 - $500 |
| Shop Labor (Replacement) | $150 - $300 |
| Shop Labor (Painting & Blending) | $300 - $600 |
Front Bumper Replacement Overview
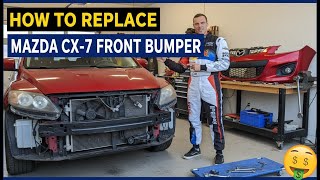
Replacing the front bumper cover on a 2010-2012 CX-7 is a manageable DIY project for someone with basic mechanical skills. 🎬 Watch this step-by-step front bumper cover removal guide The process involves removing a series of screws and clips.
- Difficulty: 2.5 out of 5
- Estimated Time: 1.5 - 2.5 hours
- Tools Needed: Phillips screwdriver, 8mm and 10mm sockets, plastic trim removal tool, flathead screwdriver.
Basic Steps:
- Open the hood and remove the plastic push clips and screws securing the top of the bumper cover.
- In each front wheel well, remove the screws and clips holding the bumper edge to the fender liner.
- Underneath the front of the vehicle, remove all the screws and clips attaching the bumper to the engine splash shield.
- Gently pull each side of the bumper cover outwards to release it from the mounting brackets under the headlights.
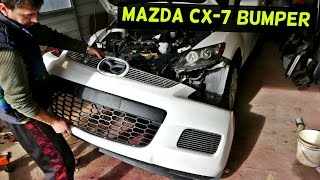
- With a helper, pull the bumper cover forward. If you have fog lights, disconnect the electrical connectors before fully removing the cover. 🎬 See how to safely remove the front bumper cover
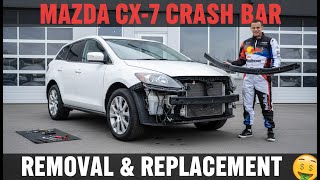
- If replacing the reinforcement bar, it is held on by several 14mm bolts on each frame rail. 🎬 Watch: CX-7 impact bar removal and replacement
- Installation is the reverse of removal.
Warning: The plastic clips used to hold the bumper on can become brittle with age and may break during removal. It's a good idea to have a few replacements on hand before you start the job.
Frequently Asked Questions (FAQ)
Will a bumper from a 2007-2009 CX-7 fit my 2011 CX-7?
No. The Mazda CX-7 received a facelift for the 2010 model year which included a completely redesigned front bumper and grille. You must use a bumper from a 2010, 2011, or 2012 model.
Do I need to paint a replacement bumper cover?
Yes. New OEM and aftermarket bumper covers typically come in a black or gray primer and must be painted to match your vehicle's color. A used bumper will also likely need to be repainted unless you are lucky enough to find one from a vehicle with the exact same paint code and in excellent condition.
Can I replace just the lower grille without removing the whole bumper?
While some owners have managed to do this by removing the lower splash shields and flexing the bumper cover, the proper and easiest way is to remove the entire bumper cover. The grilles are clipped in from behind, making access extremely difficult with the bumper on the vehicle.
What is the difference between a bumper cover and a bumper assembly?
A 'bumper cover' is just the outer plastic fascia. A 'bumper assembly' or 'bumper assy' typically refers to a more complete set of parts, which may include the cover, the foam energy absorber, and the metal reinforcement bar. When buying used, always clarify exactly which parts are included.
Helpful Videos
Technical Specifications
OEM Part Numbers: EG21-50-070B EH44-50-031D EH44-50-031D-AA EH44-50-031F EH44-50-031F-BB EH44-50-111 EH44-50-C11A EH44-50-C21A EH44-51-680B EH44-51-690C EH4450031GBB
Partslink Number: MA1000226. Fits 2010, 2011, 2012 Mazda CX-7 facelift models. Available for models with or without fog lamp provisions.

The information in this article is provided for general reference and educational purposes only. Vehicle specifications, procedures, and part compatibility can vary by production date, trim level, and region. Always consult your vehicle's factory service manual and verify part numbers before purchasing or performing repairs. Safety-critical components such as airbags, seat belts, and braking systems should be installed by a qualified professional.
- Mazda CX-7:
- 🎬 Helpful Videos
- Anatomy of the 2010-2012 CX-7 Front Bumper Assembly
- Symptoms of a Damaged Front Bumper
- Known Issues, Recalls, and TSBs
- Buying a Used 2010-2012 CX-7 Front Bumper: A Buyer's Guide
- Cost of Replacing a 2010-2012 Mazda CX-7 Front Bumper
- Front Bumper Replacement Overview
- Frequently Asked Questions (FAQ)
- 🎟️ Get 5% Off