

Audi Xenon Headlight Control Module Issues: 2003-2017 A4, A5, A6, Q5, Q7 & More
This guide clarifies common failures, replacement costs, and programming needs for the Xenon HID headlight control module (ballast) in many popular Audi models.
- This part is a Headlight Control Module (Ballast), not the main Body Control Module (BCM).
- Failure is most commonly caused by water intrusion from a bad headlight seal; fix the leak to prevent repeat failures.
- For these vehicle years, replacement with a matching part number is typically plug-and-play and does not require dealer programming.
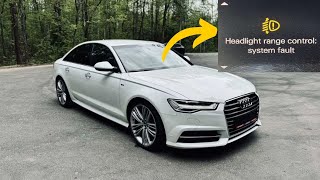
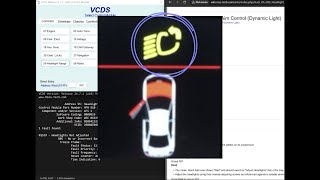
- A "Headlight Range Control Defective" warning and headlights pointing at the ground are classic symptoms of failure.
What is a Headlight Control Module and Why Does it Fail?


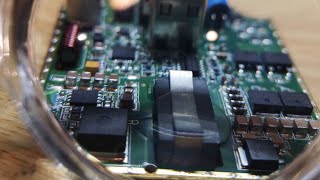
On many 2003-2017 Audi vehicles like the A4, A5, A6, Q5, and Q7, the component that controls the factory Xenon HID headlights is an electronic module, or ballast, mounted to the headlight assembly itself. While sometimes confused with the main Body Control Module (BCM), this part's only job is to power and regulate the complex HID headlights. Failure is common and can be caused by several factors.
The most frequent cause of failure is water intrusion. Over time, the seals on the headlight assembly can degrade, or damage can occur from high-pressure car washes, allowing moisture to enter. Because the module is often located at the bottom of the headlight housing, it is highly susceptible to water damage and corrosion. Other causes include electrical issues like voltage spikes, internal component wear from age and heat cycles, and sometimes even a failing HID bulb can damage the module.
Known Issues, TSBs, and Recalls
While there are no widespread recalls specifically for this module on the listed vehicles, related issues exist. Some newer Audi models have had recalls for incorrect headlight software, but these do not apply to the 2003-2017 generation vehicles covered here. However, a Technical Service Bulletin (TSB) for the 2022 Audi Q3 notes that a headlight warning light and a stored fault code (DTC C119811) could be caused by insufficient soldering of LEDs inside the headlight, requiring headlight replacement. While a different model year, this highlights that issues within the headlight assembly can trigger module-related fault codes.
Compatibility Warning: These modules are designed ONLY for vehicles with factory-installed HID/Xenon headlights. They are not compatible with halogen headlight systems. Additionally, some models used different modules for directional (AFS - Adaptive Front-lighting System) and non-directional headlights. Always match your original part number to ensure you are buying the correct replacement.
Symptoms of a Failing Headlight Control Module

When this module begins to fail, you will notice distinct problems with your headlights. Recognizing these symptoms can help you diagnose the issue correctly.
- Headlight Flickering or Not Turning On: One of the most common signs is a headlight that flickers, works intermittently, or fails to turn on at all. Often, swapping the bulb to the other side can help determine if the bulb or the module is the culprit.
- "Headlight Range Control Defective" Warning: A warning message on the dashboard, such as "Headlight Range Control Defective" or an icon of a flashing headlight, 🎬 See what this dashboard warning looks like and how it behaves. is a direct indicator of a problem in the system.
- Headlights Pointing Down: As a fail-safe, the system will often default the headlights to their lowest position to avoid blinding oncoming traffic. This results in extremely poor visibility at night.
- Loss of Adaptive Functions: If your vehicle is equipped with AFS, you may lose the cornering or auto-leveling functionality.
A diagnostic scan with a tool like VCDS can reveal specific fault codes stored in the Headlight Range Control Module (often addressed as J431 or in module 55) that can pinpoint the issue to a specific component like a level sensor or the control unit itself.
Buying a Used Headlight Control Module
Purchasing a used OEM headlight control module is a cost-effective way to fix your Audi's lighting issues. Because these modules do not typically require complex programming, a used unit can be a simple plug-and-play solution. Here’s what to look for:
- Match the Part Number Exactly: Audi used several versions of these modules. Part numbers like 8K0941597E, 8K0941597C, and 4E0907476 are common, but you must match the number on your original part. Superseded part numbers are often compatible, but direct matching is safest.
- Inspect for Corrosion: Carefully examine the electrical connector pins and the metal casing. Any signs of green or white crusty residue indicate water damage. A water-damaged module is likely to fail, even if it works initially.
- Check the Source Vehicle: If possible, know the history of the donor car. A module from a front-end collision vehicle might be fine, but one from a flood-damaged car should be avoided.
- Why Used OEM is a Good Choice: Used OEM modules from manufacturers like Hella or Mitsubishi Electric are built to Audi's original specifications. They often offer better reliability and a guaranteed fit compared to cheap aftermarket clones, which can have a high failure rate.
Replacement and Programming Guide

Replacement Procedure
The difficulty of replacing the module depends on the specific Audi model.
- Location: The module is almost always mounted to the bottom or back of the headlight assembly, held in place by three or four Torx screws (often T15).
- Access: On some models like the Audi A5, you must remove the entire headlight assembly from the vehicle to access the module. This typically involves removing the front bumper cover. 🎬 Watch this step-by-step guide on removing the bumper and module. On other models, you may be able to access it by removing the airbox or other components in the engine bay, or by going through the wheel well liner.
- Installation: Once accessed, replacement is straightforward. Disconnect the electrical connector, unscrew the old module, and install the new one. Ensure the weather seal is in good condition and properly seated to prevent future water damage.
Programming and Calibration
Pro Tip: For most of the vehicles covered in this guide, a direct replacement with a matching part number does not require programming or coding. It is typically a plug-and-play repair.
While the module itself usually doesn't need to be programmed, the headlight system may need to be recalibrated after the repair, especially if you receive a "Headlights Not Adjusted" error. This can happen after a loss of power or component replacement. This is a simple procedure that can be done with a diagnostic tool like VCDS.
🎬 Watch a technician perform the VCDS calibration and coding process.Using VCDS:
- Go to the [55 - Headlight Range] control module.
- Select [Basic Settings - 04].
- Go to Group 001 and click [Go!].
- The system will learn the new parameters. Wait for the status to show "Learned" or similar, then exit the controller.
For newer models or more complex issues involving mismatched software, a dealer tool (ODIS) might be required for flashing the correct dataset, but this is rare for the specified vehicle range.
| Part Type | Estimated Price Range |
|---|---|
| New OEM (Dealer) | $450 - $650 |
| New Aftermarket | $50 - $150 |
| Used OEM | $75 - $200 |
| Shop Labor Cost (Module Only) | $150 - $300 |
| Shop Labor Cost (incl. Bumper Removal) | $400 - $700+ |
Frequently Asked Questions
Do I need to program a new or used headlight control module?
For most of the 2003-2017 models listed, if you use a replacement module with the exact same part number, no programming is required. It should be a plug-and-play installation. You may need to perform a basic settings calibration with a scan tool to clear any dashboard warnings.
My headlight is full of condensation. Is the module bad?
Not necessarily, but it's a major warning sign. Condensation means the headlight seal has failed. Since the control module is at the bottom of the housing, the water will pool there and eventually cause the module to fail from corrosion. You must fix the water leak by resealing or replacing the headlight assembly to prevent repeat failures of the module.
Can I swap the modules from left to right to diagnose a problem?
Yes. The modules are often identical for the left and right sides. Swapping them is an excellent diagnostic step. If the problem moves to the other headlight, you have confirmed the control module is the faulty component.
What is the difference between a Headlight Control Module and a Body Control Module (BCM)?
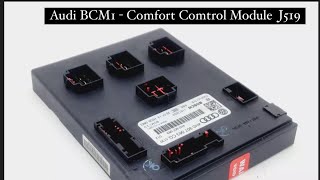
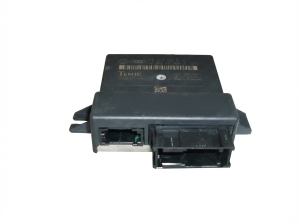
The Headlight Control Module (or ballast) is a small computer dedicated solely to managing the high-voltage Xenon headlights. The Body Control Module (BCM), which Audi often calls the Central Electrics Module (J519), is a much larger, more complex computer that manages dozens of functions like power windows, door locks, interior lighting, and wipers. A failure in the J519 can cause many widespread electrical problems, whereas a headlight module failure only affects the headlight.
Helpful Videos
Technical Specifications
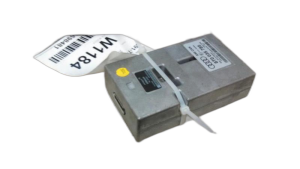
OEM Part Numbers: 4E0907476 8K0941597 8K0941597B 8K0941597C 8K0941597E
Input Voltage: DC 12V. Controls D1S or D3S type Xenon/HID bulbs depending on the specific module.
We Have This Part in Stock





The information in this article is provided for general reference and educational purposes only. Vehicle specifications, procedures, and part compatibility can vary by production date, trim level, and region. Always consult your vehicle's factory service manual and verify part numbers before purchasing or performing repairs. Safety-critical components such as airbags, seat belts, and braking systems should be installed by a qualified professional.
- Audi Q7:
- Audi A6:
- Audi Q5:
- Audi A4:
- Audi A5:
- Audi A8:
- Audi S6:
- Audi S8:
- 🎬 Helpful Videos
- 🛍️ Shop This Part
- What is a Headlight Control Module and Why Does it Fail?
- Known Issues, TSBs, and Recalls
- Symptoms of a Failing Headlight Control Module
- Buying a Used Headlight Control Module
- Replacement and Programming Guide
- Replacement Procedure
- Programming and Calibration
- Frequently Asked Questions
- 🎟️ Get 5% Off