

2014-2023 Ford Transit Connect C-Pillar Trim: A Buyer's Guide to Fitment and Replacement
This guide details the crucial differences in C-pillar trim panels for the Ford Transit Connect, helping you find the exact part and avoid common purchasing errors.
- Compatibility is critical: You must match the panel to your van's body style (Cargo/Passenger), wheelbase (SWB/LWB), and side (Left/Right).
- When buying used, the most important inspection is for broken mounting clips and tabs on the back of the panel.
- Failure is almost always cosmetic or results in annoying rattles; it does not make the vehicle unsafe to drive.
- Replacement is a simple DIY task that requires only basic plastic trim removal tools.
Critical Variants: Identifying the Correct C-Pillar Trim
The single most important factor when replacing a C-Pillar trim panel on a 2014-2023 Ford Transit Connect is identifying the exact version your vehicle requires. Ford produced several variations that are not interchangeable. Ordering the wrong panel will result in wasted time and money.
Warning: Before purchasing, you must confirm four key details: your vehicle's body style, wheelbase, the specific side needed, and the color/finish.
- Body Style: Cargo Van vs. Passenger Wagon. These two models use fundamentally different interior trims. Cargo van panels are typically made of a durable, unfinished grey or black plastic designed to withstand abuse. Passenger Wagon (including XL, XLT, and Titanium trims) panels are more refined, often covered in fabric or finished in a specific interior color to match the rest of the cabin. They are not interchangeable.
- Wheelbase: Short Wheelbase (SWB) vs. Long Wheelbase (LWB). The Transit Connect was offered in two lengths. The LWB model is approximately 15.7 inches longer than the SWB model. This difference in body length can affect the shape and mounting points of interior panels, including the C-pillar trim. Always confirm your vehicle's wheelbase before ordering. A LWB van has a wheelbase of 120.6 inches, while a SWB is 104.8 inches.
- Position: Rear Left (Driver Side) vs. Rear Right (Passenger Side). The left and right C-pillar panels are mirror images of each other and cannot be used on the opposite side.
- Color and Finish: Especially for Passenger Wagon models, Ford offered different interior color schemes. Ensure the replacement panel's color and texture (plastic, fabric, etc.) match your vehicle's interior.
Symptoms of a Failing C-Pillar Trim Panel
Failure of this part is cosmetic and does not affect the vehicle's mechanical operation. Symptoms are usually seen or heard.
- Rattling or Buzzing Noises: The most common complaint is a rattling or buzzing sound coming from the rear of the vehicle, especially over bumps. This is usually caused by broken or loose mounting clips, allowing the panel to vibrate against the metal C-pillar.
- Visible Damage: Cracks, deep scuffs, and gouges are common, particularly in Cargo Van models used for work. The plastic can become brittle over time and crack from impact or sun exposure.
- Loose Fitment: The panel may have visible gaps between it and the headliner or adjacent panels. It might feel loose to the touch, indicating that the clips holding it in place have failed.
- Seatbelt Interference: In severe cases, a loose or broken panel could potentially interfere with the smooth operation of the seatbelt retractor housed behind it.
Pro Tip: A persistent rattle from the rear pillar area can often be temporarily silenced by wedging a small piece of foam or cloth between the panel and the vehicle body. This is a good diagnostic step to confirm the trim panel is the source of the noise before ordering a replacement.
Buying a Used Body C-Pillar Trim Panel
Since aftermarket options are virtually nonexistent for such a specific part, a used OEM panel is the most practical and cost-effective solution. Here’s what to look for:
- Confirm Compatibility: Use the four-point checklist (Body Style, Wheelbase, Position, Color) above. The best way to ensure a match is to find a part from a donor vehicle with the exact same specifications as yours.
- Inspect All Mounting Points: This is the most critical inspection step. Carefully examine the back of the panel. Look for the plastic tabs and clip retainers. Ensure none are cracked, broken off, or showing stress marks. A panel with even one broken mounting point may not sit flush and will likely rattle.
- Check for Warping or Bending: Lay the panel on a flat surface to check for any warping. Panels that have been stored improperly or exposed to extreme heat can deform, leading to a poor fit.
- Assess Cosmetic Condition: Expect minor scuffs on a used part, especially from a cargo van. Decide what level of cosmetic wear is acceptable to you. Deep gouges or cracks in the main body of the panel cannot be easily repaired.
- Verify the Part Number (If Possible): If the seller provides the part number, try to match it to your needs. The known OEM part number DT11-K31011-BFW is a starting point, but many variations exist for different configurations. Do not rely on this number alone; visual confirmation and vehicle matching are more reliable.
Replacement Overview
Replacing the C-pillar trim is a straightforward job suitable for a DIYer with basic tools.
- Difficulty: 1 out of 5
- Tools Required: Plastic trim removal tool kit, possibly a Phillips head screwdriver or a small socket for the seatbelt anchor bolt.
- General Steps:
- If the seatbelt passes through the panel, you may need to unbolt the lower anchor of the seatbelt to allow for enough slack.
- Using a plastic pry tool, carefully begin to pry the panel away from the C-pillar. Start at an edge and work your way around. The panel is held in by several hidden metal or plastic clips that will pop out.
- Once all clips are disengaged, guide the panel off, feeding the seatbelt through the opening if necessary.
- To install the new panel, align the clips with the corresponding holes in the vehicle body and press firmly until each clip snaps into place.
- Re-bolt the seatbelt anchor if you removed it, ensuring it is torqued to the manufacturer's specification.
Known Issues, TSBs, and Recalls
While there are no specific recalls or Technical Service Bulletins (TSBs) in the US for the interior C-pillar trim panel on the 2014-2023 Transit Connect, owner forums frequently mention rattles from interior panels as a common annoyance. There have been numerous recalls for this generation of Transit Connect for issues like door latches, panoramic roof adhesion, and shifter cable bushings, but none directly address this specific interior part. A recall was issued in Canada for an exterior C-pillar trim piece on some vehicles, highlighting the importance of proper trim attachment, but this is a separate part.
Cost Comparison
| Part Type | Estimated Cost |
|---|---|
| New OEM | $70 - $150 |
| New Aftermarket | Not Generally Available |
| Used OEM | $40 - $75 |
| Shop Labor for Installation | $60 - $125 |
Frequently Asked Questions (FAQ)
How do I know if I have a Short Wheelbase (SWB) or Long Wheelbase (LWB) Transit Connect?
The easiest way is to check your vehicle's documentation or the sticker on the driver's side door jamb. Visually, the LWB model has a noticeably longer body section between the sliding side door and the rear wheel arch. The LWB has a 120.6-inch wheelbase, while the SWB has a 104.8-inch wheelbase.
Can I use a Passenger Wagon trim panel in my Cargo Van?
This is not recommended. The mounting points, shape, and material are different. While it might be possible with heavy modification, it will not be a direct fit and will likely look out of place. It is much easier to source the correct part for your specific model.
My panel is not broken, but it rattles. What can I do?
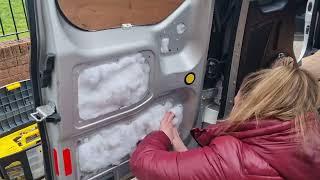
If the panel itself is intact, the rattle is likely from worn or loose clips. You can try removing the panel and applying felt or foam tape to the contact points on the back of the panel and around the clip locations. This can dampen the vibration and stop the noise. 🎬 Watch: How to add insulation and sound deadening to your Transit Connect Some owners also report success by adding a dab of silicone to the retaining clips to hold them more securely.
Do I need special tools to remove the C-pillar trim?
A set of plastic trim removal tools is highly recommended. Using a metal screwdriver or other hard object will almost certainly scratch or gouge the trim panel and surrounding plastics. These toolsets are inexpensive and essential for any interior work.
Helpful Videos

Technical Specifications
OEM Part Numbers: DT11-K31011-BFW
Varies by vehicle configuration (Cargo vs. Passenger, SWB vs. LWB, Left vs. Right)
We Have This Part in Stock


The information in this article is provided for general reference and educational purposes only. Vehicle specifications, procedures, and part compatibility can vary by production date, trim level, and region. Always consult your vehicle's factory service manual and verify part numbers before purchasing or performing repairs. Safety-critical components such as airbags, seat belts, and braking systems should be installed by a qualified professional.
- FORD TRANSIT CONNECT: