

2017-2023 Audi R8 Exterior B-Pillar Trim: A Guide to Rattles, Discoloration, and Replacement
Your definitive guide to diagnosing, replacing, and inspecting the exterior B-Pillar Trim Panel on the second-generation Audi R8.
- Rattling is the most common issue and can usually be fixed by applying felt tape to the back of the panel, rather than replacing it.
- When buying this part, understand that the OEM number 4S0853960GRU signifies a primed part that requires painting.
- When inspecting a used panel, the condition of the mounting clips on the back is more important than minor surface scratches.
- For cars with the 'Black Optic' package, check for discoloration (a known TSB issue) as it indicates UV damage.
Symptoms of a Failing B-Pillar Trim Panel
Since this is a cosmetic trim piece, failure symptoms are almost always related to noise or appearance rather than mechanical function.
Audible Rattling, Ticking, or Creaking
The most common complaint related to this part is noise. Owners report hearing faint ticking, creaking, or rattling sounds coming from the area just behind their ear while driving. This noise is often more noticeable in warm weather when plastic parts expand, or when the car's chassis flexes over uneven roads or driveways. The sound is typically caused by the plastic trim panel or its mounting clips rubbing directly against the metal body of the car. While not a safety concern, the noise can be very annoying in the otherwise refined cabin of an R8.
Visible Damage or Poor Fit
Physical damage is another primary reason for replacement. This can include:
- Scratches and Scuffs: Damage from minor impacts, automatic car washes, or improper cleaning.
- Cracks: Stress cracks can form around mounting points or from an impact.
- Loose Fitment: If mounting clips are broken, the panel may not sit flush with the body, creating gaps and leading to rattles or the risk of detachment at high speed.
Discoloration or Fading
For vehicles equipped with the 'Black Optic' package, the gloss black trim can become discolored over time. An official Audi Technical Service Bulletin (TSB) notes that this trim can take on a red, purple, or grey hue due to insufficient UV resistance in the original coating. This is a warrantable defect, but on an older vehicle, replacement is the only solution.
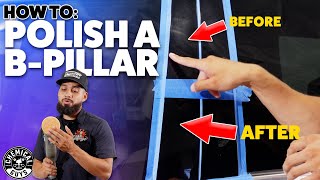
🎬 See how to restore faded B-pillar trim to look brand newKnown Issues, TSBs, and Recalls
Compatibility Note: Audi did not produce a 2019 model year of the R8 for the US market. This part fits models from 2017, 2018, and 2020-2023.
Recalls
As of early 2026, there are no safety recalls issued by the National Highway Traffic Safety Administration (NHTSA) for the B-pillar trim panel on the 2017-2023 Audi R8. Recalls for this vehicle generation pertain to issues like airbag inflators and potential transmission fluid leaks, which are unrelated to this trim piece.
Technical Service Bulletins (TSBs)
- TSB 66 23 95 2060333/3: This bulletin specifically addresses the discoloration of exterior 'Black Optic' trim on models including the 2018 and 2020-2021 R8. The cause is listed as poor UV resistance, and the fix is to replace the affected trim piece.
- Related TSB for Rattles: While not specific to the R8, other Audi TSBs (like 2048430 for the Q7) address B-pillar rattles by having technicians apply felt or fleece tape to the contact points on the back of the trim panel to insulate it from the body. This is a widely accepted and effective repair strategy for this common issue.
Buying a Used B-Pillar Trim Panel: What to Inspect
Given the high cost of new OEM parts, a used trim panel is an excellent value. However, a careful inspection is essential to ensure you get a good part.
1. Inspect All Mounting Clips and Tabs
This is the most critical check. Turn the panel over and carefully examine every plastic clip and mounting tab. Ensure none are cracked, stressed, or broken off. A panel with even one broken clip will likely not sit flush and will be prone to rattling. Ask the seller for clear, high-resolution photos of the back of the panel.
2. Check for Cracks and Previous Repairs
Inspect the entire panel, especially around the edges and mounting points, for hairline cracks. Flex the panel slightly to see if any cracks open up. Look for signs of previous repairs like body filler, sanding marks, or paint overspray on the back side.
3. Understand the Part Number and Finish
The common OEM part number for this piece is 4S0853960GRU. The 'GRU' suffix is critical—it is German for Grundiert, meaning the part is supplied in a raw, unpainted primer. It is meant to be painted to match your car's body color. If you are buying a used part that is already painted, verify the color code matches your vehicle. If you buy a new GRU part, factor in the cost of professional painting.
4. Examine the Finish
For a painted or gloss black part, check the surface for deep scratches that go through the clear coat. Minor surface scuffs can often be polished out. For carbon fiber versions, check for a yellowing or cloudy clear coat, which indicates UV damage and failure.
Replacement Overview
Installation Difficulty
- Rating: 2 out of 5
- Estimated Time: 0.5 hours
- DIY Feasible: Yes
Replacing this exterior trim panel is a straightforward job for a DIYer. The key is to be patient and use the correct tools to avoid damaging the paint or the panel itself.
Pro Tip: Always use a set of non-marring plastic trim removal tools. Using a metal screwdriver will almost certainly scratch your paint or crack the plastic trim.
General Replacement Steps
- Open the Door: Open the door fully to get clear access to the trim panel.
- Remove Adjacent Seals/Trim: You may need to gently pull back the rubber door weatherstripping that sits against the B-pillar trim to get access to its edge.
- Pry the Panel Off: Starting from an edge, carefully work a plastic pry tool between the panel and the car body. You will feel clips release as you apply gentle, steady pressure. Work your way around the panel until all clips are disengaged.
- Address Rattles (Optional): If you are reinstalling your old panel to fix a rattle, apply small pieces of felt or high-density foam tape to the contact points on the back of the panel and directly onto the clips. This will cushion it from the body.
- Install the New Panel: Align the clips on the new panel with the corresponding holes in the body. Give the panel a firm push with the palm of your hand at each clip location to snap it securely into place. You should hear an audible click as each clip engages.
- Re-seat Seals: Ensure any weatherstripping you moved is pressed firmly back into place.
Cost Comparison
| Part Type | Estimated Cost |
|---|---|
| New OEM (Primed) | $250 - $350 (plus paint) |
| New Aftermarket | Not Available |
| Used OEM | $100 - $250 |
| Shop Labor | $75 - $150 |
(Pricing as of 2026. New OEM price is for the primed 'GRU' part and does not include paint matching costs.)
Frequently Asked Questions (FAQ)
Is this an interior or exterior part?
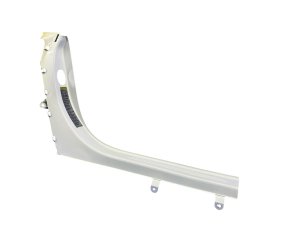
This guide refers to the exterior Body B-Pillar Trim Panel, which is the cosmetic cover on the outside of the car between the door and the rear quarter panel.
What does the 'GRU' in part number 4S0853960GRU mean?
GRU indicates that the part is supplied from the factory in primer (from the German word Grundiert). It is not a finished piece and must be professionally painted to match your vehicle's color before installation.
How can I fix a rattling B-pillar trim without replacing it?
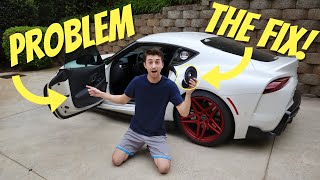
The most effective DIY fix is to carefully remove the panel and apply strips of felt or fleece adhesive tape to the back of the panel and its clips. This creates a cushion between the plastic trim and the metal body, eliminating the noise. This is the same 🎬 Watch: How to find and fix car rattle noises procedure dealers use to fix trim rattles under warranty.
Will this part fit a 2019 Audi R8?
No, because Audi did not sell a 2019 model year R8 in the North American market. This part is correct for 2017, 2018, and 2020-2023 models.
Helpful Videos
Technical Specifications
OEM Part Numbers: 4S0853960 4S0853960GRU
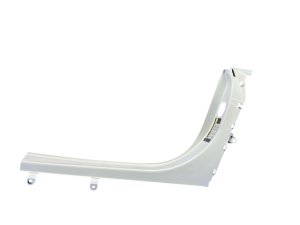
Exterior plastic trim panel. May be finished in body color, gloss black, or carbon fiber. 'GRU' part number denotes a primed, unpainted finish.
We Have This Part in Stock

The information in this article is provided for general reference and educational purposes only. Vehicle specifications, procedures, and part compatibility can vary by production date, trim level, and region. Always consult your vehicle's factory service manual and verify part numbers before purchasing or performing repairs. Safety-critical components such as airbags, seat belts, and braking systems should be installed by a qualified professional.
- Audi R8:
- 🎬 Helpful Videos
- 🛍️ Shop This Part
- Symptoms of a Failing B-Pillar Trim Panel
- Audible Rattling, Ticking, or Creaking
- Visible Damage or Poor Fit
- Discoloration or Fading
- Known Issues, TSBs, and Recalls
- Recalls
- Technical Service Bulletins (TSBs)
- Buying a Used B-Pillar Trim Panel: What to Inspect
- 1. Inspect All Mounting Clips and Tabs
- 2. Check for Cracks and Previous Repairs
- 3. Understand the Part Number and Finish
- 4. Examine the Finish
- Replacement Overview
- Installation Difficulty
- General Replacement Steps
- Cost Comparison
- Frequently Asked Questions (FAQ)
- 🎟️ Get 5% Off