

2004-2008 Lamborghini Gallardo A-Pillar Trim: Rattles, Peeling, and Replacement
Your definitive guide to identifying, inspecting, and replacing the interior A-pillar panels on first-generation Gallardo coupe models.
- Compatibility is critical: This part ONLY fits 2004-2008 Gallardo Coupe models. It will not fit Spyders or 2009+ LP560-4 cars.
- The most common failures are cosmetic (peeling material) or audible (rattling from broken clips).
- When buying used, the condition of the rear mounting clips is more important than minor cosmetic flaws on the front.
- Replacement is a simple DIY task, but requires plastic trim tools and a gentle touch to avoid breaking clips or damaging adjacent panels.
Critical Compatibility: 2004-2008 Coupe Models ONLY
Warning: These A-pillar trim panels are exclusively for the first-generation Lamborghini Gallardo Coupe, manufactured between the 2004 and 2008 model years. They will NOT fit Spyder (convertible) models or the second-generation LP560-4 and newer models from 2009-2014.
Compatibility is the single most important factor for this part. Here’s why:
- Coupe vs. Spyder: The windshield frame, roof structure, and headliner are completely different between the coupe and the convertible Spyder. The A-pillar trim for a coupe is designed to integrate with a fixed roof and will not align with the Spyder's soft-top mechanism.
- First-Generation (2004-2008) vs. Second-Generation (2009-2014): Lamborghini introduced a major facelift for the 2009 model year with the Gallardo LP560-4. This update included a redesigned dashboard and interior, which changed the shape, mounting points, and material options for the A-pillar trim panels. Panels from a 2009 or newer car will not fit a 2008 or older model, and vice-versa.
Symptoms of Failure
Failure of the A-pillar trim is typically cosmetic or results in noise. Since it is not a mechanical part, it will not trigger any warning lights.
- Rattling or Buzzing Noises: This is the most common complaint. Rattles, especially over rough pavement, are usually caused by broken or loose plastic mounting clips on the back of the panel. These clips can become brittle with age and snap during removal for other services, like windshield replacement or alarm installation.
- Peeling or Bubbling Material: The adhesive holding the leather or Alcantara to the plastic backing can fail over time due to heat and sun exposure. This causes the material to lift, bubble, or sag, creating an unsightly appearance.
- Visible Cracks or Damage: The underlying plastic panel can crack from improper removal (using metal tools instead of plastic trim removers) or in the event of a side curtain airbag deployment.
Buying a Used Body A-Pillar Trim Panel
Given the high cost of new OEM panels, a quality used part is an excellent option. Aftermarket versions are not produced for this vehicle. A thorough inspection is key to getting a good part.
Physical Inspection Checklist:
- Flip it Over: The most important check is the back of the panel. Carefully inspect every single mounting tab and clip. Ensure none are cracked, stressed, or missing. A panel with broken tabs will never fit securely and will likely rattle.
- Check Material Adhesion: Run your hand over the entire surface of the leather or Alcantara. Feel for any bubbles, lifting, or areas where the material feels loose. Pay close attention to the edges and sharp curves, as this is where peeling often starts.
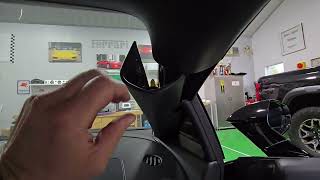
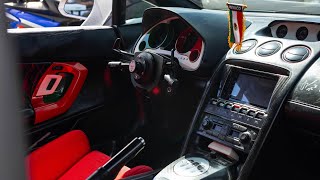
- Verify Material and Color: Gallardos were available with different interior options, including full leather, or Alcantara 🎬 Watch a Gallardo get a custom interior upgrade (a synthetic suede-like material) on the pillars. Ensure the material and color (e.g., Nero Perseus black, Avorio Lilium ivory) perfectly match your car's interior.
- Look for Cracks: Flex the panel slightly to check the integrity of the plastic base. Look for any hairline cracks, especially around the mounting points.
Pro Tip: Ask the seller for the VIN of the donor car. This can sometimes help a dealer or specialist verify the original interior color and material specifications to ensure a perfect match.
Replacement Overview
Replacing the A-pillar trim is a straightforward job that can be done by a DIYer with patience and the right tools. The key is to be gentle to avoid damaging the delicate panel or surrounding trim.
Installation Difficulty: 2 out of 5
Estimated Time: 0.5 hours
Tools Needed:
- Plastic trim removal tool kit
- Small flathead screwdriver or pick (for airbag badge)
- Torx screwdriver (potentially T20, if a screw is present)
Step-by-Step Guide (General Procedure):
- Disconnect the Battery: As a precaution, since you are working near the side curtain airbag, it's wise to disconnect the negative battery terminal.
- Check for Screws: On many vehicles, there is a hidden screw. Carefully pry off the small plastic badge that says "AIRBAG" or "SRS". Look inside for a Torx screw holding the panel to the pillar. If present, remove it.
- Pry the Panel Off: Start at the top corner where the panel meets the headliner. Gently work a plastic trim tool between the panel and the body. Pry outwards to release the first clip.
- Work Your Way Down: Continue to work your way down the pillar, carefully popping each clip out. Do not use excessive force. Some clips may require a special hook tool to release by sliding them up or down.
- Disconnect Wiring: If your pillar houses a tweeter or microphone, carefully disconnect the electrical connector before fully removing the panel.
- Installation: To install the new panel, reconnect any wiring, align the clips with the holes in the A-pillar, and give it a firm tap with the palm of your hand to seat each clip. Reinstall the retaining screw, if equipped.
Known Issues, TSBs, and Recalls
There are no official recalls or Technical Service Bulletins (TSBs) from Lamborghini or the NHTSA specifically for the A-pillar trim panels on the 2004-2008 Gallardo. The primary known issues are age-related material peeling and rattling from broken clips, as described in the symptoms section.
Cost Comparison
| Part Type | Estimated Cost |
|---|---|
| New OEM | $600 - $1,000+ per side |
| New Aftermarket | Not Available |
| Used OEM | $150 - $500 per side |
| Shop Labor | $75 - $150 |
Technical Specifications & Part Numbers
Part numbers can vary based on left/right side, color, and material (leather vs. Alcantara). Always verify the exact part number for your vehicle's VIN before purchasing.
| Part Number | Description | Notes |
|---|---|---|
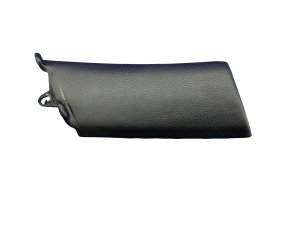
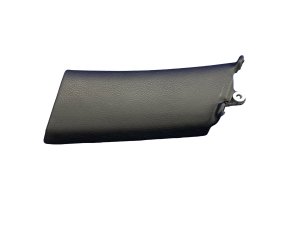
| 400867233 / 400867233B | A-Pillar Trim, Left Hand | Verify color/material |
| 400867234 | A-Pillar Trim, Right Hand | Verify color/material |
| 400857085 | A-Pillar Trim, Left Hand | Alternate number, verify application |
| 400857086 | A-Pillar Trim, Right Hand | Alternate number, verify application |
| 400867269A | A-Pillar Trim, Left Hand | Alternate number, verify application |
| 400867270 / 400867270A | A-Pillar Trim, Right Hand | Alternate number, verify application |
Frequently Asked Questions (FAQ)
Will this trim panel fit my Gallardo Spyder?
No. The A-pillar, windshield, and roof structure of the Spyder are completely different from the Coupe to accommodate the convertible top. You must purchase a trim panel specifically made for the Spyder.
Why is my A-pillar trim rattling?
The most common cause of rattling is broken or loose plastic mounting clips on the back of the panel. These can break from age or during removal for other maintenance. The panel is no longer held tightly against the chassis, allowing it to vibrate.
Can I repair my peeling trim panel instead of replacing it?
Yes, it is possible to have the panel re-upholstered by a professional auto interior shop. This involves stripping the old material, cleaning the plastic base, and applying new adhesive and material. This can be a cost-effective option if you can't find a good used replacement, but it requires specialized skill to achieve an OEM-quality finish.
🎬 See how to wrap interior pillars in suede yourselfIs this part difficult to replace myself?
For a moderately skilled DIYer, this is a relatively easy replacement. The difficulty is rated 2 out of 5. The main challenges are being gentle, using proper plastic trim tools to avoid damage, and dealing with potentially tricky clips.
Helpful Videos


Technical Specifications
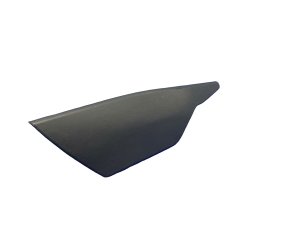
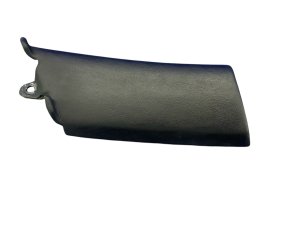
OEM Part Numbers: 400867233 400867233B 400867234 400857085 400857086 400867269A 400867270 400867270A
Material: Plastic base with either leather or Alcantara upholstery. Fitment: Coupe models only.
We Have This Part in Stock

The information in this article is provided for general reference and educational purposes only. Vehicle specifications, procedures, and part compatibility can vary by production date, trim level, and region. Always consult your vehicle's factory service manual and verify part numbers before purchasing or performing repairs. Safety-critical components such as airbags, seat belts, and braking systems should be installed by a qualified professional.
- Lamborghini Gallardo:
- 🎬 Helpful Videos
- 🛍️ Shop This Part
- Critical Compatibility: 2004-2008 Coupe Models ONLY
- Symptoms of Failure
- Buying a Used Body A-Pillar Trim Panel
- Physical Inspection Checklist:
- Replacement Overview
- Tools Needed:
- Step-by-Step Guide (General Procedure):
- Known Issues, TSBs, and Recalls
- Cost Comparison
- Technical Specifications & Part Numbers
- Frequently Asked Questions (FAQ)
- 🎟️ Get 5% Off