

2017-2024 Audi Rain & Light Sensor Failure: A4, A5, Q5, Q7 & More
This guide explains the common failures of the automatic headlight and wiper sensor, and what to know before buying a used replacement.
- The most common cause of failure is not the sensor itself, but the silicone gel pad between the sensor and the windshield, which can develop air bubbles.
- A faulty sensor will cause both the automatic wipers and automatic headlights to malfunction, often displaying a warning on the dash.
- When replacing the sensor, you MUST use a new gel pad. Re-using the old one will lead to system failure.
- After replacement, the sensor may require electronic calibration with a diagnostic tool for proper function.
Symptoms of a Failing Rain & Light Sensor

When the rain and light sensor begins to fail, it can cause several distinct and often annoying issues. Because this single part controls both the automatic wipers and headlights, you will likely see problems with both systems at the same time.
- "Automatic headlights/wipers defective" Message: This is the most direct symptom. A warning message will appear on your instrument cluster, explicitly stating there is a malfunction with the system.
- Automatic Wipers Don't Work: In the 'Auto' setting, the wipers will not activate when it rains, or they may not adjust their speed correctly with the intensity of the rainfall.
- Automatic Headlights Don't Work: The headlights may not turn on automatically when driving in the dark (e.g., at night or in a tunnel), or they may stay on all the time, even in bright daylight.
- Erratic Behavior: Sometimes the failure is not total but intermittent. The wipers might swipe randomly on a dry windshield, or the headlights might flicker on and off without reason. This can also affect the dimming of the instrument cluster and infotainment screens.
What Causes the Failure?
The most common cause of failure isn't always the sensor electronics, but the special silicone gel pad that sits between the sensor and the windshield. Over time, or especially after a windshield replacement, this pad can develop air bubbles or become contaminated with dirt or moisture. These imperfections prevent the sensor from getting a clear optical reading of the glass, leading to false signals and fault codes. In other cases, water can seep into the sensor housing, causing corrosion on the electrical connectors.
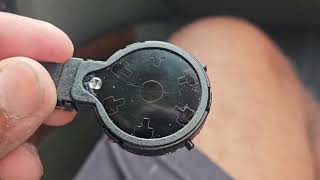
Pro Tip: Before replacing the sensor, carefully inspect the area where it meets the windshield. If you see visible air bubbles, debris, or a wavy appearance in the gel, the problem may be the gel pad itself 🎬 Watch this quick guide on how to repair the sensor., not the sensor. A replacement gel pad (Audi Part # 8U0-955-609 or 7N0 955 609) is much cheaper than a new sensor.
Buying a Used Automatic Headlight Sensor

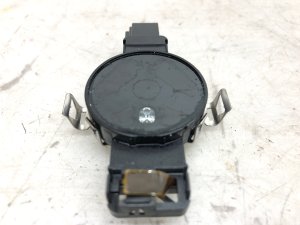
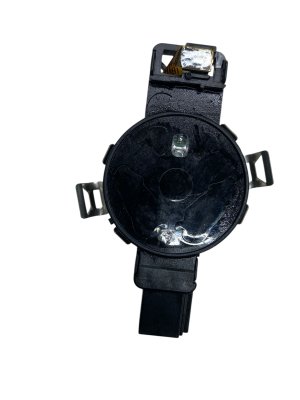
Buying a used rain and light sensor is a great way to save money, as new OEM units can be expensive. However, there are a few critical things to check to ensure you get a good part.
- Verify the Part Number: The primary OEM part number for these models is 81A955555B, which supersedes older versions like 81A955555A and 81A955555. Always match the part number from your old sensor to the used one you plan to buy. While they may look identical, internal differences can cause compatibility issues.
- Inspect the Gel Pad Area: A used sensor will have the old gel pad removed. Inspect the lens of the sensor for any scratches, cloudiness, or damage. The surface must be perfectly clean and clear for the new gel pad to adhere correctly and for the sensor to function.
- Check the Connectors: Look at the electrical connector pins. They should be straight, clean, and free of any green or white corrosion. Corrosion is a sign of moisture damage, and the sensor should be avoided.
- Buy From a Reputable Source: Purchase from a seller that offers a warranty. This protects you in case the part is dead on arrival. A used OEM sensor is often a better choice than a cheap new aftermarket part, as the OEM electronics are designed and tested specifically for your vehicle's complex systems.
Warning: You MUST use a new silicone gel pad when installing a replacement sensor. Re-using an old pad or trying to install the sensor without one will result in air bubbles and immediate failure.
Known Issues, TSBs, and Recalls

As of early 2026, there are no specific recalls or Technical Service Bulletins (TSBs) from the NHTSA directly addressing the failure of the rain and light sensor itself for these Audi models. Most issues reported by owners are related to individual component failure, often linked to the gel pad after a windshield replacement or water intrusion. Some owners of 2017 Q7s have reported issues with headlight marker light warnings, but these are typically related to the headlight assembly itself, not the rain/light sensor.
Replacement & Calibration
Replacing the rain and light sensor is a relatively straightforward process, but it requires care and may require electronic calibration.
Difficulty: 2 out of 5 (DIY feasible for those comfortable with interior trim)
Estimated Time: 0.5 hours
Replacement Steps (General Guide):
- Remove the Mirror Cover: The plastic housing behind the rearview mirror usually consists of two pieces that snap together. Carefully pry them apart using a plastic trim removal tool to avoid breaking the clips.
- Disconnect and Remove the Sensor: The sensor is clipped into a bracket on the windshield. Unplug the electrical connector. Then, release the retaining clips (often a metal spring clip) and gently pull the sensor away from the glass.
- Clean the Windshield: Thoroughly clean the area on the windshield where the sensor mounts. All residue from the old gel pad must be removed. Use isopropyl alcohol for a final wipe to ensure the surface is perfectly clean and dry.
- Install the New Gel Pad and Sensor: Apply the new silicone gel pad to the new sensor, being careful not to trap any air bubbles. Press the sensor assembly firmly onto the windshield bracket and secure the retaining clips. Plug in the electrical connector.
- Reinstall the Cover: Snap the plastic mirror covers back into place.
Calibration Requirements
This is a critical step. While some vehicles may function without it, Audi specifies that the sensor often requires calibration using a diagnostic tool (like VCDS or at a dealership) after replacement. This process tells the control module that a new sensor is installed and allows it to adapt to the specific optical properties of your windshield 🎬 See how to calibrate the sensor after a windshield replacement. and the new gel pad. Failure to calibrate can result in the same erratic behavior you were trying to fix. Some basic functions may be restored by cycling the ignition a few times, but for full functionality, an electronic calibration is recommended.
🎬 Watch: How to reset the calibration after cleaning or replacement.Cost to Replace an Audi Rain & Light Sensor
The cost can vary significantly depending on whether you do the work yourself and the type of part you choose.
| Part or Service | Estimated Cost |
|---|---|
| New OEM Sensor (Dealer) | $325 - $460 |
| New Aftermarket Sensor | $75 - $120 |
| Used OEM Sensor | $30 - $75 |
| New OEM Gel Pad | $25 - $100 |
| Shop Labor (Replacement & Calibration) | $100 - $200 |
Frequently Asked Questions
Can I still drive my car with a bad rain and light sensor?
Yes. A failed sensor is an issue of convenience, not critical safety. You will have to operate your headlights and wipers manually, just like in a car without these automatic features.
My windshield was just replaced and now my auto wipers don't work. Is the sensor broken?
Probably not. It is extremely common for the gel pad between the sensor and the glass to be installed incorrectly or damaged during a windshield replacement. Air bubbles in the pad will prevent the sensor from working. Take the vehicle back to the glass shop and have them inspect the sensor mounting and replace the gel pad.
Why do my automatic headlights stay on during a bright, sunny day?
This is a common symptom of a failing light sensor. The sensor is unable to correctly measure the bright ambient light, so the system defaults to turning the headlights on as a fail-safe. It could be a faulty sensor or an issue with the gel pad preventing a correct reading.
Do I need a special tool to calibrate the new sensor?
For a proper, factory-spec calibration, yes. A diagnostic tool like VCDS (VAG-COM) or the dealer's equipment is needed to perform the calibration routine. While the car might work without it, you may experience continued intermittent issues if the calibration is skipped.
Helpful Videos

Technical Specifications
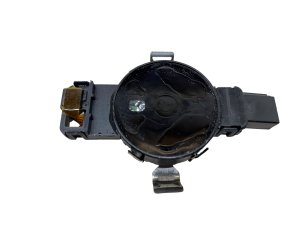
OEM Part Numbers: 81A955555B 81A955555A 81A955555 81A907660A 81A907660
Combined Rain, Light, and Humidity Sensor. Mounts to windshield behind rearview mirror. Requires a separate silicone gel pad for installation (e.g., 8U0-955-609).
We Have This Part in Stock

The information in this article is provided for general reference and educational purposes only. Vehicle specifications, procedures, and part compatibility can vary by production date, trim level, and region. Always consult your vehicle's factory service manual and verify part numbers before purchasing or performing repairs. Safety-critical components such as airbags, seat belts, and braking systems should be installed by a qualified professional.
- Audi A4:
- Audi A5:
- Audi A6:
- Audi Q3:
- Audi Q5:
- Audi Q7:
- Audi Q8:
- Audi A3:
- Audi A7:
- Audi A8:
- Audi e-tron:
- 🎬 Helpful Videos
- 🛍️ Shop This Part
- Symptoms of a Failing Rain & Light Sensor
- What Causes the Failure?
- Buying a Used Automatic Headlight Sensor
- Known Issues, TSBs, and Recalls
- Replacement & Calibration
- Replacement Steps (General Guide):
- Calibration Requirements
- Cost to Replace an Audi Rain & Light Sensor
- Frequently Asked Questions
- 🎟️ Get 5% Off