

Chrysler Pacifica Audio Guide (2017-2025): Fixing Black Screens, No Sound & Radio Swaps
Your definitive guide to diagnosing, replacing, and programming the various Uconnect radio and amplifier systems in the 2017-2025 Chrysler Pacifica and 2017-2018 Pacifica Hybrid.
- Compatibility is critical. You must identify your specific audio system (Base, Alpine, Harman Kardon) and radio features (Nav, Hybrid) before buying a replacement.
- Used radios and amplifiers are NOT plug-and-play. They are VIN-locked and require programming by a dealer or a qualified shop with specialized tools to function.
- Common failures include black screens, total loss of sound (amplifier failure), and software glitches that can cause battery drain or system reboots.
- Before replacing an amplifier for a 'no sound' issue, always check the dedicated amplifier fuse (typically F9) in the under-hood fuse box first.
Identifying Your Pacifica's Audio System

Before attempting any repair or purchasing a replacement part, you must first identify which audio system your vehicle has. Mismatched parts will not work. There are three main audio tiers and several radio variations.
- Base Audio (6 Speakers): Standard on lower trims, this system has no special branding on the speaker grilles.
- Alpine Premium Audio (13 Speakers): This is a common upgrade. Look for the 'Alpine' logo on the front door speaker grilles or the dashboard speaker.
- Harman Kardon Premium Audio (20 Speakers): The top-tier system, found on high-end trims. It features 'Harman Kardon' logos on the door speaker grilles.
Additionally, the radio head units (Uconnect systems) vary based on features:
- Screen Size: Most common is the 8.4-inch touchscreen, though other sizes exist.
- Navigation: Some units have built-in navigation, while others rely on Apple CarPlay/Android Auto.
- Vehicle Type: Gasoline and Hybrid models often use different radio units due to the Hybrid's specific energy-monitoring screens.
- Features: Options like Satellite Radio (SiriusXM) and Uconnect Access telematics determine which radio part number is correct for your van.
Pro Tip: The easiest way to confirm your exact configuration is to provide your Vehicle Identification Number (VIN) to a dealership parts department. They can look up the original factory-installed components.
Common Audio System Failures (2017-2025)

Pacifica owners report a range of issues, from simple glitches to complete hardware failure. Many software-related problems can be temporarily fixed with a system reset.
- Black or Unresponsive Screen: The radio screen goes blank but audio may still play, or the entire unit is unresponsive. This can sometimes be fixed by a soft reset (holding the power and tune knobs 🎬 Watch: How to perform a Uconnect factory reset and reboot) or by disconnecting the battery for several minutes. If it persists, it may indicate internal hardware failure.
- No Sound from Speakers: The radio appears to work correctly, but there is no audio output from any source. This often points to a failed amplifier or a blown amplifier fuse. Some owners report a low thumping or heartbeat sound from the speakers, which is a strong indicator of amplifier failure.
- Constant Static or Tinny Sound: Audio plays, but it is filled with static or sounds thin and 'tinny' regardless of the source (FM, Bluetooth, CarPlay). This can be caused by a failing amplifier or, in some cases, issues with the Active Noise Cancellation (ANC) module.
- "Ghost Touch" or Delamination: The screen registers touches that aren't happening or the top layer of the screen begins to peel or bubble. This is a physical failure of the touchscreen digitizer and requires repair or replacement of the screen assembly.
- Parasitic Battery Drain: A faulty radio module can fail to shut down correctly, leading to a drained battery, even when the vehicle is off. This has been linked to an internal chip failure on the radio's main board.
- Uconnect Glitches: Problems like Apple CarPlay/Android Auto disconnecting, navigation freezing, or Bluetooth pairing issues are common. Many of these are caused by software bugs that can be addressed with an over-the-air (OTA) or dealership-installed software update.
Part 1: The Radio Head Unit (Uconnect)

The head unit is the brain of the system. When it fails, you lose access to media, navigation, and sometimes even climate controls.
Known Issues, Recalls, and TSBs
- Recall VE2 (NHTSA 19V886000): Affecting some 2018-2019 Pacificas, a software error could cause the rearview camera image to remain on the screen after shifting out of reverse. The fix is a software update performed by a dealer.
- TSB 08-009-23: This Technical Service Bulletin addresses a wide range of Uconnect software issues on 2018-2020 models, including radio resets, crackling noises, lost presets, and phone pairing problems. The solution is a software update. The TSB warns that updating from a very old software version directly to the newest can damage the radio, requiring a two-step update process.
- NHTSA Communication 11022029: While not a formal recall or TSB, this document acknowledges widespread issues on Uconnect 5 systems, including navigation freezing and CarPlay instability after an over-the-air update.
Part 2: The Audio Amplifier

The amplifier is responsible for powering the speakers. Its failure results in a total loss of sound. There are different amplifiers for the base, Alpine, and Harman Kardon systems, and they are not interchangeable.
Known Issues and Failure Modes
- Complete Audio Loss: The most common symptom is a sudden and total loss of sound from all speakers. The head unit will appear to function normally.
- Fuse F9: Before replacing the amplifier, always check the 25A amplifier fuse (typically F9 in the under-hood fuse box 🎬 See this guide to locating your Pacifica's radio and amp fuses).
- Location and Water Damage: While the main audio fuses are under the hood, the amplifier itself is often located in the rear of the vehicle, sometimes under a seat or behind a trim panel. This location can make it susceptible to damage from spilled liquids or water leaks.
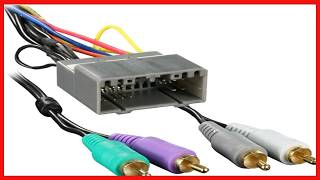
Warning: Installing an aftermarket radio in a Pacifica with a factory amplifier is not straightforward. The factory amplifier communicates with the head unit via a digital data bus, not standard RCA or speaker-level inputs. Bypassing the amplifier or using a special data interface adapter is required to get sound.
🎬 Watch: Why your aftermarket radio isn't playing audio and the fixBuying a Used Audio System Component

Purchasing a used radio or amplifier can save a significant amount of money, but it is critical to get the right part. These are not simple plug-and-play components.
- Verify Your System First: Before you shop, know exactly which system you have (Base, Alpine, Harman Kardon) and the key features of your radio (Gas/Hybrid, Nav/Non-Nav, SiriusXM).
- Match Part Numbers EXACTLY: The best way to ensure compatibility is to match the OEM part number from your original unit. Many part numbers have multiple revisions (ending in AA, AB, AC, etc.). Often, a newer revision will work, but it's crucial to verify this. A seller specializing in these parts can help.
- Anti-Theft and Programming: This is the biggest hurdle. Chrysler radios are tied to the vehicle's VIN. When you install a used radio, it will likely display an anti-theft message and will not function until it is programmed to your vehicle's VIN. This process, often called a "proxy alignment," requires specialized diagnostic tools. A Chrysler dealership can do this. Some advanced independent shops with tools like AlfaOBD or an Autel scanner may also be able to perform the programming. You cannot do this yourself without the proper tools and knowledge.
- Amplifier Programming: Like the radio, a replacement amplifier may also require programming to work correctly with the rest of the vehicle's audio system.
- Inspect for Physical Damage: When buying used, check for obvious signs of damage, especially to the screen on a head unit. For amplifiers, look for any signs of corrosion on the connectors, which would indicate water damage.
Cost of Replacement
| Component | New OEM (Dealer) | Used OEM (Online) | Shop Labor (Install & Program) |
|---|---|---|---|
| Uconnect Head Unit | $1000 - $1800+ | $150 - $400 | $200 - $400 |
| Amplifier | $400 - $800+ | $100 - $250 | $150 - $300 |
Note: Prices are estimates and can vary based on specific part numbers, location, and shop rates. Labor costs include physical installation and the necessary electronic programming.
Frequently Asked Questions (FAQ)
Do I need a code to install a used radio?
It's not a simple 4-digit code. Chrysler radios use VIN-locking for anti-theft. A used radio must be electronically programmed to your vehicle's VIN using dealer-level diagnostic tools. Without this programming, the radio will not work.
My screen is black. How can I reset it?
First, try a soft reset by pressing and holding the volume and tune knobs simultaneously for about 10-15 seconds until the screen reboots. If that doesn't work, you can try a hard reset by disconnecting the negative terminal of the car's main battery for 15-30 minutes. If neither of these fixes the issue permanently, it may be a hardware problem.
Can I upgrade my basic radio to the 8.4-inch navigation system?
Yes, this is a popular upgrade, but it requires more than just the radio. You will need the 8.4-inch screen, the correct radio receiver module, and potentially a new USB media hub and bezel. Companies that specialize in these upgrades pre-program the radio to your VIN for a more plug-and-play installation.
Why is there no sound, but the radio screen works?
This is the classic symptom of a failed audio amplifier or a blown amplifier fuse. Check fuse F9 (25A) in the under-hood fuse box first. If the fuse is good, the amplifier itself is the most likely culprit.
Is the audio system for the Pacifica Hybrid different?
Yes. The head units for the Pacifica Hybrid models are often specific to the hybrid because they contain software and displays for monitoring battery usage and power flow. While they may look identical, a radio from a gasoline model is generally not compatible with a Hybrid model, and vice-versa.
Helpful Videos

Technical Specifications
OEM Part Numbers: 68232028AH 68207344 68207344AF 68207344AG 68207344AH 68207344AI 68298683AE 68323691AG 68323691AH 68331626AB 68331626AC 68331626AD 68331626AE 68331626AF 68331626AG
System components vary based on trim and options. Key variations include: 6-speaker base audio, 13-speaker Alpine premium audio, and 20-speaker Harman Kardon premium audio. Head units are available with and without navigation, and with specific software for gasoline or hybrid models. Most common screen size is 8.4 inches.
We Have This Part in Stock



The information in this article is provided for general reference and educational purposes only. Vehicle specifications, procedures, and part compatibility can vary by production date, trim level, and region. Always consult your vehicle's factory service manual and verify part numbers before purchasing or performing repairs. Safety-critical components such as airbags, seat belts, and braking systems should be installed by a qualified professional.
- Chrysler Pacifica:
- Chrysler Pacifica Hybrid:
- 🎬 Helpful Videos
- 🛍️ Shop This Part
- Identifying Your Pacifica's Audio System
- Common Audio System Failures (2017-2025)
- Part 1: The Radio Head Unit (Uconnect)
- Known Issues, Recalls, and TSBs
- Part 2: The Audio Amplifier
- Known Issues and Failure Modes
- Buying a Used Audio System Component
- Cost of Replacement
- Frequently Asked Questions (FAQ)
- 🎟️ Get 5% Off