

2017-2018 Honda Civic Premium Audio Amplifier: Diagnosing No-Sound Issues and Replacement
This guide covers how to diagnose a failed amplifier in premium audio systems, confirm compatibility, and replace it without needing dealer programming.
- The amplifier is only used in premium audio systems; base models do not have one.
- A replacement amplifier does NOT require dealer programming or flashing; it is plug-and-play.
- It is critical to match the OEM part number exactly to your vehicle's body style (Hatchback, Sedan/Coupe, Type R).
- Before replacing the amp for a 'no sound' issue, always check fuse #20 under the hood and perform a soft reboot of the radio.
Symptoms of a Failing 2017-2018 Civic Audio Amplifier

When the factory amplifier fails, the symptoms are often straightforward but can sometimes be confused with problems with the main radio (head unit). The most common sign of a bad amplifier is a complete loss of sound from all speakers, even though the radio display appears to be on and functioning normally.
- No Sound from Speakers: The radio turns on, you can change stations or sources, but no audio comes out of any speaker.
- Popping or Thumping Noises: A loud 'pop' or 'thump' from the speakers when the car is turned on or off can indicate an issue with the amplifier's power circuits.
- 'Amplifier Protection Mode' Message: Some owners have reported seeing a message on the infotainment screen indicating the amplifier is in protection mode, which it does to prevent further damage.
- Intermittent Audio: Sound may cut in and out randomly. This can be caused by a failing component or a loose connection at the amplifier.
Pro Tip: Before you blame the amplifier, perform a soft reboot of the infotainment system. Many audio glitches in this Civic generation are related to the head unit's software. To do this, turn the car on, then press and hold the audio system's power/volume knob for about 10 seconds until the screen goes black and reboots. If your sound returns, the amplifier is likely not the problem.
Diagnosing the Audio System

If a head unit reboot doesn't solve the problem, follow these steps to confirm the amplifier is the likely culprit.
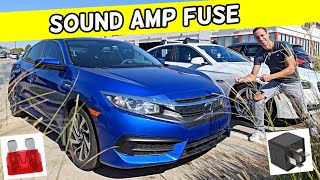
- Check the Fuses: The first and easiest check is for blown fuses. The fuses for the audio system are located in the under-hood fuse box. Check fuse #19 (typically a 15A fuse for the radio) and, more importantly, fuse #20 🎬 Watch this video to locate your Civic's amplifier fuse. (a 20A or 30A fuse for the premium audio amplifier). If a fuse is blown, replace it with one of the same amperage. If it blows again, there is a short circuit that needs to be diagnosed.
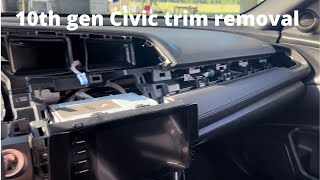
- Confirm Amplifier Location: The amplifier is located behind the passenger-side kick panel, near the floor against the side of the car. You will need to remove the plastic door sill trim and the kick panel to access it. 🎬 See how to safely remove 10th gen Civic interior trim.
- Test for Power: Once you have access to the amplifier, you can use a multimeter to check for power and ground at its main wiring harness. This step confirms that the amplifier is receiving the power it needs to operate. If there is power and ground but still no sound, the amplifier itself is the most likely point of failure.
Buying a Used 2017-2018 Civic Amplifier: What to Look For

A used OEM amplifier is an excellent, cost-effective alternative to an expensive new part. Because this is an electronic module, careful purchasing is key.
Compatibility is Critical: Match Part Numbers
Honda used several different amplifiers for the 2017-2018 Civic depending on the body style and trim. It is absolutely essential to match the part number from your original amplifier. Using the wrong amplifier may result in it not working at all.
- 39186-TGH-A01 / 39186-TGH-A02: Commonly found in the Civic Type R.
- 39186-TGG-A01: Used in Civic Hatchback models.
- 39186-TBG-A12 / 39186-TBG-A02: Used in Civic Sedan and Coupe models (including Si).
Warning: Do not attempt to 'upgrade' a base model Civic by simply adding a premium amplifier. The wiring harness and head unit are different and will not support it without extensive, custom wiring.
Programming and Installation
Good news: A replacement amplifier for the 2017-2018 Honda Civic does not need to be programmed, flashed, or coded to the vehicle. It is a plug-and-play part, provided you have the correct part number for your car's specific trim and body style. There is no anti-theft link between the amplifier and the vehicle; the anti-theft system is contained within the radio head unit.
Physical Inspection
When buying a used amplifier, inspect it carefully:
- Check for Water Damage: The amplifier's location near the floor makes it potentially vulnerable to water intrusion from a clogged sunroof drain or a bad seal. Look for any signs of corrosion, water stains, or a white, chalky residue on the casing or connectors.
- Inspect Connectors: Ensure all the pins in the electrical connectors are straight, clean, and free of corrosion.
- Examine the Case: Look for any dents, cracks, or signs that the casing has been opened, which could indicate a failed repair attempt.
Known Issues, TSBs, and Recalls
While there are no known recalls or common Technical Service Bulletins (TSBs) specifically for the audio amplifier, the 10th generation Civic is known for issues with its infotainment head unit. A class-action lawsuit was filed concerning problems like the system freezing, crashing, or the screen going blank. Honda also released TSBs like 17-048 and 18-001 to update the head unit's software to fix various bugs. It's important to be aware of these issues, as a malfunctioning head unit can sometimes mimic the symptoms of a bad amplifier.
| Part Type | Estimated Cost |
|---|---|
| New OEM | $650 - $990 |
| New Aftermarket | Not commonly available |
| Used OEM | $250 - $450 |
| Shop Labor | $100 - $200 |
Frequently Asked Questions (FAQ)
Does a used 2017-2018 Civic amplifier need to be programmed by a dealer?
No. The amplifier is a plug-and-play module and does not require any programming, flashing, or VIN matching. The vehicle's anti-theft security is tied to the radio head unit, not the amplifier.
Where is the audio amplifier located on a 2017-2018 Honda Civic?
The premium audio amplifier is located behind the passenger-side kick panel, which is the plastic trim piece next to the passenger's right foot.
Can I install a premium audio amplifier in my Civic LX that didn't come with one?
This is not a simple plug-in upgrade. The base audio system has its amplifier built into the head unit and lacks the specific wiring harness and low-level signal outputs needed to connect to the external premium amplifier. It would require significant custom wiring.
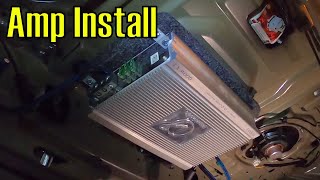
🎬 Watch an example of installing an aftermarket amplifier to a factory head unit.What fuse is for the amplifier on a 10th gen Civic?
In the fuse box located under the hood, you should check fuse #20. It is typically a 20-amp or 30-amp fuse designated for the sound amplifier on models with the premium audio system.
Helpful Videos
Technical Specifications
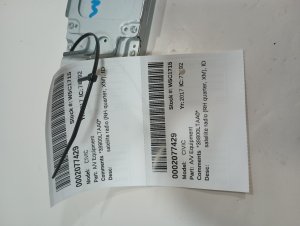
OEM Part Numbers: 39186-TGH-A01 39186-TGH-A02 39186TGHA021M1 39186-TGG-A01 39186-TBG-A12 39186-TBG-A02
System: Premium Audio (10-speaker system) Location: Behind passenger side kick panel
We Have This Part in Stock



The information in this article is provided for general reference and educational purposes only. Vehicle specifications, procedures, and part compatibility can vary by production date, trim level, and region. Always consult your vehicle's factory service manual and verify part numbers before purchasing or performing repairs. Safety-critical components such as airbags, seat belts, and braking systems should be installed by a qualified professional.
- Honda Civic:
- 🎬 Helpful Videos
- 🛍️ Shop This Part
- Symptoms of a Failing 2017-2018 Civic Audio Amplifier
- Diagnosing the Audio System
- Buying a Used 2017-2018 Civic Amplifier: What to Look For
- Compatibility is Critical: Match Part Numbers
- Programming and Installation
- Physical Inspection
- Known Issues, TSBs, and Recalls
- Frequently Asked Questions (FAQ)
- 🎟️ Get 5% Off