

2011-2016 Chevrolet Cruze Pioneer Audio Amplifier: Diagnosis and Replacement Guide
This in-depth guide covers the common failures, compatibility warnings, and critical programming requirements for the 2011-2016 Cruze premium audio amplifier.
- This amplifier is ONLY for 2011-2016 Cruze models with the factory Pioneer premium audio system; it will not work in a base model.
- A replacement amplifier, whether new or used, MUST be programmed to the vehicle by a dealer or qualified shop to function.
- The most common failure symptom is a working radio display but complete silence from all speakers.
- Before replacing the amp, always check the 30A fuse (#35) in the under-hood fuse box first.
Symptoms of a Failing 2011-2016 Cruze Amplifier

When the factory Pioneer amplifier begins to fail, you'll notice distinct audio problems. Because this module drives all the speakers in the premium sound system, a failure can result in complete silence. Here are the most common symptoms:
- No Sound From Any Speakers: The most common symptom is a total loss of audio. The radio display will appear to function normally, but no sound—including music, chimes, or turn signal clicks—will come from the speakers.
- Intermittent Audio / Cutting Out: The sound may cut in and out randomly while driving. This can be caused by internal components overheating or failing.
- Popping, Crackling, or Static Noises: Unwanted noises that are not related to the audio source often point to failing electronic components inside the amplifier.
- Distorted or Muffled Sound: If the music sounds fuzzy, unclear, or lacks its usual punch, especially at normal volumes, the amplifier may no longer be regulating power correctly.
- Only Some Speakers Work: A failure of one or more internal channels can cause sound to stop playing from specific speakers or sections of the car (e.g., no sound from the rear).
- Blowing Fuses: If the amplifier fuse (Fuse #35 in the under-hood fuse box) repeatedly blows, it's a strong indicator of a short circuit or other major failure within the amplifier itself.
Diagnosing the Amplifier

Before condemning the amplifier, perform a few simple checks:
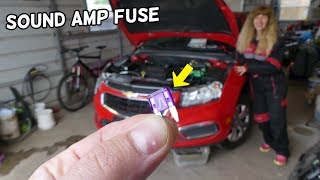
- Check the Fuses: There are three fuses related to the audio system. First, check fuse #4 (20A for the radio) and #5 (7.5A for the display) in the interior fuse panel located under the headlight switch. 🎬 Watch: How to find the interior radio fuses More importantly for a "no sound" issue, check fuse #35 (a 30A green fuse) in the main fuse box under the hood. This fuse provides power directly to the amplifier. 🎬 See this guide to locate the amplifier fuse
- Verify System Settings: Make sure the volume is up and that the balance and fader controls in the radio menu are centered.
- Power Cycle the System: Sometimes, a software glitch can cause the amplifier to become unresponsive. Try turning the car off, opening and closing the driver's door to ensure all modules shut down, and waiting 15-20 minutes before restarting the vehicle.
If these steps don't resolve the issue, the amplifier is the most likely culprit, especially if the radio display and controls are still working perfectly.
Compatibility Warning: This amplifier is ONLY for vehicles originally equipped with the 9-speaker, 250-watt Pioneer premium audio system. It cannot be used to upgrade a base 6-speaker audio system, as the vehicle wiring and radio programming are different. For the 2016 model year, this amplifier only fits the Cruze Limited (the older body style, designated by VIN P), not the redesigned second-generation Cruze.
Buying a Used Amplifier for Your Cruze

A used OEM amplifier is an excellent, cost-effective solution for a failed unit. Since new aftermarket direct-fit amplifiers for this specific system are not available, a recycled original part is often the best choice. Here's what to look for:
- Match the Part Number: The most reliable way to ensure compatibility is to match the part number. The primary OEM part number is 95228887. Remove the trunk trim to view the part number on your original amplifier before ordering a replacement.
- Inspect the Connectors: When you receive the used amplifier, carefully inspect the electrical connector ports for any signs of corrosion, bent pins, or water damage. The amplifier is located in the trunk on the passenger side, an area that can be susceptible to moisture if a trunk seal fails.
- Check for Physical Damage: Look for dents, cracks, or signs that the casing has been opened. A physically damaged unit may have internal problems.
- Why Used OEM is Better: A genuine GM amplifier is designed to work seamlessly with the vehicle's radio and electrical system. It has the correct power output, impedance matching for the Pioneer speakers, and—most importantly—the correct software interface. Universal aftermarket amplifiers would require extensive and complex rewiring.
Programming and Installation

The amplifier is located in the trunk, behind the passenger-side trim panel. Access involves removing the trunk floor covering and the side liner.
Pro Tip: Disconnect the negative terminal of your car's battery before unplugging the old amplifier or plugging in the new one to prevent any risk of electrical shorts.
This part requires programming. According to General Motors service information, a replacement amplifier must be programmed to the vehicle to function correctly. This procedure uses special dealer tools (like GDS2 and the SPS programming system) to configure the amplifier to the vehicle's specific options and VIN. While some well-equipped independent shops may have this capability, a visit to a Chevrolet dealership is often required to complete the installation. An unprogrammed amplifier may not produce sound or function correctly.
Cost to Replace a 2011-2016 Cruze Amplifier
| Part Type | Estimated Cost |
|---|---|
| New OEM | $240 - $435 |
| Used OEM | $75 - $160 |
| Shop Labor (Installation & Programming) | $150 - $250 |
Known Issues, TSBs, and Recalls
There are no specific recalls or widespread Technical Service Bulletins (TSBs) for the failure of the 2011-2016 Cruze audio amplifier itself. However, some related TSBs exist for general audio system glitches, such as PI0055A for intermittent iPod/Bluetooth/USB operation or PI1114 for the radio locking up on 2013-2014 models, which was resolved with a software update. A general GM communication (PIT6471) for newer vehicles describes a similar "no audio" condition caused by a software anomaly in the amplifier, which is often temporarily fixed by a battery disconnect. 🎬 Watch: Quick fix for GM no sound issues While not directly applicable to the 2011-2016 Cruze, it highlights a common failure pattern in GM audio systems.
Frequently Asked Questions (FAQ)
Does a used Chevy Cruze amplifier need to be programmed?
Yes. According to GM's official parts information, a replacement amplifier requires programming and setup procedures to ensure it operates correctly in the vehicle. This pairs the module to your car's VIN and options.
Where is the amplifier located on a 2011-2016 Chevy Cruze?
The Pioneer premium audio amplifier is located in the trunk, mounted behind the trim panel on the passenger's side.
Will replacing the amplifier fix my car's "no sound" problem?
If the radio display works but you have no sound from any speaker, and the amplifier's fuse (#35 under the hood) is good, then a failed amplifier is the most likely cause.
Can I install this Pioneer amplifier to upgrade my base stereo?
No. This amplifier is only for vehicles that came from the factory with the 9-speaker Pioneer premium audio system. The wiring harnesses, speaker setup, and radio programming are different on base models, making this not a plug-and-play upgrade.
Helpful Videos
Technical Specifications
OEM Part Numbers: 95228887 22836325
For 9-speaker Pioneer 250-watt premium audio system. Location: Trunk, passenger side.
We Have This Part in Stock



The information in this article is provided for general reference and educational purposes only. Vehicle specifications, procedures, and part compatibility can vary by production date, trim level, and region. Always consult your vehicle's factory service manual and verify part numbers before purchasing or performing repairs. Safety-critical components such as airbags, seat belts, and braking systems should be installed by a qualified professional.
- Chevrolet Cruze: