

2007-2016 Honda CR-V Antenna: Solving Reception Issues and Water Leaks
This guide covers the common failure points of the 2007-2016 CR-V antenna, from poor radio reception to headliner water leaks, and explains how to choose the correct used replacement.
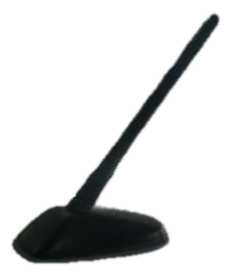
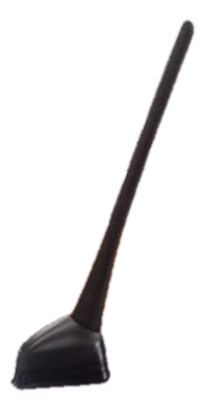
- Compatibility is critical. Antennas differ based on whether the CR-V has a standard radio, satellite radio (XM), or GPS navigation. Visually match the connectors before buying.
- The most common failure is the rubber base gasket, which cracks and causes water to leak into the headliner and trunk area.
- Poor radio reception, especially on the AM band, is a primary symptom of a failing antenna base or amplifier.
- Replacement is a simple DIY task that involves partially lowering the rear headliner to access a single mounting nut and the electrical plugs.
Key Variants and Compatibility

Before purchasing a replacement antenna for a 2007-2016 Honda CR-V, it is critical to identify your vehicle's original audio system. Honda used different antenna bases depending on the factory-installed options, and they are not interchangeable. The primary differences relate to whether the vehicle was equipped with Satellite Radio (XM) and/or a GPS Navigation system.
- Standard AM/FM Radio: Found on base models like the LX and some EX trims, this antenna has the simplest connection, typically a single coaxial cable for radio reception.
- Satellite Radio (XM): Common on EX-L and Touring trims, this version includes additional wiring and a different connector to handle the satellite signal.
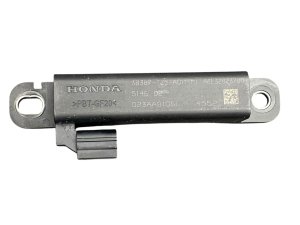
- GPS Navigation System: On models equipped with factory navigation, the antenna assembly also includes the receiver and wiring for the GPS signal. This is often the most complex variant with multiple connectors.
Warning: Always compare the electrical connectors on the bottom of the antenna base to your original part before purchasing. A visual match is the best way to guarantee compatibility. An antenna from a vehicle with satellite radio will not work correctly on a vehicle that only had a standard AM/FM radio, and vice-versa.
Common Symptoms of a Failing CR-V Antenna

A failing antenna on a Honda CR-V can manifest in several ways, some of which are not immediately obvious.
- Poor Radio Reception: The most common symptom is weak, static-filled, or intermittent reception on AM and/or FM bands. You might notice that stations you could previously tune in clearly are now noisy or fade in and out. 🎬 Watch: How to diagnose a failing car antenna
- Water Leaking Into the Cabin: The rubber gasket at the base of the antenna can dry out, crack, and fail over time. This allows water to seep past the seal, drip onto the headliner, and often run down the C-pillar into the spare tire well in the trunk. Stains on the headliner around the rear dome light are a tell-tale sign of this issue. 🎬 See: Tracking down a CR-V trunk water leak
- Visible Damage: The antenna mast can be broken or bent by automatic car washes or low-hanging branches. The plastic or rubber base can also become cracked and brittle from sun exposure.
- Loss of Satellite Radio or GPS Signal: If your CR-V is equipped with these features, a failing antenna base can cause intermittent or total loss of signal, leading to dropouts in satellite radio or a GPS that cannot find its location.
Pro Tip: If you experience a sudden loss of radio signal, first check that the antenna mast is securely screwed into the base. Sometimes they can become loose over time or after a car wash.
Buying a Used 2007-2016 CR-V Antenna: What to Inspect

A used OEM antenna can be a cost-effective solution, but a careful inspection is necessary to ensure you're getting a good part.
- Inspect the Rubber Gasket: This is the most critical checkpoint. Flip the antenna base over and carefully examine the rubber seal. It should be soft, pliable, and free of any cracks, tears, or brittleness. A hardened or damaged gasket will not seal against the roof and will cause water leaks.
- Check for Physical Damage: Look for cracks in the plastic housing of the base. Check the threaded insert where the mast screws in for corrosion or stripped threads.
- Verify the Connectors: Confirm the number and type of electrical connectors on the bottom of the base. Match them exactly to the part you are replacing. Take a photo of your original antenna's connectors before you shop.
- Ask About the Donor Vehicle: If possible, find out the history of the vehicle the part came from. An antenna from a vehicle in a hot, dry climate may have more sun damage, while one from a northern climate may have more corrosion.
Choosing a used OEM antenna is often a better choice than a cheap aftermarket alternative. Genuine Honda parts are made with higher-quality materials, ensuring a better fit and a more durable weather seal, which is critical for preventing leaks.
Antenna Replacement Guide

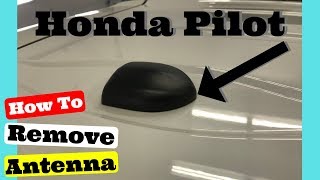
Replacing the antenna base on a 2007-2016 CR-V is a straightforward DIY job. The key is 🎬 Watch: Step-by-step roof antenna removal walkthrough to be gentle with the interior trim panels.
- Unscrew the Antenna Mast: Start by unscrewing the mast from the outside.
- Access the Interior: Open the rear hatch. You will need to lower the back edge of the headliner. To do this, remove the rear interior dome light assembly. You may also need to pop loose the top portion of the C-pillar trim panels on both sides. Use a plastic trim removal tool to avoid scratching the panels.
- Lower the Headliner: Gently pull down the rear of the headliner. You only need a few inches of clearance to access the antenna mounting nut and wiring.
- Disconnect and Unbolt: Disconnect the electrical connector(s) for the antenna. Then, use a socket wrench (typically 22mm) to remove the nut holding the antenna base to the roof.
- Install the New Antenna: Clean the roof area around the mounting hole. Guide the new antenna's wiring through the hole and position it correctly. Hand-tighten the mounting nut, then give it a final snug turn with the wrench. Do not overtighten, as this can damage the base or the roof.
- Reconnect and Reassemble: Plug in the electrical connectors. Carefully push the headliner back into place and reinstall the trim pieces and dome light. Screw the antenna mast back on from the outside.
Known Issues, Recalls, and Service Bulletins
As of early 2026, there are no specific recalls or Technical Service Bulletins (TSBs) from Honda directly addressing the antenna assembly for the 2007-2016 CR-V. However, the issue of the base gasket failing and causing water leaks is a widely documented problem among owners in online forums. Other recalls for this generation CR-V have been issued for issues like airbag inflators and rear frame corrosion in certain regions, but none pertain to the antenna.
Cost Comparison
| Part Type | Estimated Price Range |
|---|---|
| New OEM (Honda) | $60 - $270, depending on variant |
| New Aftermarket | $25 - $80 |
| Used OEM | $40 - $120 |
| Shop Labor | $100 - $180 |
Frequently Asked Questions (FAQ)
Can I just replace the rubber seal on the bottom of the antenna base?
No, Honda does not sell the rubber gasket as a separate part. To fix a leaking seal, the entire antenna base assembly must be replaced.
My antenna mast broke off in a car wash. Can I just replace the mast?
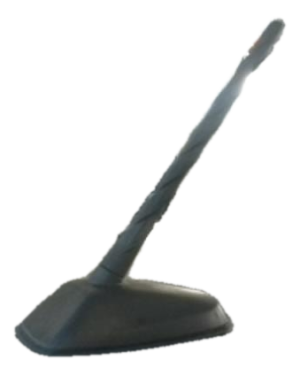
Yes, if only the screw-on mast is broken, you can buy a replacement mast. However, often the threaded stud breaks off inside the base. If you cannot extract the broken piece with a screw extractor, you will need to replace the entire base assembly.
How do I know if my CR-V has satellite radio?
The easiest way is to check your radio controls. If you have a button labeled 'XM' or 'SAT', your vehicle is equipped with satellite radio. Higher trim levels like the EX-L and Touring are most likely to have this feature.
Why is my AM reception so bad, but FM is okay?
AM radio signals are often the first to degrade when an antenna system starts to fail. This could be an early sign of a problem with the antenna's amplifier (located in the base) or a poor connection in the coaxial cable.
Helpful Videos

Technical Specifications
OEM Part Numbers: 39151-SWA-306 39152-SWA-A01 39152-SWA-A02 39152-SWA-A03 39152-SWA-A11 39152-SWA-A12 39152-SWA-A13 39152-T0A-A01 39152-T0A-A11 39152-T0A-A22 39835-SWA-A02
Varies by audio system (Standard AM/FM, XM Satellite, GPS Navigation). Requires visual confirmation of connectors.
We Have This Part in Stock

The information in this article is provided for general reference and educational purposes only. Vehicle specifications, procedures, and part compatibility can vary by production date, trim level, and region. Always consult your vehicle's factory service manual and verify part numbers before purchasing or performing repairs. Safety-critical components such as airbags, seat belts, and braking systems should be installed by a qualified professional.
- Honda CR-V: