

1992-1993 Acura Integra Alternator: Diagnosing Noises and Choosing a Replacement
A complete guide to understanding common alternator failures, symptoms, replacement costs, and how to buy a reliable used unit for your 1992-1993 Integra.
- The most common failure symptom is a grinding or whining noise from the engine that changes with RPM, indicating bad bearings.
- Verify you are getting an 80 Amp Denso-type alternator with a 4-groove pulley, as this is the correct OEM specification for both 1.7L and 1.8L engines.
- A simple voltage test can confirm failure: the battery should read ~13.5-14.5V with the engine running. If it's near 12.6V or dropping, the alternator is bad.
- When replacing, inspect for oil leaks from the valve cover gasket above the alternator, as this is a common reason for premature failure.
Symptoms of a Failing 1992-1993 Integra Alternator

A failing alternator in a second-generation Integra provides several distinct warning signs. Recognizing them early can prevent you from being stranded with a dead battery.
- Grinding or Whining Noise: The most commonly reported symptom is a grinding, howling, or whining noise coming from the engine bay. This sound is caused by worn-out internal bearings and will typically change pitch with engine RPM (getting louder as you accelerate).
- Dimming Lights and Electrical Issues: You may notice the headlights, dashboard lights, and interior dome light are dimmer than usual, especially at idle. They might flicker or brighten as you rev the engine. Other accessories like the radio or power windows may malfunction or seem slow.
- Battery Warning Light: A battery-shaped warning light on your instrument cluster is a direct indicator of a charging system problem. This light means the alternator's output voltage is too low and the car is running off battery power alone.
- Dead or Weak Battery: If the alternator isn't recharging the battery, you'll find it difficult to start the car, especially after it has been sitting. You might hear a slow, sluggish crank or just a clicking sound. A battery that repeatedly dies is a classic sign of a bad alternator.
- Smell of Burning Rubber or Wires: A hot, burning smell can indicate that the alternator's drive belt is slipping on a seized pulley. A smell of hot electrical components can point to an overworked or shorting alternator.
Diagnosing the Alternator

Before replacing the alternator, a few simple tests can confirm it's the source of the problem.
- Voltage Test: This is the most definitive test. Using a simple multimeter set to DC voltage, measure the voltage across your battery terminals.
- Engine Off: A healthy, fully charged battery should read approximately 12.6 volts.
- Engine On: Start the car. The reading should jump to between 13.5 and 14.5 volts. If the voltage stays near 12.6V or starts to drop, the alternator is not charging.
- Listen to the Unit: With the engine running, carefully listen to the alternator. A distinct grinding or whining sound points to bad bearings.
- Inspect the Belt: Turn the engine off and check the alternator drive belt. It should be tight and free of cracks or fraying. A loose belt can cause charging issues.
Pro Tip: An oil leak from the valve cover gasket, a common issue on Honda B-series engines, can drip directly onto the alternator. This oil saturation can cause the alternator to fail prematurely. When replacing the alternator, inspect the area above it for any signs of fresh oil.
Buying a Used 1992-1993 Integra Alternator: What to Look For

For a vehicle of this age, a quality used OEM alternator is often a more reliable and cost-effective choice than a cheap, new aftermarket part. The original Denso units are known for their durability. Here’s what to check.
- Verify Compatibility: The 1992-1993 Integra (for both 1.7L and 1.8L engines) uses an 80 Amp Nippondenso/Denso alternator with a 4-groove pulley. Some aftermarket listings may show a 65 Amp version, which may not be sufficient. Always match the specifications of your original unit.
- Physical Inspection: When inspecting a used alternator, look for a few key things. The case should be free of heavy corrosion or signs of being soaked in oil. Spin the pulley by hand; it should rotate smoothly and quietly. Any roughness, grinding, or wobble indicates bad bearings. Check that the electrical connectors are intact and not corroded.
- Mileage and Source: Ask for the mileage of the donor vehicle if possible. While even high-mileage OEM Denso units can be reliable, a lower-mileage part is always a safer bet. Buying from a reputable recycler that tests their parts provides an extra layer of security.
- OEM vs. Aftermarket: A used OEM Denso alternator that has been tested is often superior to a new, budget-brand aftermarket unit. Many cheap aftermarket alternators use lower-quality components and have a higher failure rate, sometimes within the first year or two.
Cost of Replacement
The cost to replace a 1992-1993 Integra alternator varies depending on the part source and labor.
| Part Type | Estimated Cost (Part Only) |
|---|---|
| New OEM (Acura/Denso) | $325 - $450+ (Often discontinued) |
| Remanufactured (Quality) | $95 - $220 |
| New Aftermarket | $140 - $190 |
| Used OEM | $50 - $125 |
| Shop Labor | $218 - $320 |
Known Issues, Recalls, and TSBs
For the 1992-1993 model years, there are no specific recalls or Technical Service Bulletins (TSBs) issued by the NHTSA related to the alternator. However, premature alternator bearing failure is a widely known common problem for Integras from this era. There were several recalls for these model years, but they pertain to other systems like automatic transmissions and seatbelts.
Alternator Replacement Overview

Replacing the alternator on a 1992-1993 Integra is a manageable DIY job for those with some mechanical experience. Access is tight, but it can be done without removing the driveshaft, which some service manuals suggest.
Warning: Always disconnect the negative battery terminal before beginning any work on the charging system to prevent electrical shorts and injury.
- Disconnect Battery: Disconnect the negative terminal from the battery.
- Loosen Belts: Loosen the 12mm top alternator bolt (the tensioner bolt) and the 14mm lower pivot bolt. This will allow you to push the alternator forward to create slack in the belt.
- Remove Belt: Slip the drive belt off the alternator pulley.
- Disconnect Wiring: Unplug the main electrical connector (a green plug) and unbolt the 10mm nut holding the main power wire to the alternator post.
- Remove Alternator: Remove the upper and lower bolts completely and maneuver the alternator out of the engine bay. This can be tricky; some owners find it easiest to remove it from the top by temporarily moving the brake fluid reservoir, while others wiggle it out from the bottom.
- Installation & Tensioning: Installation is the reverse of removal. After the new alternator is in place and the belt is on, use a pry bar to apply tension to the belt while you tighten the tensioner bolt. The belt should have about 1/2 inch of play when pressed firmly. Finally, tighten the lower pivot bolt.
Torque Specifications
Using correct torque specs is crucial for a lasting repair. These values apply to the B-series engines found in these Integras.
- Alternator Upper (Tensioner) Bolt: 17 ft-lbs
- Alternator Lower (Pivot) Bolt: 33 ft-lbs
Related Parts to Inspect
When replacing your alternator, it's wise to inspect a few related components that can either be damaged by the failure or cause the new part to fail.
- Drive Belt: If the belt is old, cracked, or glazed, replace it. It's an inexpensive part and you've already done most of the labor.
- Battery: A failing alternator can strain and damage a battery. Have the battery load-tested at an auto parts store to ensure it can still hold a proper charge.
- Valve Cover Gasket: Check for oil leaks from the valve cover directly above the alternator. If it's leaking, replace the gasket to protect your new alternator.
Frequently Asked Questions (FAQ)
Can I use a higher-output alternator on my Integra?
Yes, high-output alternators are available from aftermarket suppliers. This is a popular upgrade for owners who have added significant electrical loads, such as a powerful audio system or auxiliary lighting. If you upgrade, you must also upgrade the main power wire from the alternator to the battery (known as the "Big 3 Upgrade") to handle the extra current safely.
What is the difference between a Denso and a Mitsubishi alternator?
For the 1992-1993 Integra, the original equipment manufacturer was Nippondenso (now Denso). While Mitsubishi also makes alternators for other Honda/Acura models, the correct fitment for this specific vehicle is the Denso type. They are not interchangeable without modification.
Will a bad alternator drain my battery when the car is off?
Yes, it can. A failure in the alternator's internal diode rectifier can cause a parasitic draw, meaning it draws power from the battery even when the car is turned off. If you have a healthy battery that repeatedly dies overnight, a faulty alternator could be the cause.
How do I properly tension the alternator belt?
After installing the new alternator and belt, use a pry bar between the engine block and the alternator case to pull the alternator away from the engine, tensioning the belt. While holding tension, tighten the top 12mm tensioner bolt. A properly tensioned belt should have about a half-inch of deflection when you press on it firmly at the longest point between pulleys. Once set, fully tighten the lower 14mm pivot bolt.
Helpful Videos
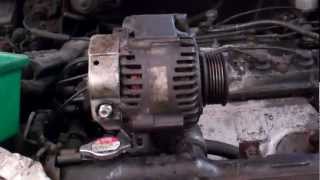
Technical Specifications
OEM Part Numbers: 06311-PR4-C01 06311-PR4-C01RM 31100-PR3-033 31100-PR4-C01 31100-PR4-C02 31100-PR4-C01RM 100211-5350 100211-8910 100211-8911 CJP92
Amperage: 80 Amps (some aftermarket units listed as 65 Amps) Voltage: 12V Pulley: 4-Groove Serpentine Rotation: Counter-Clockwise Regulator: Internal Manufacturer: Nippondenso / Denso

The information in this article is provided for general reference and educational purposes only. Vehicle specifications, procedures, and part compatibility can vary by production date, trim level, and region. Always consult your vehicle's factory service manual and verify part numbers before purchasing or performing repairs. Safety-critical components such as airbags, seat belts, and braking systems should be installed by a qualified professional.
- Acura Integra:
- 🎬 Helpful Videos
- Symptoms of a Failing 1992-1993 Integra Alternator
- Diagnosing the Alternator
- Buying a Used 1992-1993 Integra Alternator: What to Look For
- Cost of Replacement
- Known Issues, Recalls, and TSBs
- Alternator Replacement Overview
- Torque Specifications
- Related Parts to Inspect
- Frequently Asked Questions (FAQ)
- 🎟️ Get 5% Off