

2011-2018 Dodge Durango A/C Control Module: A Guide to Failures & Compatibility
Solving common A/C problems in your Durango starts with understanding its complex climate control module—here's how to diagnose, buy, and replace it correctly.
- Compatibility is critical. The module MUST match your Durango's exact options: screen size, seat features (heated vs. ventilated), and park assist.
- Many issues like erratic fan speed or random shutdowns can be caused by software glitches fixed by a dealer reprogram (TSB 24-004-17).
- Before replacing the module, always check simple things first: HVAC fuses and cabin air filter.
- After installation, a calibration procedure is required. This often happens automatically by leaving the key in the 'ON' position for two minutes before starting the engine.
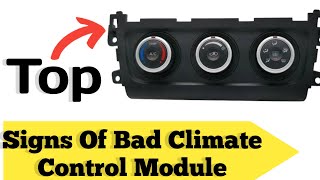
Symptoms of a Failing A/C Control Module 🎬 Watch this overview of common bad climate control module symptoms

When the A/C control module in a 2011-2018 Dodge Durango begins to fail, it can cause a range of frustrating issues. Because the module controls the entire system, symptoms can sometimes be mistaken for other problems like a bad blower motor or a refrigerant leak. Always start with the simplest checks, like inspecting fuses, before assuming the module is at fault.
- Unresponsive Controls: Buttons, dials, or touch-screen functions do not respond, or there is a significant delay. You might not be able to change fan speed, temperature, or the direction of airflow.
- Incorrect Temperature Output: The system blows hot air when set to cold, or cold air when set to hot. It may also produce brief bursts of hot or cold air after an adjustment.
- Fan Speed Issues: The blower fan may be stuck on one speed (often high), not turn on at all, or cycle erratically on its own, especially in "Auto" mode.
- Flashing A/C Light or Display: A blinking light on the A/C button or a flickering control panel display can indicate that the system has detected a fault and shut down.
- Loss of Dual-Zone or Rear Climate Control: One side of the vehicle may be a different temperature than the other, or the rear climate controls may stop working entirely.
- System Shuts Off Randomly: The entire HVAC system may turn off during operation, sometimes during a cold engine start, requiring you to manually turn it back on.
Known Issues, Recalls, and Technical Service Bulletins (TSBs)

While there are no direct recalls for the A/C temperature control module itself on the 2011-2018 Durango, several Technical Service Bulletins (TSBs) have been issued by Dodge to address software-related HVAC problems. These bulletins instruct dealers to reprogram the module to fix specific issues.
- TSB 24-004-17: Released for 2014-2015 models, this TSB addresses several customer complaints including the HVAC system shutting off during a cold start, erratic blower speeds in auto mode, and brief bursts of hot or cold air after changing the temperature. The fix is a software update for the HVAC module.
- TSB 24-009-19: This bulletin applies to 2019 models but is relevant as it shows a pattern of software issues. It addresses a condition where the controller overheats the cabin during a cold start. The fix is to reprogram the HVAC module with updated software.
- Customer Satisfaction Notification R62: While for a different vehicle (Grand Caravan/Town & Country), this notification is a good example of how FCA addresses widespread HVAC issues. It involved reprogramming the module to prevent blend door actuators from binding and failing, a common issue across many vehicles.
No major safety recalls specifically target the front A/C control module for this generation of Durango. However, always check for any outstanding recalls on your vehicle by VIN.
Pro Tip: Before replacing the module for a software-related symptom described in a TSB, check with a Dodge dealer. They may be able to perform a software flash that resolves the issue for less than the cost of a new part.
Buying a Used 2011-2018 Durango A/C Control Module: The Definitive Checklist

Purchasing a used A/C control module is an excellent way to save money, but it is absolutely critical to get the exact correct part. The Durango was offered with a vast number of feature combinations, and the control module must match your vehicle's original equipment perfectly. An incorrect module will not work.
Step 1: Match Your Vehicle's Options EXACTLY
This is the most important step. The module is programmed to work with a specific set of features. Before you even look for a part number, you must know which options your Durango has. Look for a used module from a donor vehicle with the identical feature set.
Warning: There is no 'close enough.' A module from a vehicle with heated seats will NOT work correctly in a vehicle with heated AND ventilated (cooled) seats. A module for a 5.0-inch screen will NOT work in a vehicle with an 8.4-inch screen.
Verify these options on your vehicle before buying:
- Temperature Control Type: Does your vehicle have Automatic Temperature Control (ATC) where you set a specific temperature, or manual controls with simple blue-to-red dials?
- Seat Features: Does your vehicle have Heated Front Seats only, or does it have both Heated AND Ventilated (Cooled) Front Seats?
- Screen Size: Is your Durango equipped with the 5.0-inch, 7.0-inch, or 8.4-inch Uconnect touch screen? The control module is different for each.
- Park Assist: Does your vehicle have rear park assist sensors? The button for this feature is integrated into some control panels.
- Rear A/C: Does your vehicle have a separate climate control system for the rear passengers?
- Engine Stop/Start: Does your vehicle have the automatic engine stop/start feature? The button for this is also on the control panel.
Step 2: Verify the Part Number
Once you have confirmed the options, try to match the part number from your original module. You can find this number on a sticker on the unit's housing after removal. While many part numbers exist and some may supersede others, matching the number is the safest way to ensure compatibility. If you can't get your original number, provide the seller with your VIN and a detailed list of your vehicle's features.
Step 3: Physical Inspection Checklist
When you have the used part in hand, inspect it carefully:
- Buttons and Knobs: Press every button and turn every knob. They should move freely without sticking and have a solid, tactile click. Check for excessive wear on the button graphics.
- Connectors: Look at the electrical connector ports on the back. Ensure there are no bent or corroded pins and that the plastic housing isn't cracked or broken.
- Mounting Tabs: Check that all plastic mounting tabs are intact. Broken tabs will result in a loose, rattling fit in your dashboard.
- No Signs of Liquid Damage: Look for any sticky residue or discoloration, especially around the seams or in the connector ports, which could indicate a spilled drink caused the original failure.
Cost Comparison: New vs. Used
The cost of replacing an A/C control module can vary significantly depending on the source of the part.
| Part Source | Estimated Cost Range |
|---|---|
| New OEM (Dealer) | $250 - $500+ |
| New Aftermarket | $150 - $300 |
| Used OEM (Recycled) | $75 - $200 |
| Shop Labor | $50 - $150 |
Replacement Guide

Replacing the A/C control module in a 2011-2018 Durango is a relatively straightforward job suitable for a DIYer with basic tools.
- Difficulty: 2/5
- Estimated Time: 30-60 minutes
- Tools Needed: Plastic trim removal tools, Phillips screwdriver or 7mm socket.
Step-by-Step Overview
- Disconnect the Battery: Before starting any electrical work, disconnect the negative terminal of your vehicle's battery to prevent short circuits.
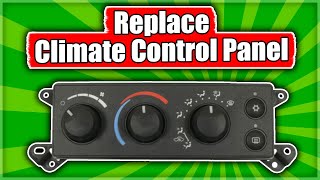
- Remove the Center Stack Trim: 🎬 See how to remove and replace a Dodge climate control panel Using a plastic pry tool, carefully pry away the large trim piece that surrounds the radio and climate controls. It is held in by clips. Start from the bottom and work your way up.
- Unscrew the Control Module: The A/C control module is typically held in place by two or four screws. Remove these screws.
- Disconnect and Remove: Gently pull the module out from the dash. Press the release tab on the electrical connector(s) on the back and pull them straight out. The module is now free.
- Install the New Module: Connect the electrical harness to the new module, slide it into place, and secure it with the screws. Re-attach the center stack trim by aligning the clips and pressing it firmly into place.
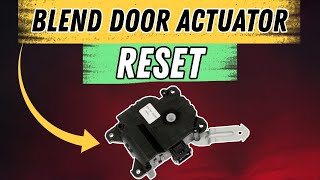
- Perform Calibration Procedure: 🎬 Watch how to calibrate blend door actuators on a Dodge Reconnect the battery. A calibration procedure is often required for the system to learn the positions of the new actuators and controls.
Post-Installation: HVAC Calibration Procedure
After replacing the module or disconnecting the battery, the HVAC system may need to be recalibrated. This allows the control module to learn the full range of motion of the blend doors. While procedures can vary slightly, a common method is:
- Turn the ignition to the 'ON' position (without starting the engine).
- Wait for 1-2 minutes. During this time, do not touch any of the climate controls. You may hear the blend doors moving behind the dash as they cycle through their positions.
- After two minutes, turn the ignition off, then start the vehicle and test all functions of the HVAC system—temperature, fan speed, and all vent modes.
If this simple relearn does not work, a more advanced calibration may need to be performed with a diagnostic scan tool.
Frequently Asked Questions (FAQ)
Do I need to program a used A/C control module?
Generally, no. If you purchase a used module that is an exact match for your vehicle's original features (screen size, seat options, etc.), it should be plug-and-play after performing the calibration procedure. However, some software-related issues can only be fixed with a dealer re-flash.
Why are my A/C controls not working after the battery died?
The module may have lost its calibration settings. Before assuming the part has failed, try the HVAC calibration procedure mentioned above. Disconnecting the battery for 10-15 minutes and then reconnecting can force the system to recalibrate itself.
Can I upgrade from manual to automatic climate control by just swapping the module?
No. This is a much more complex conversion. The automatic system uses additional components, including sun sensors and in-cabin temperature sensors, as well as different wiring and blend door actuators. Simply swapping the control panel will not work.
My A/C blows air but it's not cold. Is it the control module?
It's possible, but less likely. An electrical issue with the climate control is a common cause of A/C problems, but the most frequent reason for an A/C system blowing warm air is a refrigerant leak. Other causes include a faulty A/C compressor or a clogged cabin air filter. A proper diagnosis is needed to pinpoint the cause.
Helpful Videos

Technical Specifications
OEM Part Numbers: 05091857AA 05091857AB 5091857AB 55111865AG 55111865AL 55111865AP 55111865AQ 55111865AR 68253735ab 68253735ac 68253735ad 68253735ae 68253735af 68158253AD
Compatibility is determined by vehicle options such as screen size (5.0", 7.0", 8.4"), seat features (heated, ventilated), park assist, and rear A/C.
We Have This Part in Stock



The information in this article is provided for general reference and educational purposes only. Vehicle specifications, procedures, and part compatibility can vary by production date, trim level, and region. Always consult your vehicle's factory service manual and verify part numbers before purchasing or performing repairs. Safety-critical components such as airbags, seat belts, and braking systems should be installed by a qualified professional.
- Dodge Durango:
- 🎬 Helpful Videos
- 🛍️ Shop This Part
- Symptoms of a Failing A/C Control Module
- Known Issues, Recalls, and Technical Service Bulletins (TSBs)
- Buying a Used 2011-2018 Durango A/C Control Module: The Definitive Checklist
- Step 1: Match Your Vehicle's Options EXACTLY
- Step 2: Verify the Part Number
- Step 3: Physical Inspection Checklist
- Cost Comparison: New vs. Used
- Replacement Guide
- Step-by-Step Overview
- Post-Installation: HVAC Calibration Procedure
- Frequently Asked Questions (FAQ)
- 🎟️ Get 5% Off