

2017-2024 Pacifica & Voyager Rear HVAC Guide: Fixing No Air in the Back
A complete guide to diagnosing and fixing the rear auxiliary climate control unit in your 2017-2024 Chrysler Pacifica or 2020-2024 Chrysler Voyager.
- This guide is for the REAR auxiliary HVAC unit only, located in the passenger-side cargo area of Pacifica and Voyager models with rear climate control.
- The most common failures are the rear blower motor (causing no airflow) or a refrigerant leak (causing warm air from rear vents).
- Replacement is a labor-intensive job (4-6 hours) requiring the removal of extensive interior trim panels, making it a difficult DIY.
- If the rear A/C stops working but the front is okay, the system is likely low on refrigerant; the rear system is always the first to show symptoms.
Is This Your Part? Key Compatibility Warnings

Important: This guide covers the REAR auxiliary HVAC unit only. It is for vehicles factory-equipped with rear heating and air conditioning. If your minivan does not have rear climate controls, you do not have this part. The symptoms and repairs discussed here do not apply to the main dashboard A/C and heater system.
Symptoms of a Failing Rear HVAC Assembly

Problems with the rear HVAC unit can show up in several ways. Because the assembly contains multiple components, diagnosing the exact point of failure depends on the specific symptom.
1. No Air From Rear Vents
This is the most common symptom. If you turn the rear controls on and hear nothing, and no air comes from the ceiling or floor vents in the back, the problem is almost always electrical or a failed rear blower motor. Start by checking the fuses for the rear HVAC system. 🎬 Watch: How to find the rear blower motor fuse and relay If the fuses are good, the rear blower motor itself or its resistor has likely failed.
2. Weak or Inconsistent Airflow
If air comes out of the rear vents but seems weak, the blower motor may be worn out and unable to reach its proper speed. In some cases, this could also indicate a blockage in the ductwork or a clogged condensate drain for the A/C evaporator, which can cause the housing to fill with water and restrict airflow.
3. Grinding, Squealing, or Rattling Noises
Any unusual noises from the rear passenger-side cargo area that change with the fan speed point to a problem. Squealing or grinding usually indicates worn bearings in the blower motor. A rattling or clicking sound could be debris in the fan cage or, more commonly, a broken blend door actuator inside the housing.
🎬 See how to fix a clicking noise by replacing the actuator4. Rear Vents Blow, But Air Isn't Cold
If the fan is working but the air isn't cold (while the front A/C works fine), it's a classic sign of low refrigerant. The rear A/C system is the last to receive refrigerant, so it's the first to stop cooling when the system is low. You might also hear a hissing or bubbling sound from the rear cargo area, which indicates a refrigerant leak. Other causes include a failed temperature blend door actuator stuck in the 'hot' position or a leak in the rear evaporator core itself.
5. Rear Vents Blow, But Air Isn't Hot
If you have good airflow but the air never gets warm in the winter, the issue could be a clogged rear heater core, a failed temperature blend door actuator stuck in the 'cold' position, or air trapped in the coolant lines that run to the back of the vehicle. Because the rear heater core is a high point in the cooling system, it is prone to trapping air, especially after a coolant service.
Known Issues, TSBs, and Recalls

There are no major recalls specifically for the entire rear HVAC assembly on the Chrysler Pacifica or Voyager. However, some related issues are known:
- A/C Compressor TSB: Chrysler issued TSB 24-011-23 for some 2022 Pacifica models due to A/C compressor failure, which would cause both front and rear A/C to fail.
- Refrigerant Leaks: Slow leaks from the rear A/C lines or the evaporator core are a common complaint. This results in the rear A/C failing first, followed by the front A/C as the refrigerant level drops further.
- Blower Motor Failure: The rear blower motor is a frequent failure point, leading to a complete lack of airflow in the back. 🎬 Watch this walkthrough on how to replace the rear blower motor
- Blend Door Actuators: The small electric motors that control the blend doors can fail, getting stuck in one position and preventing temperature changes.
Buying a Used A/C Evaporator Housing

Given that a complete aftermarket assembly is not widely available, a used OEM unit is often the most practical and cost-effective solution. Here’s what to inspect to ensure you get a quality part.
- Verify Part Numbers: The housing has gone through several revisions. Common part numbers include 68342100AA, 68342100AB, and 68342100AF. While later revisions are generally preferred, matching your original part number is the safest way to ensure compatibility.
- Inspect the Housing: Carefully check the entire black plastic housing for cracks, especially around the mounting points and seams. Shipping damage is common.
- Check for Leak Evidence: Look closely at the pipe connections for the heater core (coolant) and evaporator (A/C). Any chalky, colorful residue on the heater core pipes indicates a past coolant leak. An oily, grimy film on or around the A/C evaporator or its connections is a sure sign of a refrigerant leak. Do not buy a unit with any signs of leaks.
- Test the Blower Motor: Reach into the housing and spin the blower fan cage by hand. It should spin freely and smoothly with no grinding or wobbling.
- Examine the Cores: Look at the fins on both the heater core and evaporator core. They should be straight and clean. Severely bent fins or heavy corrosion can reduce performance.
Pro Tip: If you've diagnosed the problem to a single component like the blower motor or a blend door actuator, you can replace just that part. However, the labor to access the assembly is the same, so if you are paying a shop or your time is valuable, replacing the entire used assembly can be a smart move to prevent future failures of the other components.
Cost Breakdown
The cost to repair the rear HVAC system varies widely depending on what has failed. Replacing the entire assembly is a high-labor job.
| Part/Service | Estimated Cost | Notes |
|---|---|---|
| New OEM Assembly | $450 - $600+ | Dealer part, may not include all actuators or motors. |
| New Aftermarket Assembly | Not Generally Available | Individual components (blower motor, cores) are available. |
| Used OEM Assembly | $150 - $350 | Best value. Includes all components. |
| Shop Labor (Assembly Replacement) | $500 - $900 | 4-6 hours of labor. Does not include A/C recharge or coolant refill if needed. |
| Shop Labor (Evaporator Core Only) | $1,100 - $1,700+ | Extremely labor-intensive and requires specialized A/C equipment. |
Frequently Asked Questions (FAQ)
Can I replace the rear HVAC assembly myself?
This is a difficult job (rated 4 out of 5) recommended for experienced DIY mechanics. The main challenge is removing all the interior trim panels in the rear cargo area without breaking clips. If you are replacing a leaking evaporator or heater core, you will also need to drain the coolant and/or have the A/C refrigerant professionally recovered, which requires special tools.
My rear A/C is leaking refrigerant. Can I just block it off?
Yes, this is a common temporary solution, especially if a replacement part is unavailable or the repair cost is too high. A/C line block-off kits are available that cap the lines running to the rear of the vehicle. This allows the front A/C to hold a charge and function normally, but it permanently disables the rear A/C.
Why is my rear heat not working but the front is fine?
This points directly to a problem with the rear unit. The most likely causes are a failed temperature blend door actuator stuck on 'cold', a clogged rear heater core, or an air pocket in the coolant lines running to the back. Bleeding the cooling system to remove trapped air is a good first step after checking the controls.
Do I need to do any programming after installing a new or used assembly?
Generally, no programming is required for the assembly itself. However, some sources suggest that the blend door actuators may need to be calibrated after replacement. This procedure can sometimes be initiated by disconnecting the battery for a few minutes and then turning the key to the 'On' position without starting the engine, allowing the climate control module to cycle through and relearn the actuator positions.
Helpful Videos
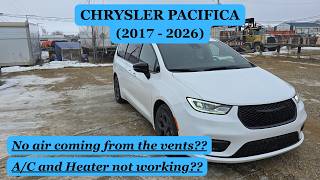
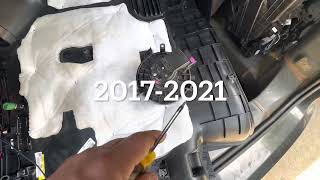
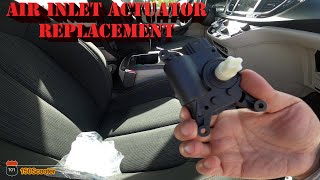
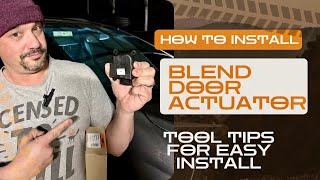
Technical Specifications
OEM Part Numbers: 68342100AA 68342100AB 68342100AE 68342100AF
Complete rear HVAC assembly including blower motor, heater core, A/C evaporator core, and housing. For vehicles with factory-installed rear climate control.

The information in this article is provided for general reference and educational purposes only. Vehicle specifications, procedures, and part compatibility can vary by production date, trim level, and region. Always consult your vehicle's factory service manual and verify part numbers before purchasing or performing repairs. Safety-critical components such as airbags, seat belts, and braking systems should be installed by a qualified professional.
- Chrysler Pacifica:
- Chrysler Voyager:
- 🎬 Helpful Videos
- Is This Your Part? Key Compatibility Warnings
- Symptoms of a Failing Rear HVAC Assembly
- 1. No Air From Rear Vents
- 2. Weak or Inconsistent Airflow
- 3. Grinding, Squealing, or Rattling Noises
- 4. Rear Vents Blow, But Air Isn't Cold
- 5. Rear Vents Blow, But Air Isn't Hot
- Known Issues, TSBs, and Recalls
- Buying a Used A/C Evaporator Housing
- Cost Breakdown
- Frequently Asked Questions (FAQ)
- 🎟️ Get 5% Off