

1985-1990 Saab 9000 A/C Condenser: Decoding Fittings and Refrigerants
A detailed guide to diagnosing, replacing, and finding the correct A/C condenser for your classic Saab 9000, focusing on the critical 1990 model year changes.
- The 1990 model year is a transition period; you must visually verify your A/C line fitting type before purchasing a replacement condenser.
- Any time the A/C system is opened, the receiver/drier must also be replaced to prevent moisture damage.
- The A/C system must be professionally evacuated before starting work and vacuum-tested/recharged afterward.
- If converting from the original R12 refrigerant to R134a, the system requires a full flush and new, compatible O-rings and service ports.
Symptoms of a Failing A/C Condenser
A bad A/C condenser will quickly make itself known, especially during hot weather. Here are the most common signs that your Saab 9000's condenser may be failing:
- Poor or No A/C Cooling: This is the most obvious symptom. If the condenser is clogged, damaged, or leaking, it cannot cool the refrigerant properly, resulting in warm air from the vents. Performance is often worst when the car is stationary or moving at low speeds.
- Visible Leaks or Damage: The condenser is located at the front of the vehicle, making it vulnerable to rocks and road debris. Look for bent or crushed fins, cracks, or punctures. A leak will often appear as an oily, grimy residue on the condenser's surface, as the refrigerant carries lubricating oil with it.
- A/C Compressor Overheating or Cycling Rapidly: A blocked or inefficient condenser can cause excessively high pressure in the A/C system. This can lead to the compressor overheating or the system's high-pressure switch turning the compressor off and on repeatedly.
- Engine Overheating at Idle: The A/C condenser sits in front of the engine's radiator. If the condenser is severely clogged with debris, it can restrict airflow to the radiator, potentially causing the engine to run hot, especially when the car is not moving.
Known Issues for the 1985-1990 Saab 9000
Working on a classic vehicle like the Saab 9000 comes with unique challenges. Beyond typical wear and tear, there are specific issues to be aware of regarding the A/C condenser.
The Critical 1990 Fitting Change
Warning: The 1990 model year was a transition period for the Saab 9000's A/C system. There are two different types of A/C line fittings used during this year. Early 1990 models may have older-style flare fittings, while later models use more modern O-ring block fittings. There is no exact cutoff date for this change. You must visually inspect the fittings on your existing condenser before purchasing a replacement. Failure to do so will likely result in buying a part that cannot be connected to your vehicle's A/C lines.
Converting from R12 to R134a Refrigerant
These vehicles originally used R12 (Freon) refrigerant, which is no longer available to the public and has been phased out for environmental reasons. Most systems have been, or will need to be, converted to the modern R134a standard. While the condenser itself is generally compatible, the conversion is more involved than just adding the new gas.
- Oil Incompatibility: R12 systems use mineral oil, while R134a systems use PAG or Ester oil. These oils are not compatible. The system must be thoroughly flushed to remove all old mineral oil before adding the new oil and refrigerant.
- O-Ring Replacement: The original black rubber O-rings are not compatible with R134a and its oil. They will degrade and cause leaks. They must be replaced with modern green or blue HNBR O-rings.
- Higher Operating Pressures: R134a operates at a slightly higher pressure than R12, which can put more strain on an old, weak condenser. A quality OEM or aftermarket unit is recommended over a cheap, poorly made alternative.
- Service Ports: The charging ports for R12 and R134a are different. A conversion kit will include adapters to fit the new R134a service equipment.
Buying a Used 1985-1990 Saab 9000 A/C Condenser
Given the age of these vehicles, a quality used OEM condenser can be a smart choice, often offering better fit and durability than a cheap new aftermarket part. Here’s what to look for:
- Physical Inspection: Carefully examine the entire condenser. Minor bending of the cooling fins is normal and can be gently straightened with a fin comb. However, reject any unit with major fin damage, cracks (especially near welds), or signs of previous repairs like epoxy or brazing.
- Check for Leaks: Look for dark, oily stains or residue. This is a clear sign of a past leak. While a used part can't be guaranteed, one that is clean and dry is a much better bet.
- Verify Fittings: This is the most important step. Get clear photos of the inlet and outlet fittings from the seller. Compare them directly to the fittings on your car's old condenser. This is especially crucial for 1990 models.
- Ask About the Donor Car: If possible, find out the mileage of the vehicle the part came from. A lower-mileage part is always preferable. Also, ask if the A/C system was working before the car was dismantled.
A/C Condenser Replacement Overview
Replacing the condenser is a moderately difficult job that requires special tools. While mechanically straightforward, the legal and technical requirements of handling refrigerant mean this is often best left to a professional or a very well-equipped DIYer.
Warning: It is illegal to release A/C refrigerant into the atmosphere. The system must be evacuated by a professional with an approved recovery machine before you begin work.
- System Evacuation: Have a qualified shop recover any refrigerant from the system.
- Access the Condenser: This typically involves removing the front grille and possibly other trim pieces.
- Disconnect Lines: Using two wrenches (one to hold the fitting, one to turn the nut) to prevent twisting the aluminum tubing, carefully disconnect the A/C lines from the condenser. Be prepared for a small amount of residual oil to drip out.
- Remove the Condenser: Unbolt the condenser from its mounts and carefully lift it out of the vehicle.
- Install New Part: Installation is the reverse of removal. Always install new, properly lubricated O-rings on the A/C line fittings.
- Replace the Receiver/Drier: It is mandatory to replace the A/C receiver/drier (also called an accumulator) any time the system is opened to the atmosphere. The drier contains desiccant that absorbs moisture, and it is saturated the moment it's exposed to air. Failure to replace it will lead to poor performance and corrosion.
- Vacuum and Recharge: The system must be placed under a deep vacuum for at least 30-60 minutes to boil off any moisture that entered while it was open. After the vacuum holds, the system can be recharged with the correct type and amount of refrigerant and oil.
Cost Comparison
Prices can vary based on brand and availability. Original OEM parts are very rare.
| Part/Service | Estimated Cost |
|---|---|
| New OEM (NOS) | $400+ (If found) |
| New Aftermarket | $100 - $250 |
| Used OEM | $50 - $150 |
| Shop Labor (Replacement) | $200 - $350 |
| Shop Labor (Evacuate & Recharge) | $180 - $350 |
OEM and Aftermarket Part Numbers
While part numbers can help, visual confirmation is always the best policy for a vehicle of this age. Known part numbers include:
- AC3461 (Aftermarket)
- 634610 (Modine, Saab)
- 9626433 (Saab)
- 9629403 (Saab)
Frequently Asked Questions (FAQ)
Do I have to replace the receiver/drier when I replace the condenser?
Yes, absolutely. The receiver/drier's job is to absorb moisture from the A/C system. Once the system is opened, the desiccant inside is immediately saturated by humidity in the air and can no longer do its job. Not replacing it will lead to system corrosion and eventual failure of other components, like the compressor.
Can I just use a stop-leak product instead of replacing my condenser?
It is not recommended. A/C stop-leak products can clog not only the leak but also critical components like the expansion valve and the new condenser or receiver/drier, leading to more expensive repairs down the road. The only proper fix for a leaking condenser is replacement.
How can I tell for sure if my 1990 Saab 9000 has early or late style fittings?
The only certain way is to look. You will need to access the A/C line connections at the condenser. Take clear pictures of where the lines attach and compare them to the photos of the replacement part you intend to buy. Early-style flare fittings look different from the later block-style O-ring fittings.
My A/C works on the highway but gets warm in traffic. Is that the condenser?
It could be. This symptom is a classic sign of insufficient airflow across the condenser. First, check that the condenser's cooling fan is working. Also, inspect the front of the condenser and clean away any bugs, leaves, or dirt that may be blocking airflow. If the fan works and the condenser is clean, the condenser itself may be internally restricted and inefficient, requiring replacement.
Technical Specifications
OEM Part Numbers: 634610 9626433 9629403
Compatible with R12 and R134a refrigerants (with proper system conversion). Note: 1990 models have two possible fitting types (flare or O-ring).
We Have This Part in Stock
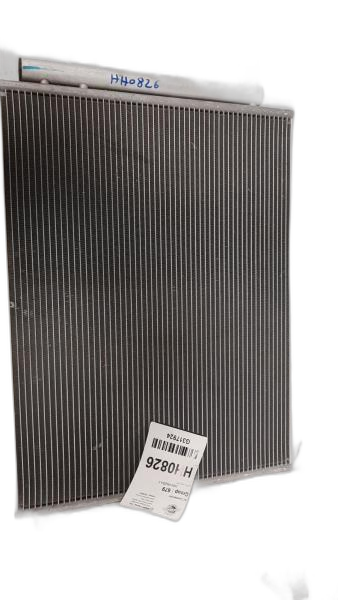

The information in this article is provided for general reference and educational purposes only. Vehicle specifications, procedures, and part compatibility can vary by production date, trim level, and region. Always consult your vehicle's factory service manual and verify part numbers before purchasing or performing repairs. Safety-critical components such as airbags, seat belts, and braking systems should be installed by a qualified professional.
- Saab 9000:
- 🛍️ Shop This Part
- Symptoms of a Failing A/C Condenser
- Known Issues for the 1985-1990 Saab 9000
- The Critical 1990 Fitting Change
- Converting from R12 to R134a Refrigerant
- Buying a Used 1985-1990 Saab 9000 A/C Condenser
- A/C Condenser Replacement Overview
- Cost Comparison
- OEM and Aftermarket Part Numbers
- Frequently Asked Questions (FAQ)
- 🎟️ Get 5% Off