

1998-1999 Nissan Altima A/C Condenser: Failure Symptoms and Replacement Guide
This guide covers the most common signs of a failing A/C condenser in a 1998-1999 Nissan Altima, what to look for in a used part, and what's involved in the replacement.
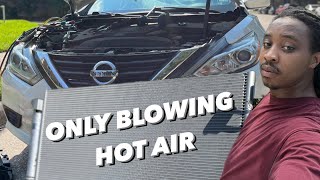
- The most common failure symptom is warm air from the vents, often caused by leaks or blockages from road debris.
- This condenser fits 1998 through 2001 Nissan Altimas with the 2.4L engine.
- When replacing the condenser, you MUST also replace the receiver/drier to prevent moisture contamination and future system failure.
- Replacement is not a simple DIY job because it requires specialized equipment to legally and safely evacuate and recharge the refrigerant.
Symptoms of a Failing A/C Condenser
When the A/C condenser on a 1998-1999 Nissan Altima starts to fail, the signs are usually straightforward. Because of its location at the front of the car, it's vulnerable to damage from road debris. Over time, corrosion or impacts can cause problems.
1. A/C Blows Warm or Not Cold Enough
This is the most common symptom. You'll notice that the air coming from the vents isn't as cold as it used to be, or it might be warm altogether. This happens because a damaged or clogged condenser can't effectively release heat from the refrigerant. The system may work for a few minutes and then start blowing warmer air as pressure and temperature build up.
2. Visible Leaks or Oily Residue
The A/C system uses refrigerant oil to lubricate the compressor. If the condenser develops a crack or a pinhole leak, this oil can escape along with the refrigerant. You might see a greasy, oily film on the condenser fins or notice a small puddle of clear or greenish-yellow fluid under the front of the car.
3. A/C System Shuts Off Intermittently
Modern A/C systems have a high-pressure switch that protects the compressor from damage. If the condenser is clogged or its fins are blocked by dirt and debris, it can't cool the refrigerant properly. This causes system pressure to rise to unsafe levels, triggering the switch to shut down the compressor. This might be more noticeable when the car is idling or in slow-moving traffic because there is less airflow across the condenser.
4. Engine Overheating at Idle
Because the condenser sits directly in front of the radiator, a condenser that is severely clogged with dirt, leaves, or bug debris can block airflow to the engine's radiator. This can cause the engine temperature to creep up, especially when you are stopped in traffic with the A/C running.
Warning: The A/C system is under high pressure. Never attempt to disconnect A/C lines or components without having the system professionally evacuated by a certified mechanic. Releasing refrigerant into the atmosphere is illegal and harmful to the environment.
Buying a Used A/C Condenser for a 1998-1999 Altima
A used OEM condenser can be a smart, cost-effective choice compared to expensive new OEM parts or potentially lower-quality aftermarket units. However, careful inspection is key to getting a good part.
Physical Inspection Checklist:
- Check for Leaks: Thoroughly inspect the entire surface and especially the inlet/outlet connections for any oily residue. This is a clear sign of a past leak.
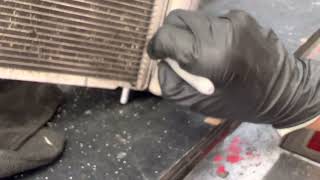
- Examine the Fins: A few bent fins are normal and can be carefully straightened with a fin comb. However, walk away from any condenser with large areas of flattened or crumbling fins, as this will severely restrict airflow.
- Look for Corrosion: Check for heavy white, powdery corrosion, especially where the aluminum tubes connect to the end tanks and around the line fittings. Minor surface oxidation is okay, but deep corrosion is a red flag.
- Inspect the Fittings: Ensure the threaded connections for the A/C lines are clean, undamaged, and not cross-threaded.
Compatibility and Part Numbers
The A/C condenser for the 1998-1999 Nissan Altima is also used on models up to 2001. When buying a used part, it's best to match the OEM part number. Verified part numbers for this generation include:
- 92110-0Z060
- 92110-0Z801
- 92110-0Z803 (supersedes previous numbers)
- 92110-9E000
The design is a parallel flow type, which is more efficient than older serpentine designs. The part should include mounting brackets but will not include the receiver/drier, which must always be replaced new.
Pro Tip: When you receive a used condenser, make sure it was capped or sealed on the inlet and outlet ports. A condenser left open to the air for an extended period can absorb moisture, which will contaminate the A/C system upon installation.
Known Issues, TSBs, and Recalls
For the 1998-1999 Nissan Altima, there are no specific recalls or Technical Service Bulletins (TSBs) related to the A/C condenser itself. Most failures are due to age, corrosion, or impact from road debris. In May 1999, Nissan did issue a recall for some vehicles due to a potential alternator diode failure that could cause an engine compartment fire, but this was unrelated to the A/C system. Any A/C issues on a vehicle of this age are typically diagnosed as standard wear-and-tear component failures.
Cost of Replacement
The cost to replace an A/C condenser can vary significantly based on the parts used and local labor rates. The job requires specialized equipment to recover and recharge the refrigerant.
| Part/Service | Estimated Cost |
|---|---|
| New OEM | $350 - $500+ |
| New Aftermarket | $80 - $170 |
| Used OEM | $40 - $90 |
| Shop Labor (including system evacuation & recharge) | $230 - $340+ |
Replacement Overview & Difficulty
Replacing the A/C condenser is a moderately difficult job for a DIY mechanic, primarily because it requires handling refrigerant.
- Difficulty Rating: 4 out of 5
- Primary Challenge: The legal and technical requirement to have the refrigerant evacuated before starting and the system vacuumed and recharged after installation.
- General Steps:
- Have the A/C system professionally evacuated.
- Disconnect the negative battery terminal.
- Remove the front grille and potentially the upper radiator support cover. On some models, the bumper cover may need to be removed for easier access, though some mechanics have found ways to work around it. 🎬 Watch: How to remove the condenser without removing the bumper
- Disconnect the high and low-pressure A/C lines from the condenser. Be prepared to cap the lines immediately to prevent contamination.
- Unbolt the condenser from its mounts and carefully lift it out, being mindful of the radiator behind it.
- Transfer any necessary brackets or sensors from the old condenser to the new one.
- Install the new condenser, ensuring it is seated correctly in its mounts.
- Crucially, install a new receiver/drier. This part absorbs moisture from the system and is essential for the longevity of the A/C components.
- Reconnect the A/C lines using new, lubricated O-rings.
- Reassemble all other removed parts (grille, covers, etc.).
- Take the vehicle to a shop to have the system vacuum-tested for leaks and recharged with the correct amount of R134a refrigerant and PAG oil.
Frequently Asked Questions (FAQ)
Do I have to replace the receiver/drier with the condenser?
Yes, absolutely. The receiver/drier (or accumulator) contains a desiccant material that absorbs moisture. Once the A/C system is opened to the atmosphere, this desiccant becomes saturated and useless. Failing to replace it will lead to corrosion, poor performance, and potential failure of your new condenser or compressor.
Can I just use a stop-leak product for a small leak?
While some stop-leak products can temporarily seal very small pinhole leaks, they are not a permanent solution. These sealants can also clog other sensitive components in the A/C system, such as the expansion valve or the compressor, leading to much more expensive repairs down the line.
Why is a used OEM condenser sometimes better than a new aftermarket one?
Original Equipment Manufacturer (OEM) parts are built to the vehicle manufacturer's exact specifications for fit, material quality, and performance. Some cheap aftermarket condensers may use fewer cooling tubes or fins, reducing their efficiency and putting more strain on the A/C compressor, especially in hot weather. 🎬 See this comparison of OEM vs cheap aftermarket condensers A well-inspected, used OEM part guarantees a perfect fit and original performance.
My A/C gets cold then warm. Is it the condenser?
It could be, but this symptom can also point to other issues. A common cause is moisture in the system freezing at the expansion valve, creating a blockage that later melts. It can also be caused by the system's high-pressure switch cycling the compressor off due to a clogged condenser or failing cooling fan. Proper diagnosis with a manifold gauge set is needed to confirm the cause.
Helpful Videos
Technical Specifications
OEM Part Numbers: 92110-0Z060 92110-0Z801 92110-0Z803 92110-9E000 921100Z060 921100Z803 921109E000
Core Dimensions: Approx. 713mm x 318mm x 16mm. Design: Parallel Flow. Material: Aluminum. Does not include receiver/drier.
We Have This Part in Stock


The information in this article is provided for general reference and educational purposes only. Vehicle specifications, procedures, and part compatibility can vary by production date, trim level, and region. Always consult your vehicle's factory service manual and verify part numbers before purchasing or performing repairs. Safety-critical components such as airbags, seat belts, and braking systems should be installed by a qualified professional.
- Nissan Altima:
- 🎬 Helpful Videos
- 🛍️ Shop This Part
- Symptoms of a Failing A/C Condenser
- 1. A/C Blows Warm or Not Cold Enough
- 2. Visible Leaks or Oily Residue
- 3. A/C System Shuts Off Intermittently
- 4. Engine Overheating at Idle
- Buying a Used A/C Condenser for a 1998-1999 Altima
- Physical Inspection Checklist:
- Compatibility and Part Numbers
- Known Issues, TSBs, and Recalls
- Cost of Replacement
- Replacement Overview & Difficulty
- Frequently Asked Questions (FAQ)
- 🎟️ Get 5% Off